
We offer a large selection of premium quality razor kits, stands, and brushes in chrome and gun metal finishes. We have razor kits for Gillette Mach3 and Fusion cartridges, and we also have a classic safety razor blade. We also sell a shaving brush made with genuine high-grade Badger hair.
All our razor kits and stands feature a threaded rod design, allowing you to disassemble the components for cleaning and refinishing. They also turn using a standard pen mandrel and bushings, making these a very easy project to make.
I’m going to turn a safety razor kit and a matching stand. If you want to turn one of the other razor kits, don’t worry, they all turn the exact same way.
Prepare the Blank
Mount a blank into a set of pen drilling jaws in a chuck the blank can be drilled accurately. This step can also be done using a drill press, though I prefer to drill on the lathe.
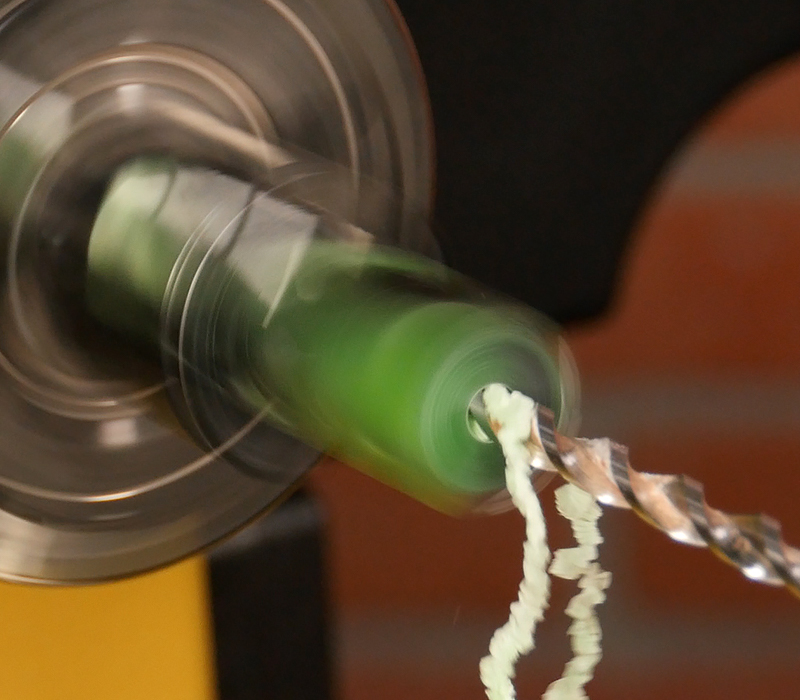
I’m going to use acrylic blanks for this kit because they are impervious to moisture. If you use a wood blank make sure it’s a dense exotic or has been stabilized.
With the speed set at about 750 RPM, drill a 7mm hole all the way through the blank, making sure to clear the chips frequently.
Repeat this step for the other blank as well. One blank is for the razor, the other for the stand.
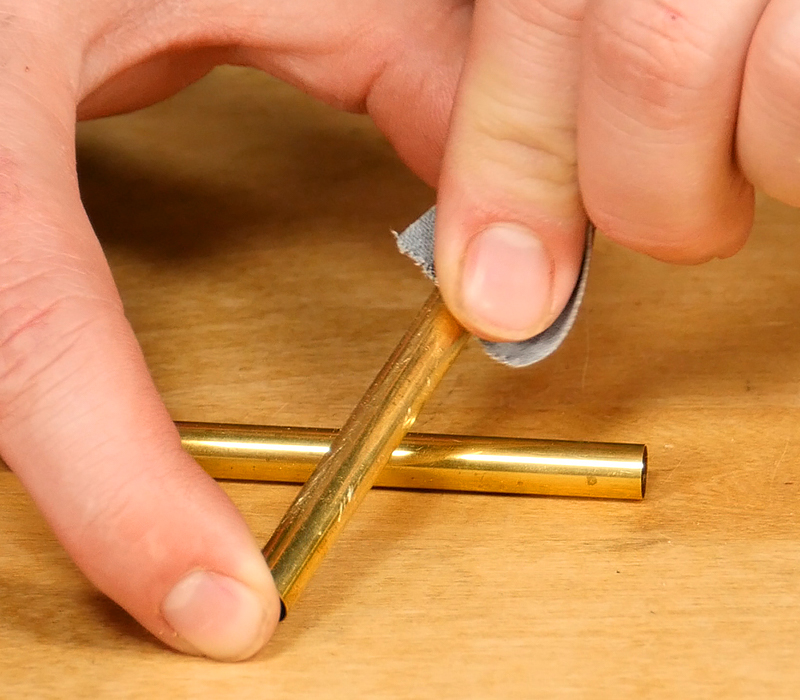
Now we’ll prep the tubes for gluing by scuffing up the brass tubes with some 220 grit sand paper, so the glue will adhere better.
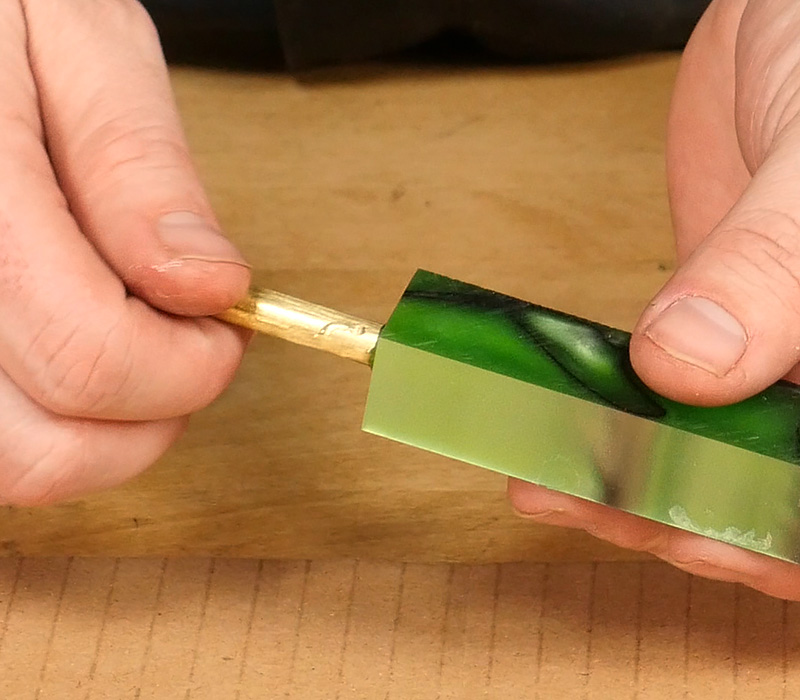
Next, apply some thick CA glue onto the brass tube, then insert it into the blank, making sure to rotate the tube to spread the glue evenly.
Spray some activator onto both ends of the blank to cure the glue, then repeat these steps on the other blank. Wait a few minutes, then we’re ready to barrel trim.
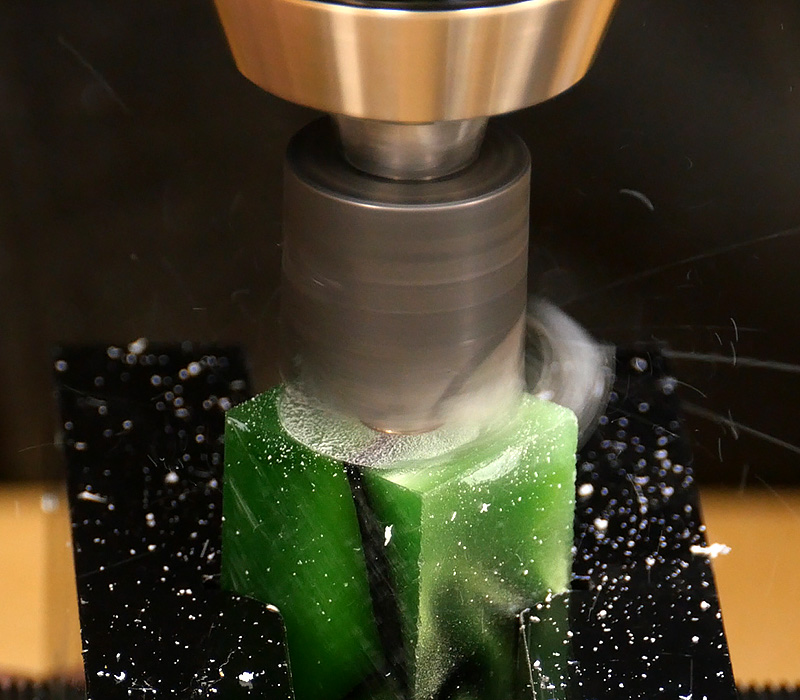
Using a vice to safely hold the blank, barrel trim both ends until the brass shows. Stop when the brass starts to shine.
Mount the Blank
Once they’re trimmed and square, we’ll go to the lathe and prepare for turning.
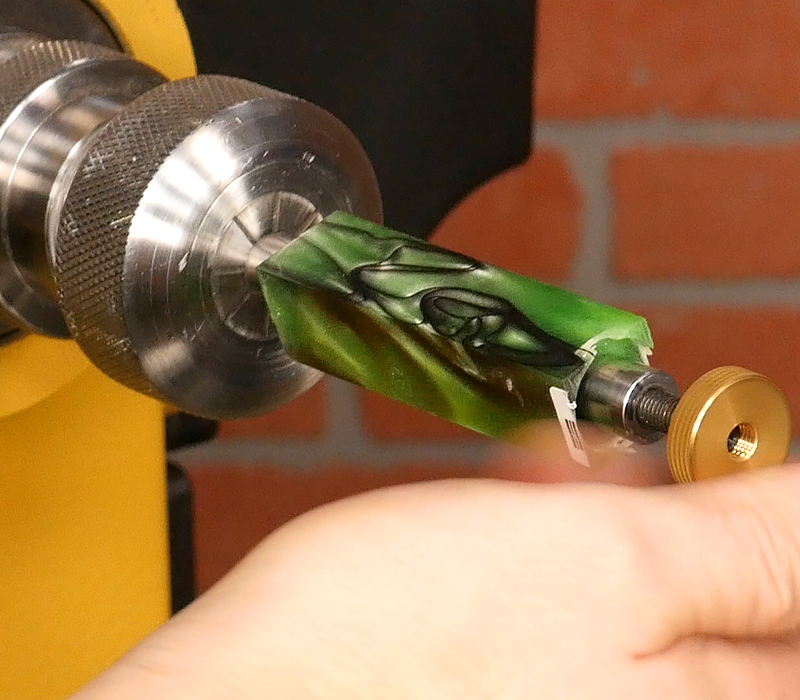
Mount the pen mandrel in a collet chuck for the best accuracy. If you don’t have a collet chuck your standard morse taper pen mandrel will work fine.
Now slide on one bushing, then the blank, then the other bushing. Bring in the tailstock with a revolving cone center for support.
Turning the Razor and Stand
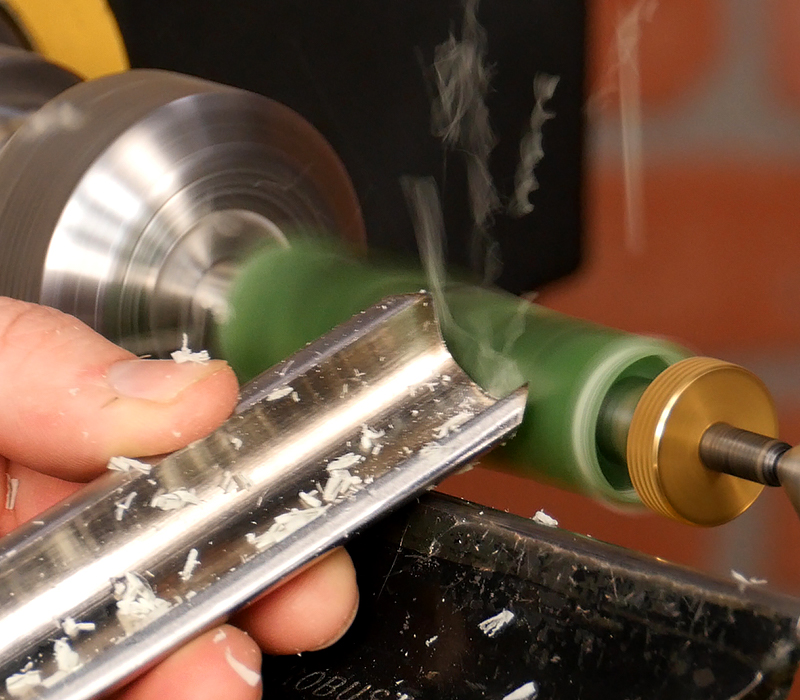
Start by roughing the blank to round with a spindle roughing gouge. With acrylic blanks take light cuts or you’ll risk chipping the blank and ruining it.
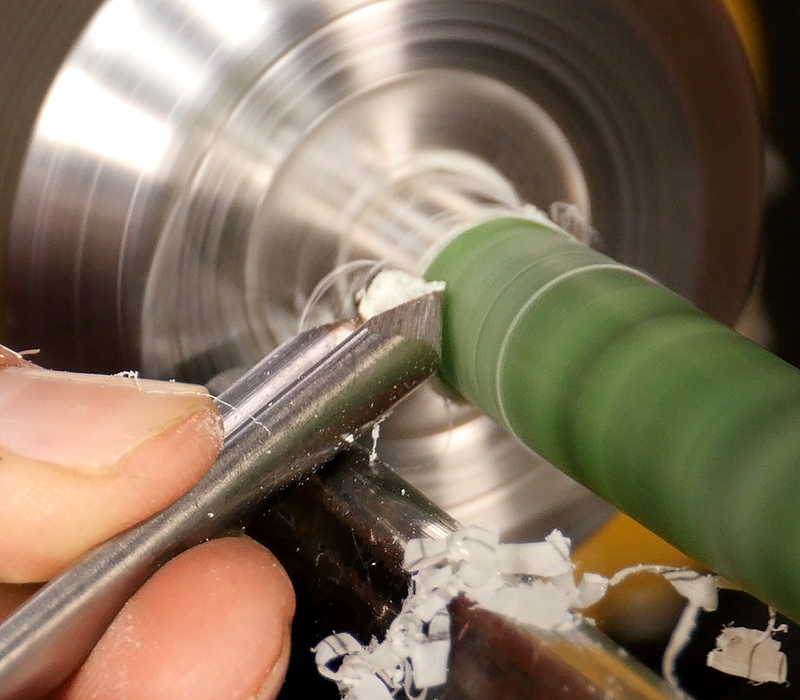
Once round, turn the blank to your desired shape with a spindle gouge. I’ll add some shape to this razor kit, but it’s all up to your imagination.
Once the blank’s slightly larger than the bushings, sand the acrylic blank through 600 grit with traditional sand paper.
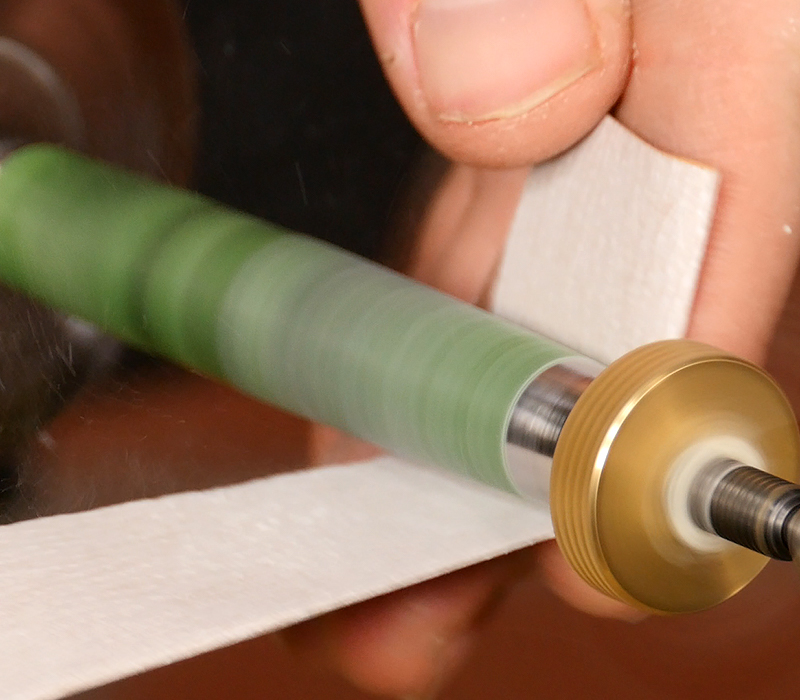
Then sand with Micro surface abrasive pads. Wet each pad before using and spend more time on the lower grits. Stop the lathe and sand laterally between grits, working your way all the way through 12,000 grit to remove all the scratches.
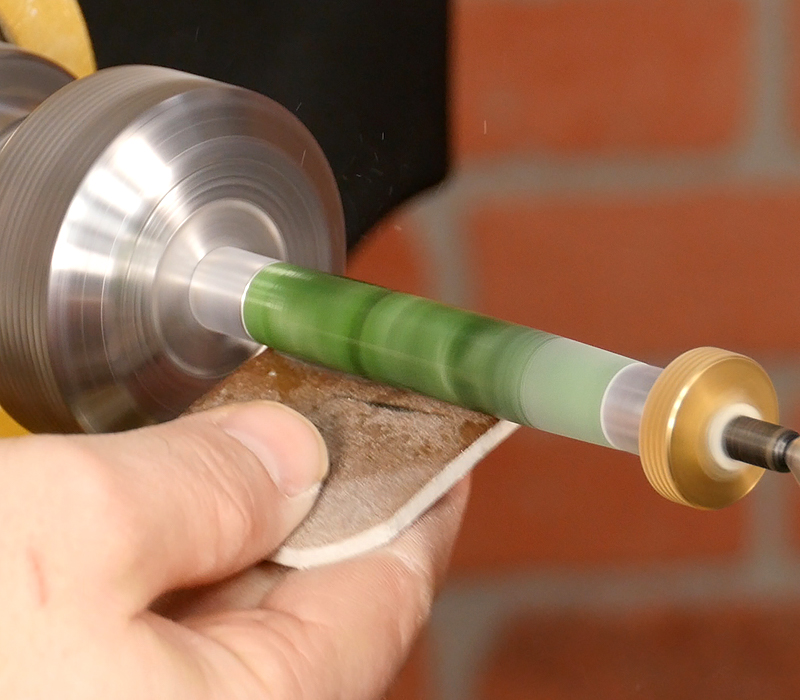
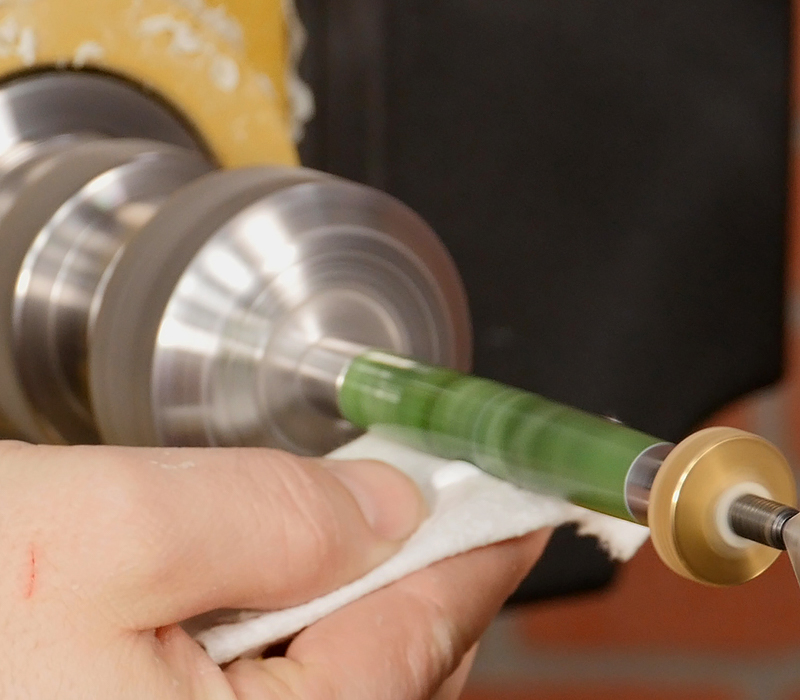
Apply some plastic pen polish with a soft, clean rag for a durable, glass-like finish.
As for the stand, turn it the exact same way as the razor.
Assembling the Razor and Stand
Carefully remove the blank from the lathe, then assemble it with the threaded end caps and rod. The assembly is easy because you don’t have any parts to press in, just thread together until tight.
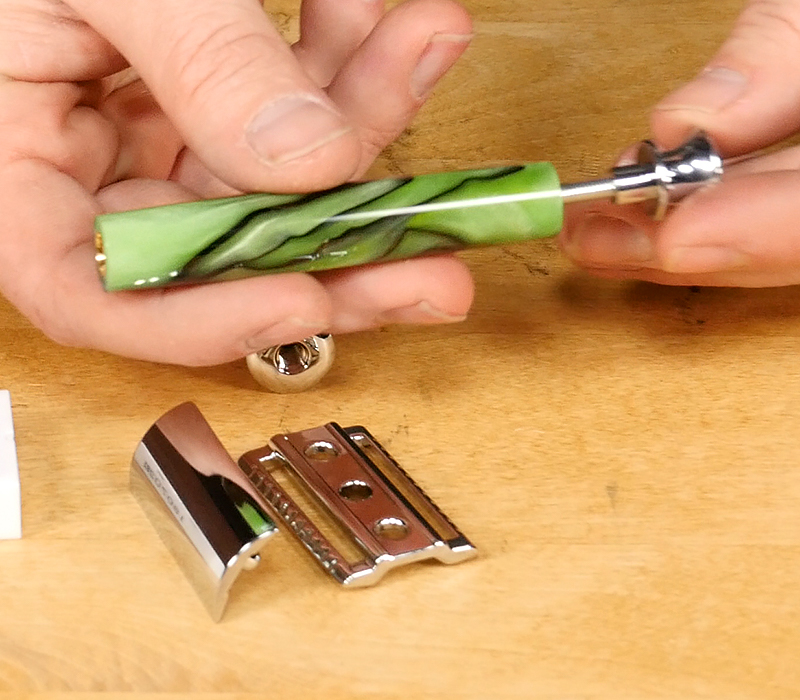
Now attach a blade and this safety razor is ready to use.
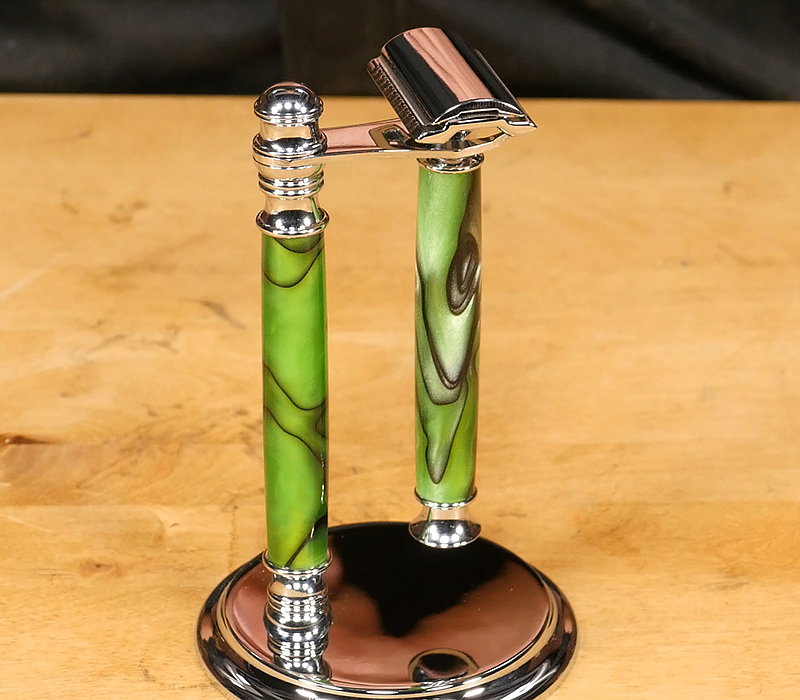
The stand also assembles with a threaded rod as well, so it’s easy to clean and re-finish when you need to.
Now you have a handsome shaving kit that works as good as it looks!
Supplies Used
Razor Kit & Stand
Acrylic Pen Blank
7mm Drill Bit
Barrel Trimmer
CA Glue
Spindle Roughing Gouge
Pen Mandrel
Collet Chuck
Revolving Center
Sand Paper
Micro Surface Pen Finishing Pads
Plastic Polish
No beards harmed in the making …… LOL!!!