
Turning a magic wand is a lot of fun because it’s an easy woodturning project that still allows for lots of creativity in your turning. Everyone wants a Harry Potter wand, and to make this one stand out from the rest I’m going to make a wand that is fire-blackened and glows in the dark. It’s easier than you might think.
Prepare the Blank
For this project to work, you must turn a blank with open grain. I’ll be using an Ash blank that is 1-1/2″ x 1-1/2″ x 12″.
Start by mounting the blank between centers, and set the lathe to about 2,500 rpm, then rough turn the blank to round using a spindle roughing gouge.
Turn and Sand the Wand
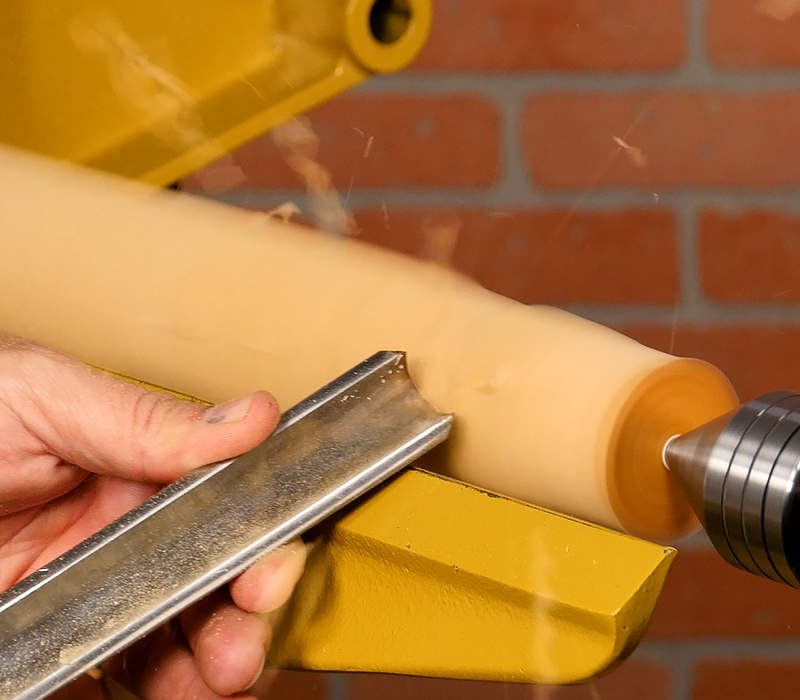
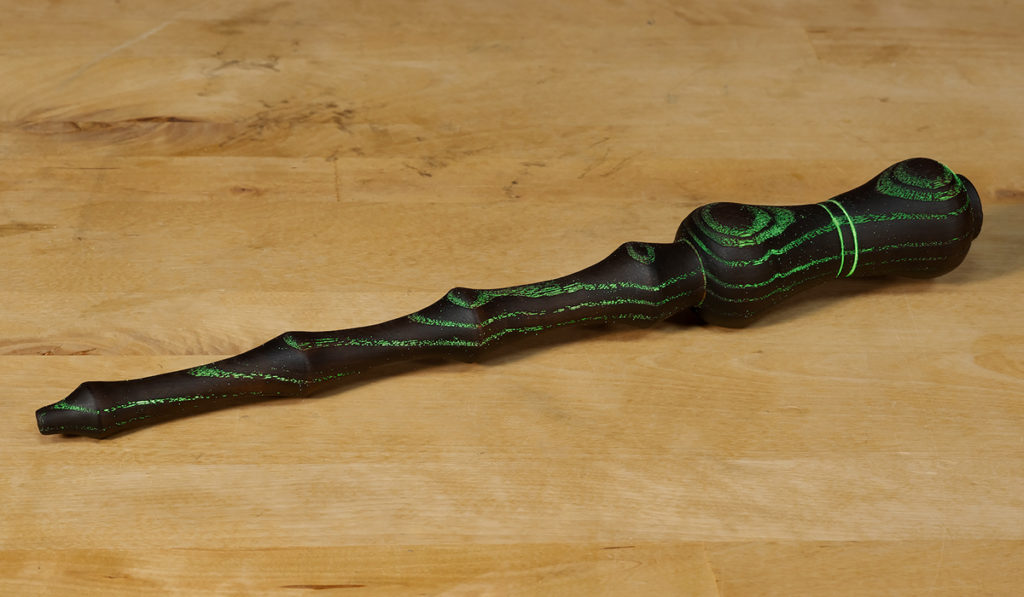
Now for the fun part – turning your magic wand. Use a spindle gouge to turn the wand to your desired shape, leaving about 1/4” of waste material on the ends. There are no rules for turning a wand, so have fun with shapes and creative textures.
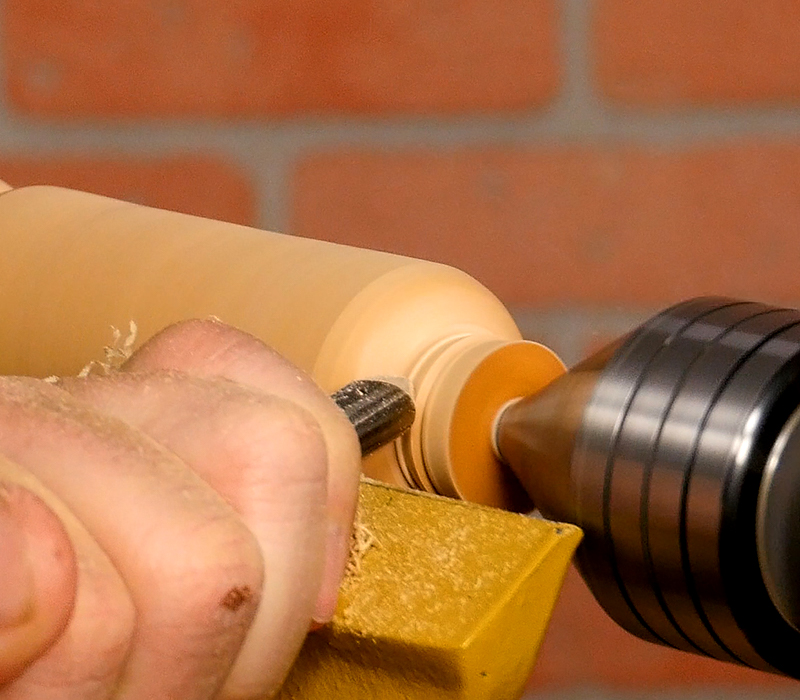
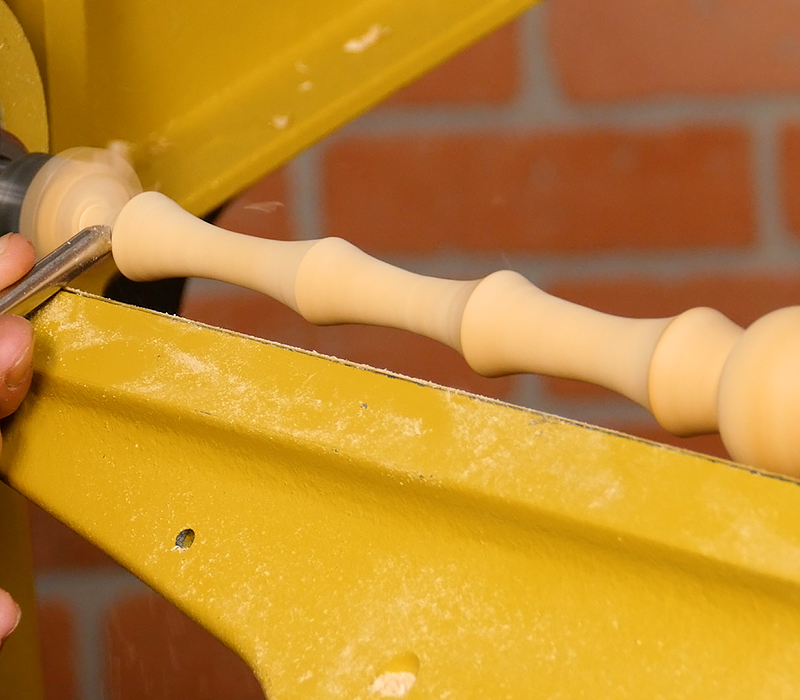
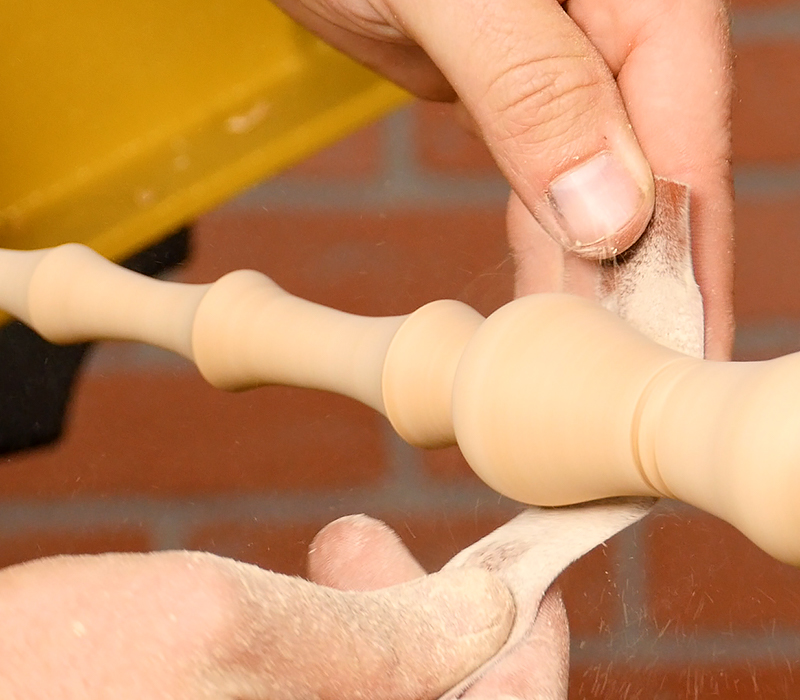
Once you’re happy with the shape, sand it through 320 grit.
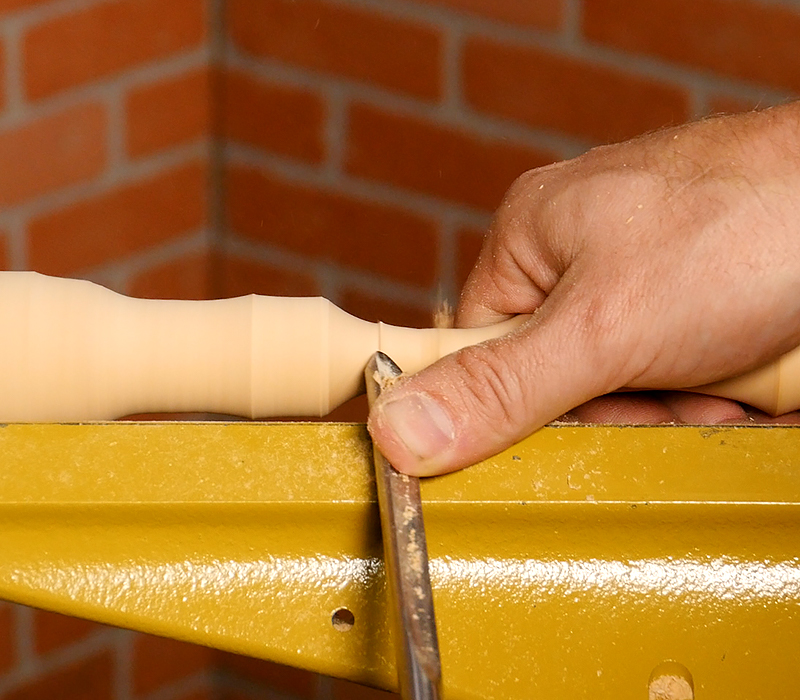
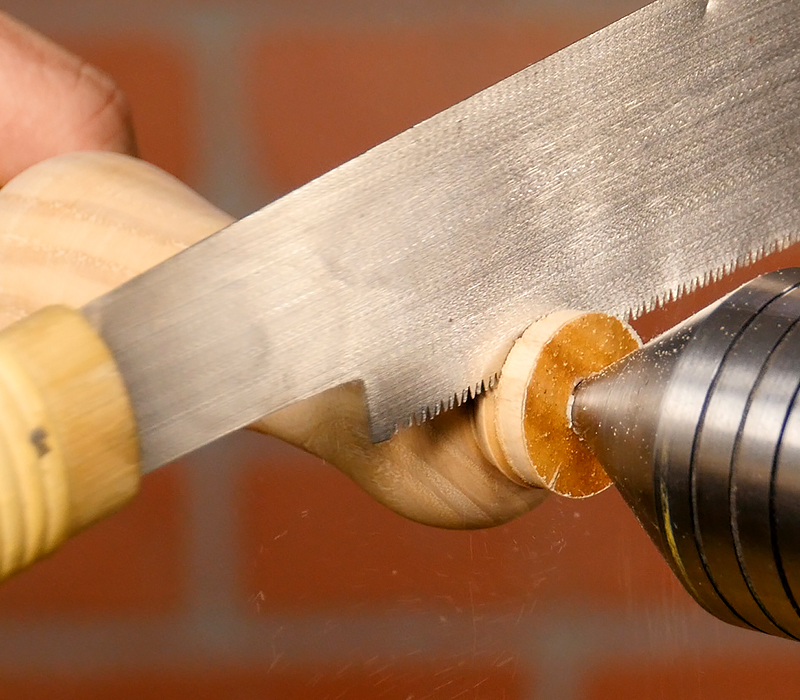
Take the wand off the lathe and saw off the nubs with a small hand-saw, then sand the ends as well.

Make it Glow in the Dark
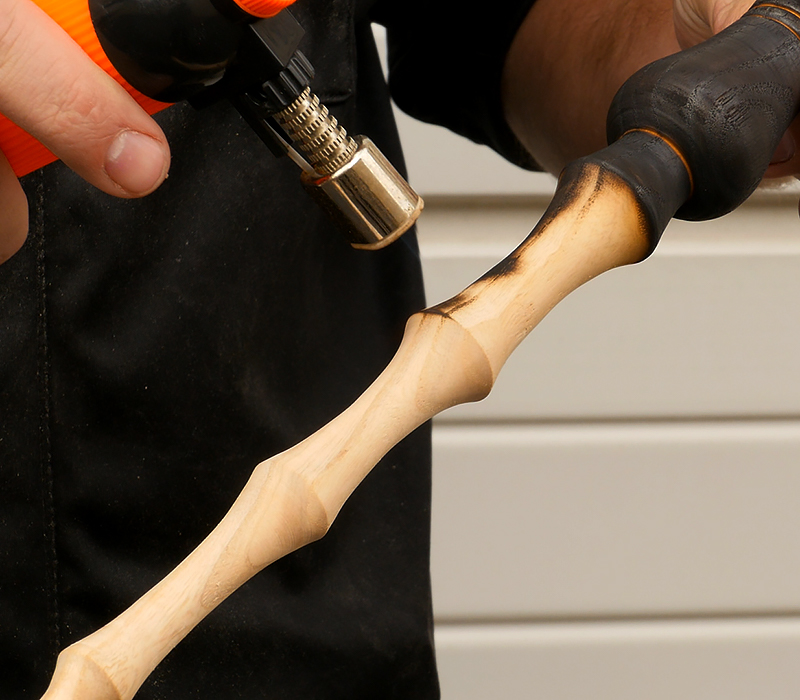
First we need to torch the wand. Not only does this make it look great, but it importantly breaks down the soft areas of the wood – giving the glow inlay holes to fill.
The torching process is easy, but to be safe do it in a well-ventilated area away from anything flammable. Preferably outdoors.
Hold the flame nice and close to the wand, evenly blackening the surface.
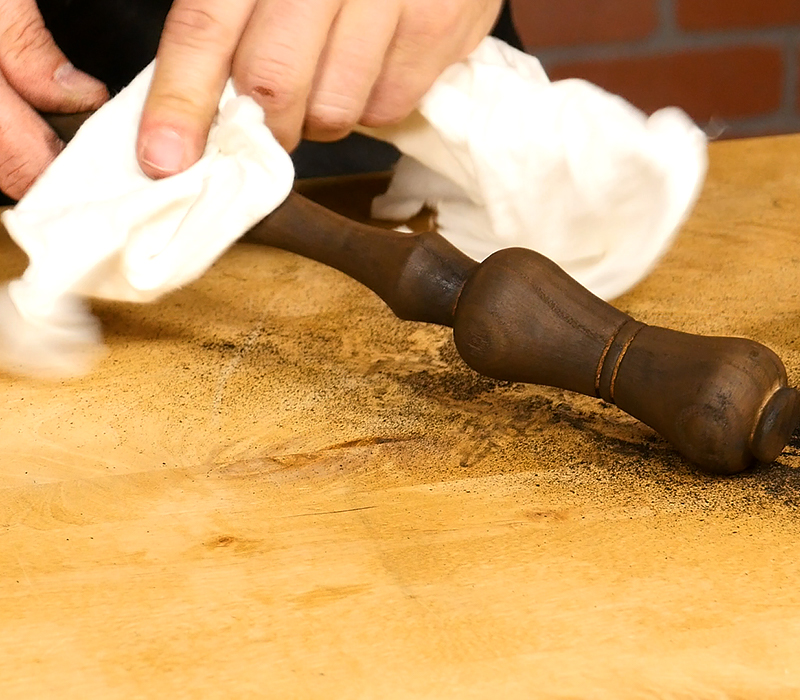
Once it’s blackened, use a steel bristle brush and thoroughly brush the wands surface. Be aggressive here, because you want to clear out all the soft grain.
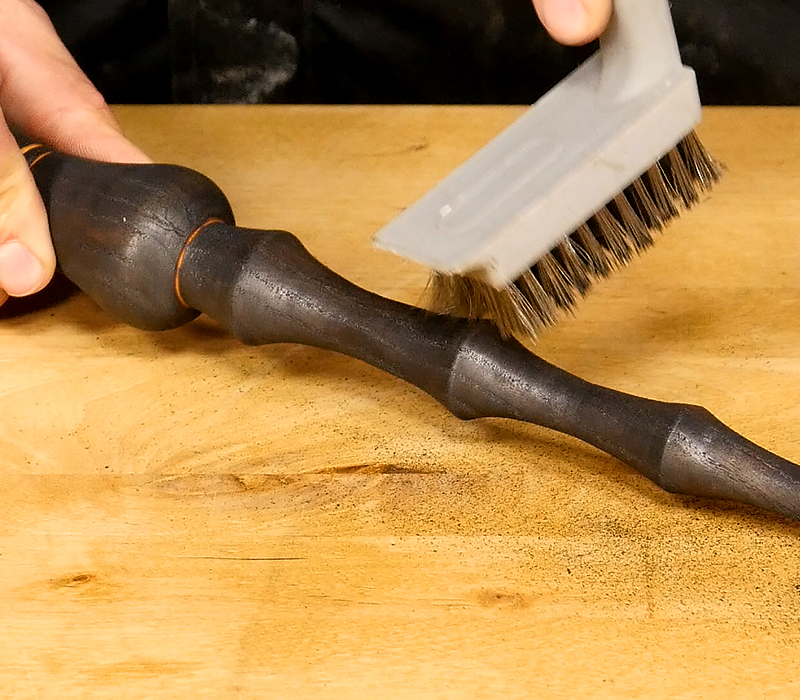
Now just clean out the pores with an air compressor or a rag.
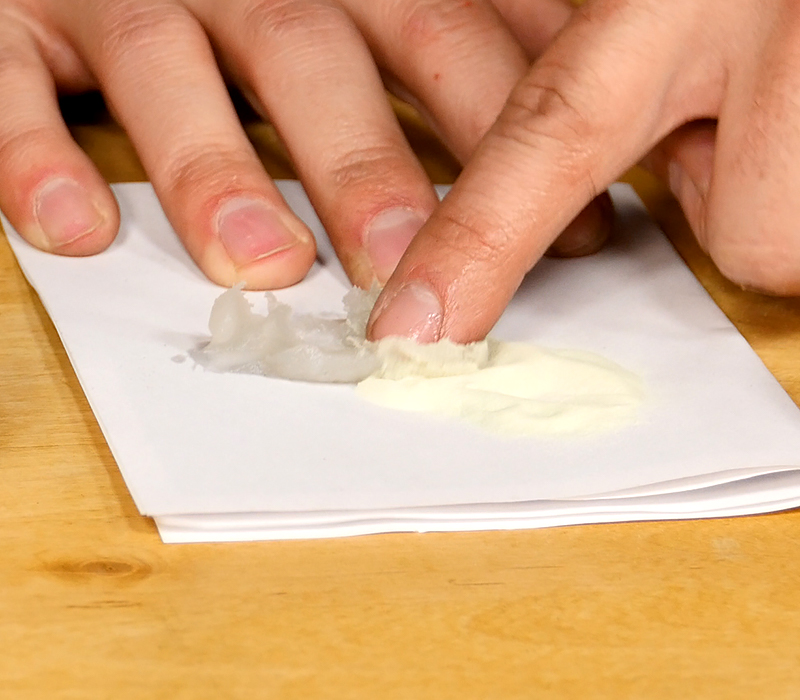
To make the wand glow, I’ll mix some scratch freee wax and glow powder together. Make sure to mix plenty of wax, so it’ll fill in the open surfaces.
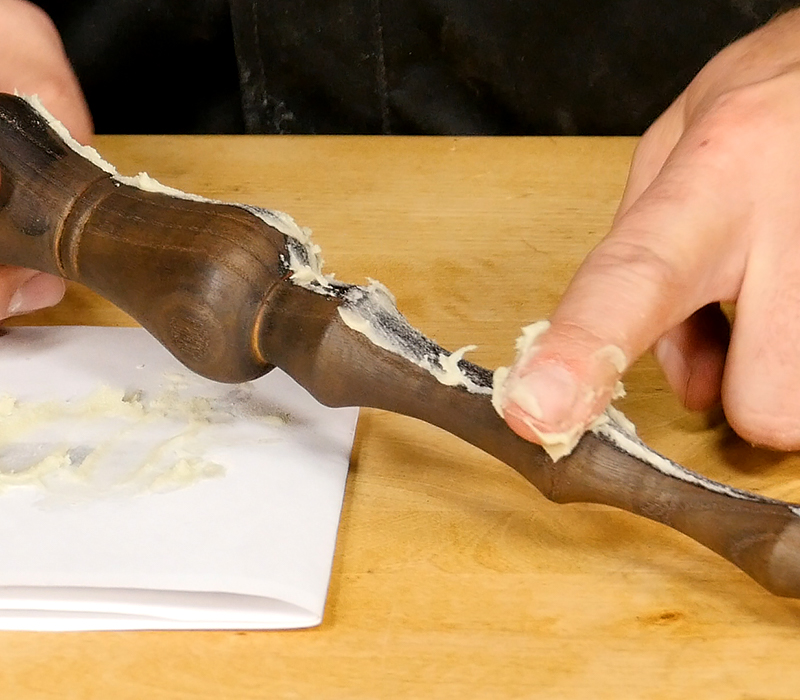
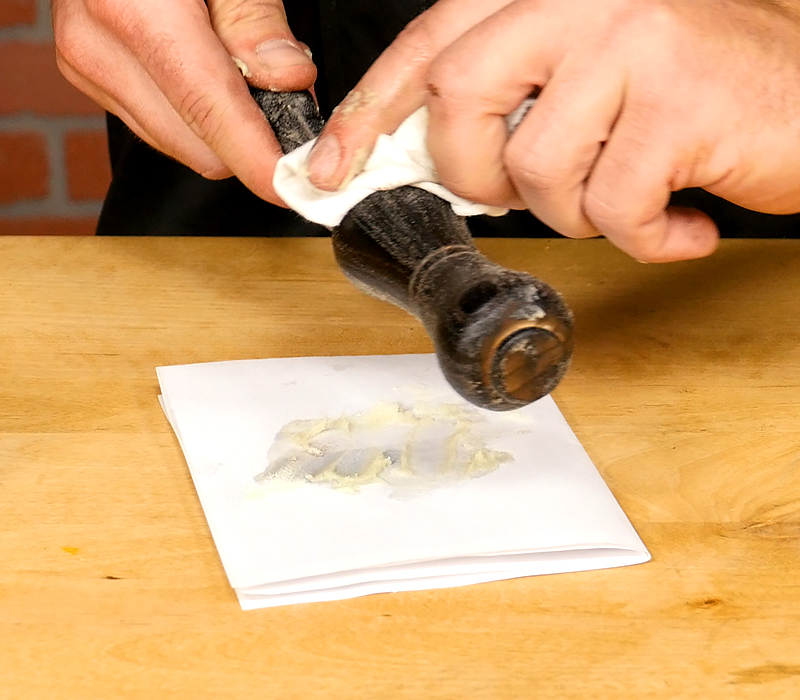
Liberally coat the mixed wax onto the entire surface, then wipe off any excess with a clean rag. I like using my fingers so I can feel the surface of the wood, but you can do this with gloves or a rag if you want.
Our wand is all finished, so hit the lights and watch it glow!
Supplies Used:
Ash Blank
Glow Inlay Powder
Scratch Freee Polishing Wax
Drive and Revolving Centers
Spindle Roughing Gouge
Spindle Gouge
Sand Paper
Cotton Rags
Do you have any recommendations for sealing the wand/wax with the glow powder when done? The glow powder seems to come off on my kids hands after they are done playing with it.
There really isn’t a good way to seal over the wax – other finishes won’t stick to it. You can explore other methods of applying the glow powder (super glue for example), but we found that the wax was the most efficient. Plus, you can always re-apply the wax/glow powder as needed.
Sorry we don’t have a great answer for you, if you find one (or if anyone else does) we’d love to hear your solution!
could the glow inlay powder be mixed with resin and infused into the wood with a vacuum chamber? I’d like to see how that would work with ash or maple….
We haven’t tried it, but I don’t think it would work. The glow powder particles are too large to be infused with the wood grain. The particles are also heavy enough that they will settle before the resin cures.
What is the ratio of scratch free wax to glow powder? I made one of these exactly as you showed but mine didn’t glow. Not sure if I didn’t use enough glow powder. I work at Woodcraft of Seattle and want to offer this as a class but was really disappointed because it didn’t glow. Since the glow powder is a little expensive, I didn’t want to use the whole bag you sent so a ratio of wax to powder would be really awesome.
The ratio used was about 50/50, but that was just what I tried, there may be a better ratio that can be found through experimentation. However, even with a very small amount of glow powder mixed in it should glow in the dark. To have a wand that isn’t glowing at all could be the result of not getting the wax/glow powder mix worked into the pores deep enough. Can you send a picture of the wand to Mike at service@woodturnerscatalog.com? If we see a photo it’ll help us get to the bottom of things a little faster.
great
what is the total cost foe all the items
Costs will vary depending on how much you buy, where it ships, if you need wood blanks, etc. Check out the bottom of the article for the “Supplies Used” section to see a link to each of the products used in the article.
White Ash Turning Blank 1-1/2″ x 1-1/2″ x 12″: $1.75
Part # 1045630002
Turners Select Glow Inlay Powder Green: $4.95
Part # 1062410001
Dr. Kirk’s Scratch FREEE Woodturners Polishing Wax 8 oz.: $15.95
Part # 1048000001
Dr. Kirk’s Scratch FREEE Woodturners Polishing Wax 8 oz.: $2.95
Part # 1048000001
Total: $25.60 + shipping/Tax
Have you seen the sheets of glow plastic? Would it work to laminate the wood and turn?
Unfortunately we haven’t seen those and don’t know how they would work. Let us know if you try it and how it turns out!