
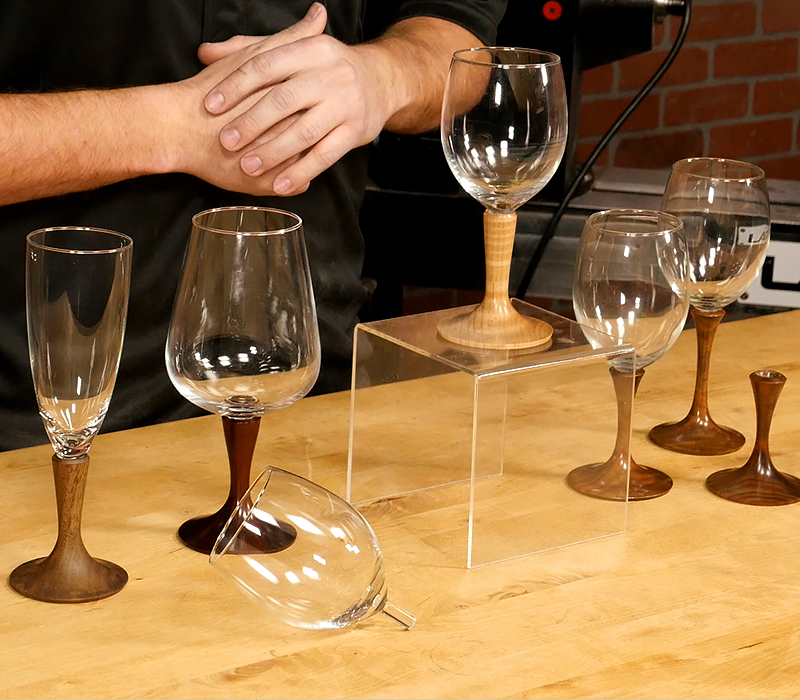
Hand-turned Stemware is a classy way to impress your guests at your next occasion. We offer a full range of glasses. The glass is hand-blown and the stem has been pre-cut so it’s ready to assemble.
I’m going to turn a base for this standard-sized Bordeaux wine glass. All that’s needed for this project is a 3” x 3” x 4” blank, some standard turning tools and supplies and a piece of scrapwood. Now let’s go to the lathe and have some fun!
Prepare the blank
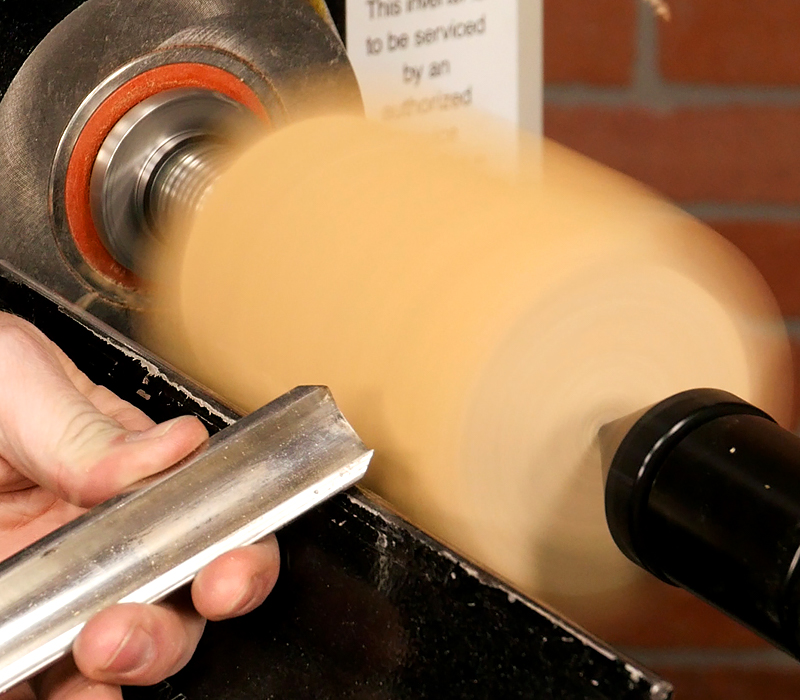
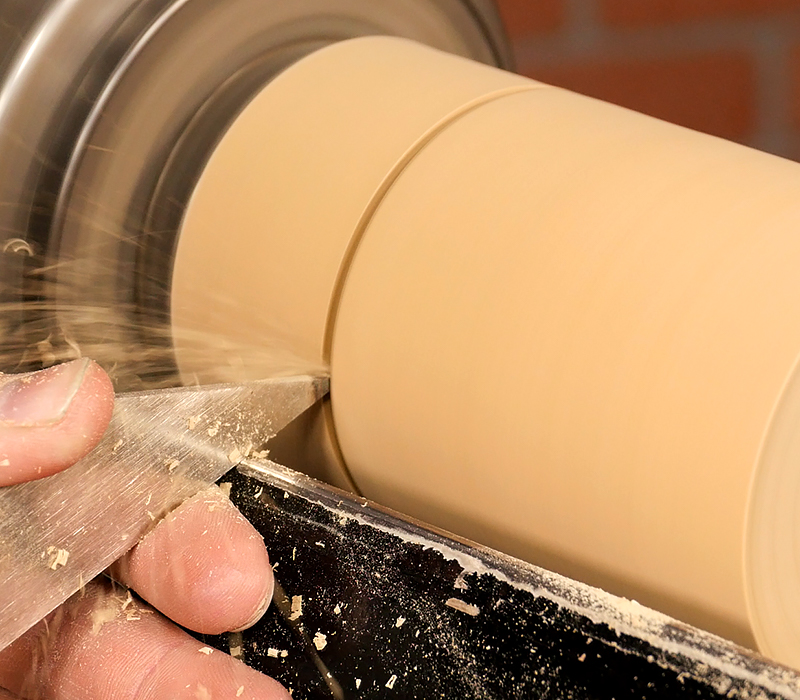
Start by mounting the blank between centers. Set the lathe speed at around 2,500 rpm and turn it round using a spindle roughing gouge.
Using the long point of a skew laid flat on its side, turn a dovetail tenon to fit your chuck jaws.
Now re-mount the blank in the chuck and square the end of the blank with your skew in preparation for drilling.
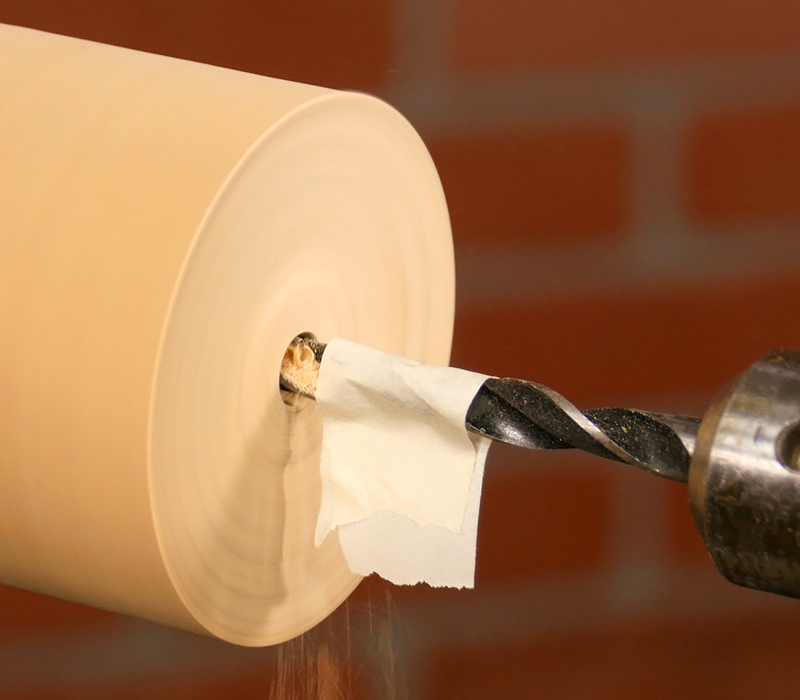
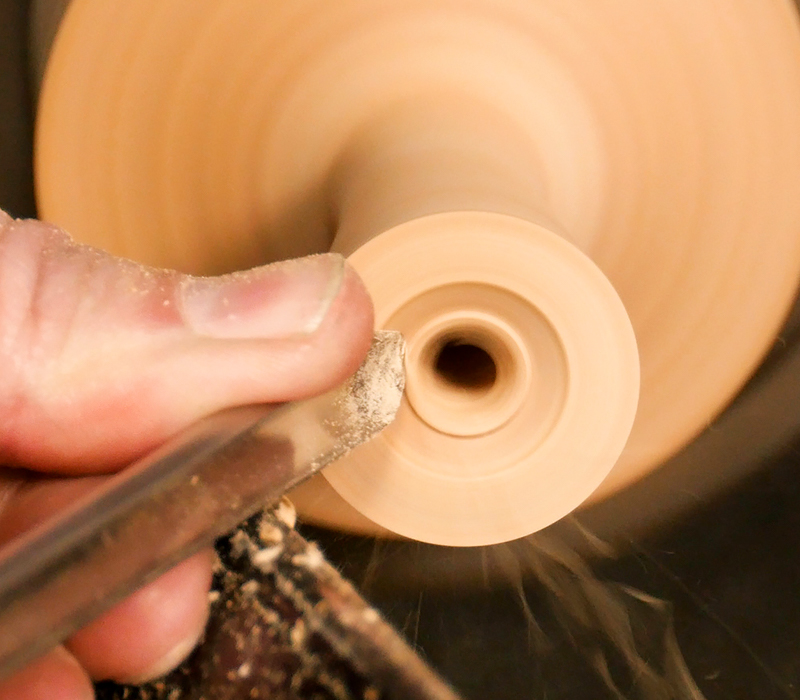
Drill the blank
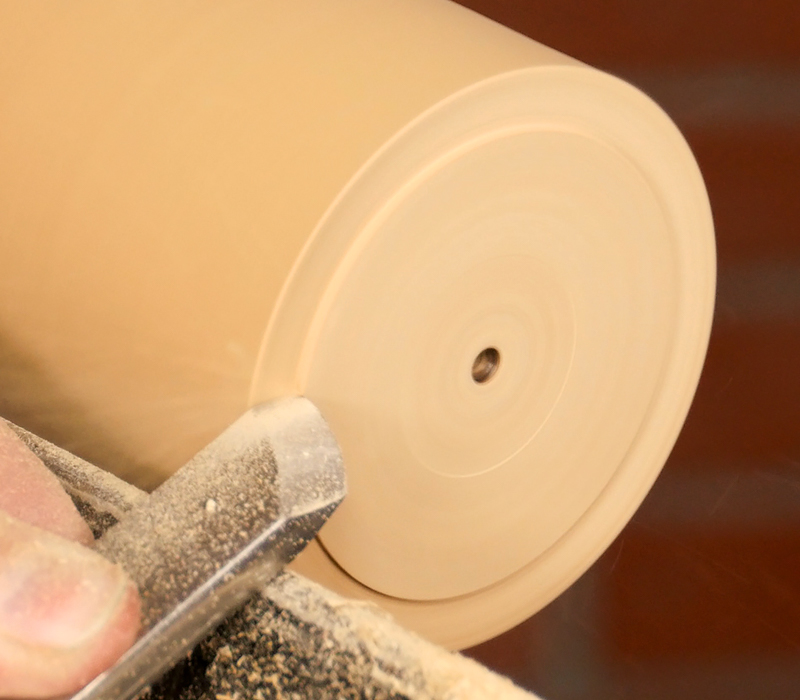
Each glass will vary slightly, so measure the stem and select the correct drill bit for a good fit. Mark the length of the stem plus a 1/4” with some tape on the bit to act as a depth gauge.
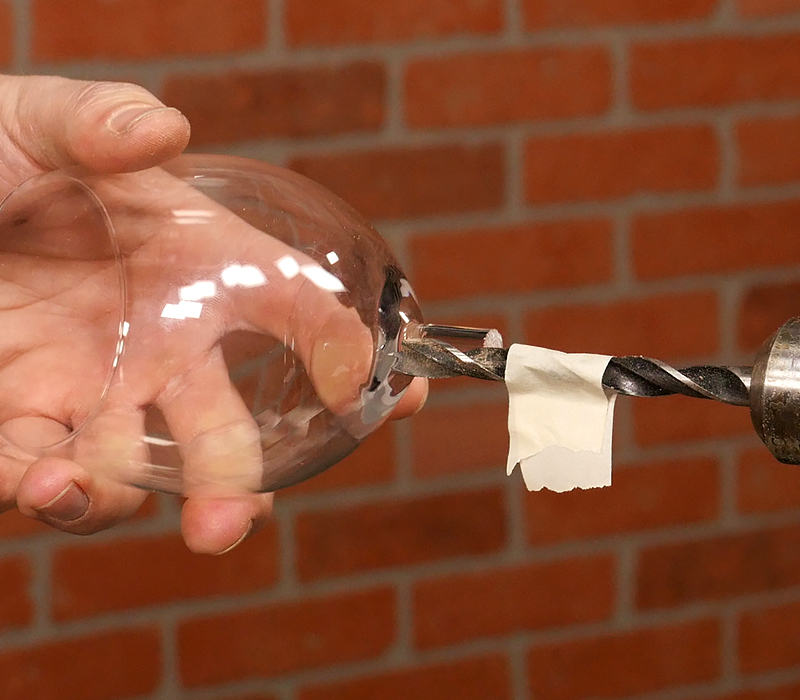
With the lathe running at 500 rpm, drill the hole while clearing the chips frequently.
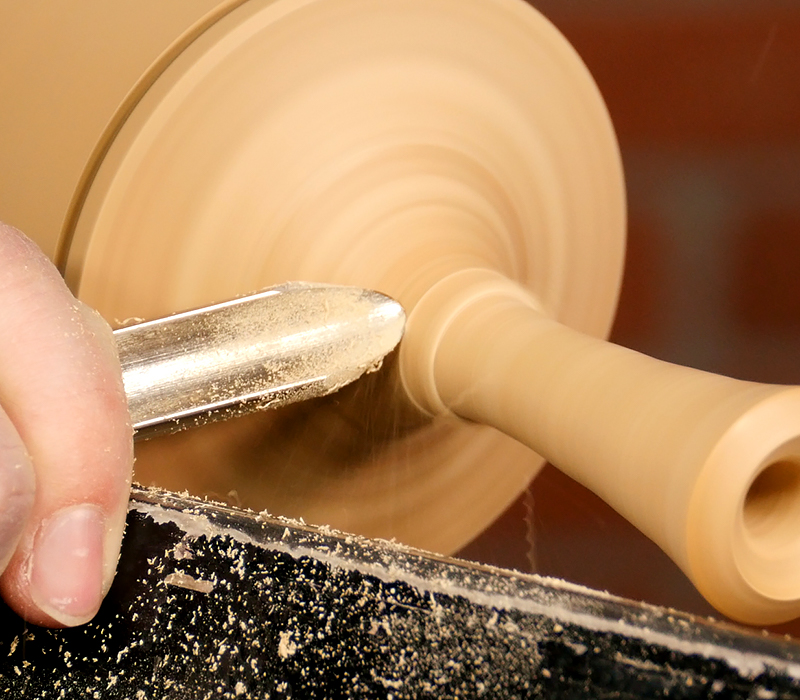
Turn the wineglass
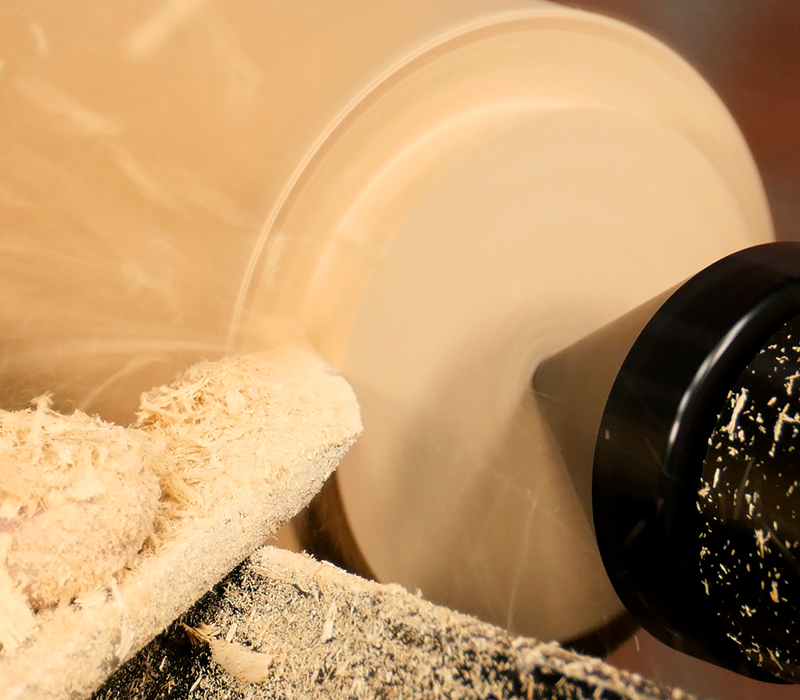
Next, measure 3-3/8” from the top and make a 3/4” deep part at the line. This will establish the overall length of the stem.
Now we’ll turn the body to the basic shape using a 1/2” spindle gouge. I like to turn a flare where the stem accepts the glass for a nice clean fit. Take light cuts here and check the fit frequently. The glass needs to fit snugly in the stem for the best appearance.
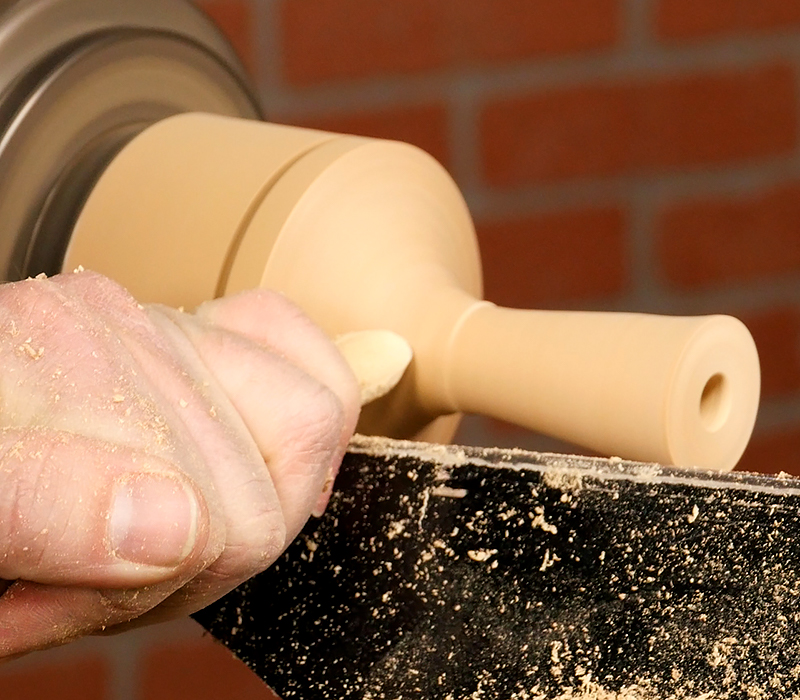
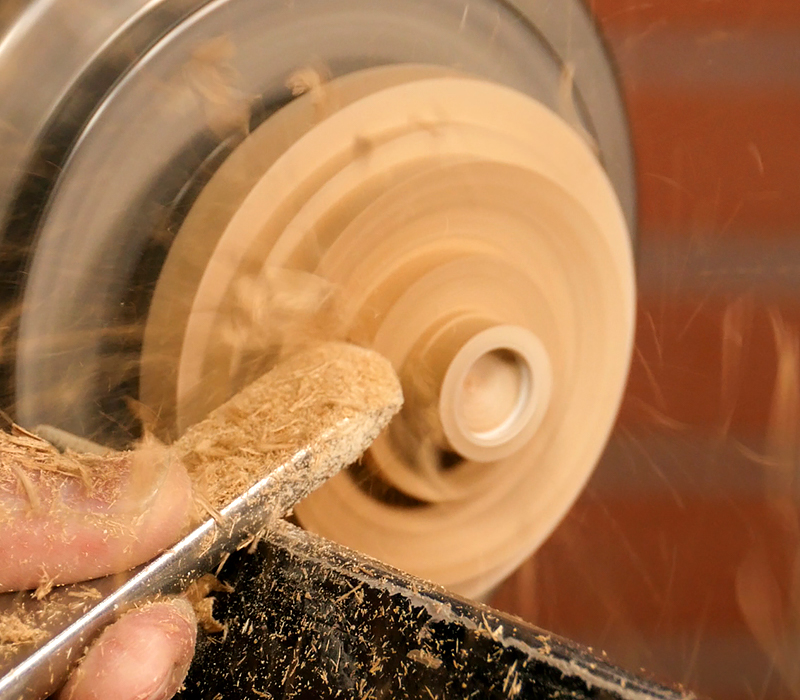
Finish turning the stem to final shape making sure you don’t go thinner than 3/8”. I turn the base to 2-3/4” diameter for a nice stable platform.
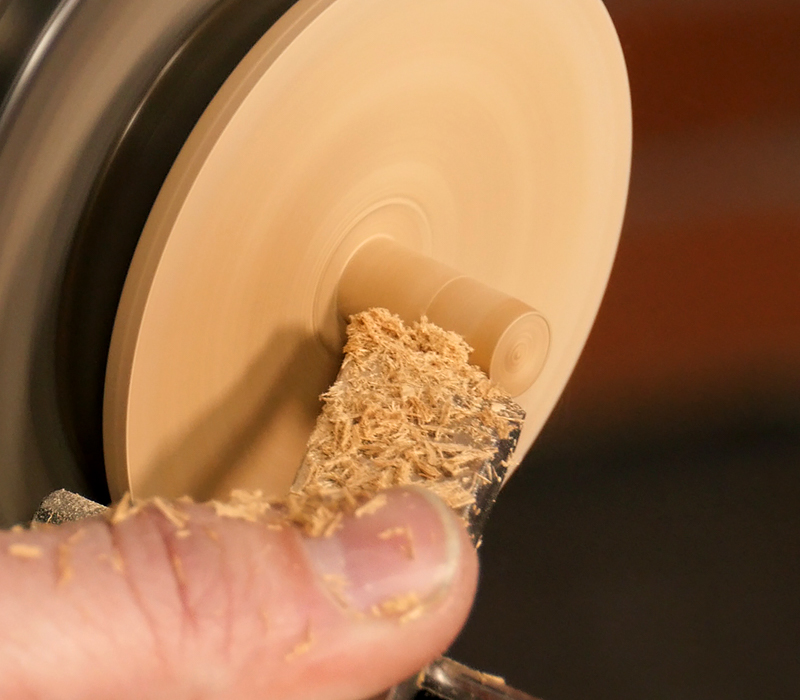
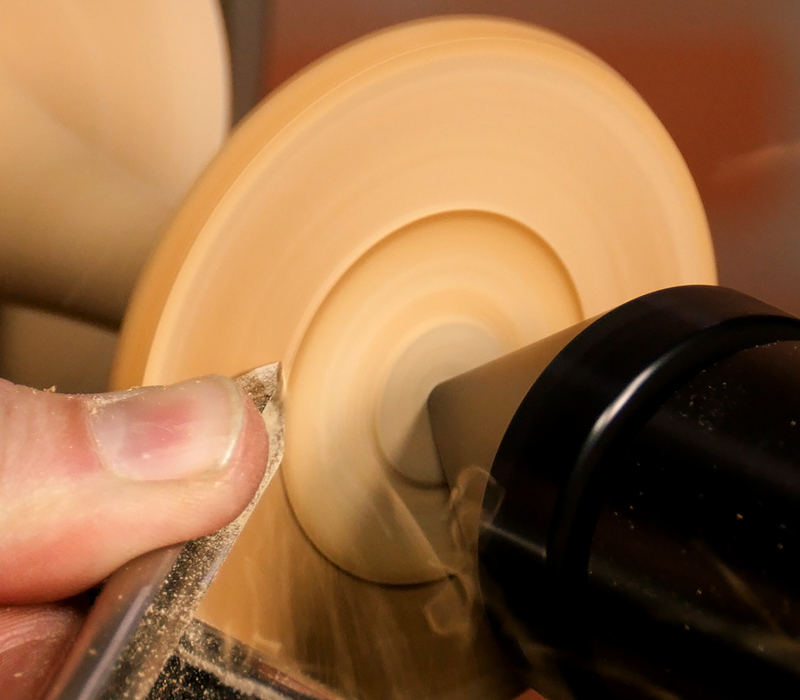
Sand through at least 400 grit, making sure to remove any scratch marks.
Carefully start parting off the base of the stem from the chuck. Once you’re close, finish the job with a small hand-saw.

Next, mount a waste block and turn a tenon to fit the hole in the stem. Check the fit frequently, it should be nice and snug.
Bring up the tailstock for support and turn the base of the stem with a spindle gouge. Turn a slightly concave profile so it will sit flat on the table.
Sand and finish
Sand the base through at least 400 grit, getting rid of any scratch marks.Now take the stem off the lathe and hand-sand away the nub.
Now it’s ready for finishing. I’ll be using spray lacquer. It’s a nice, durable finish that looks great. You don’t want to use shellac or friction polish because any spilled alcohol will ruin the finish. I’ll use my drill chuck and bit on the lathe to hold the stem while I spray the finish. Spray light coats to prevent any runs in the finish. I’ll spray three coats, letting each of them dry for about ten minutes.

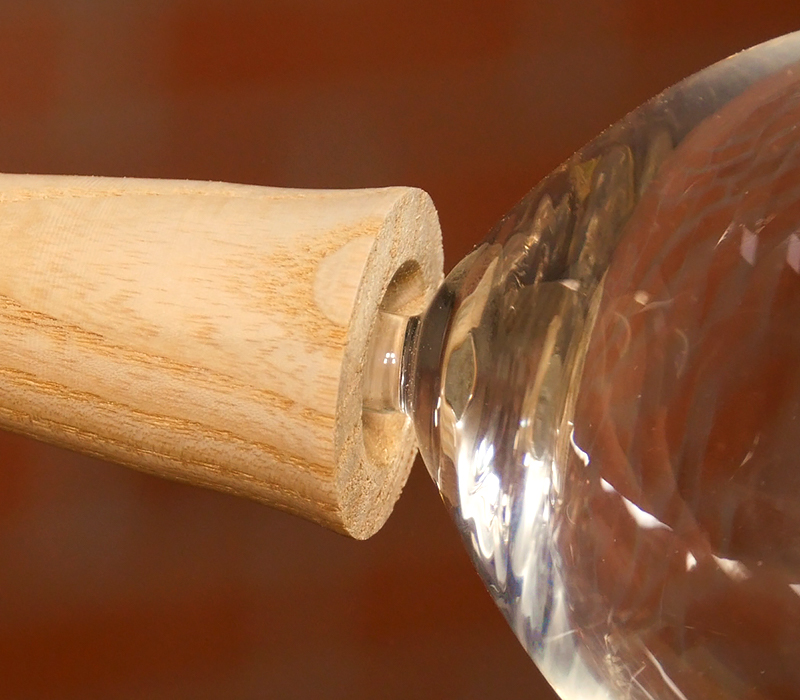
Now we’re ready to glue in the glass. Just mix a few drops of 2 part epoxy and mix thoroughly. DO NOT use CA glue because it won’t adhere to the glass. Now use a small brush or spatula and coat the drilled hole with the epoxy.
Attach the stemware, twisting back and forth to evenly spread the epoxy. Wipe away any excess epoxy and set aside to dry for 24 hours to fully cure.
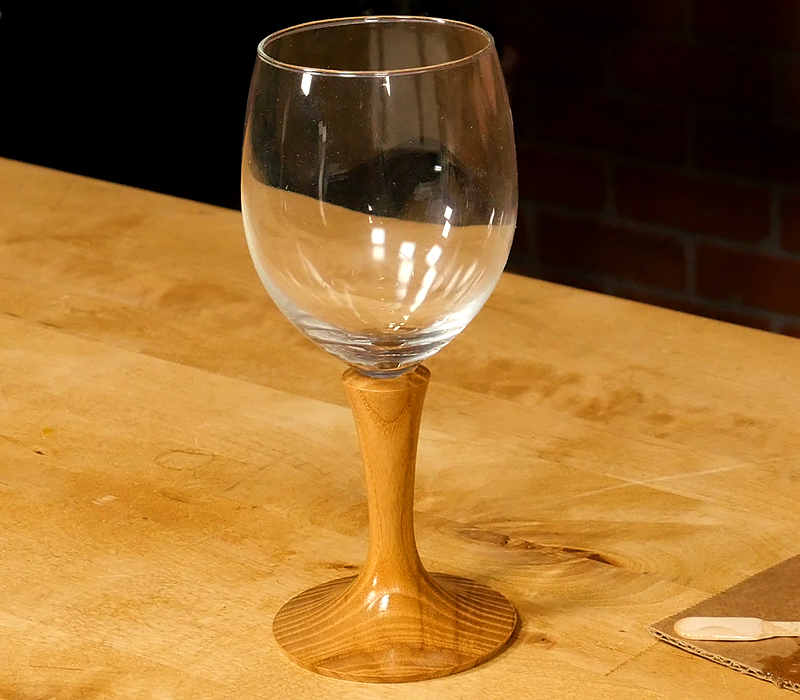
We’ve now got ourselves a beautiful, hand-turned bordeaux wine glass for the next dinner party.
Supplies Used
Wineglass
Chuck and jaws
Spindle Roughing Gouge
Spindle Gouge
Parting Tool
Drill Chuck
Sandpaper
Spray Lacquer
Epoxy
I have been turning wood stemmed wine glasses with stem length 90mm main section of stem 7mm. They I use pen blanks for the stems and normally a different wood for the base.
Is there a place or business where I can pay to have this repair done? Or, sell my red wine glasses with broken stems?
How long was the block you used? It looks longer than 4”. Thanks.
It was actually 4″ – or very close to it. We took a lot of close-ups which often make the work look a lot larger than it is.
Great how-to video!
Where can I find wine goblets with the cut/short stem?
Thanks!
Brian
Thanks for the feedback!
Here is the link to the wine glasses:
https://www.woodturnerscatalog.com/p/54/5267/Artisan-Premium-Stemware-Kit
I have been making wooden wine glass stems for the past 15+ yrs but I use up all my scrap material in doing so. It takes more time but it is worth it.
Craft Supplies always have great videos including this inspiring wine glass video.
Thanks for sharing a well done video.
Great video