
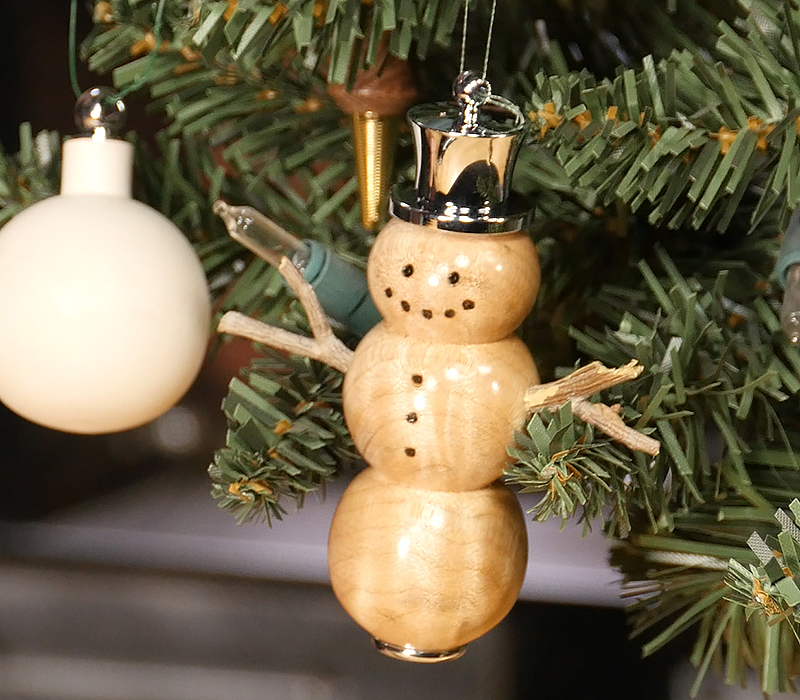
Christmas Tree Ornaments are fun, easy to turn projects with endless creative possibilities. You can really get your creative juices flowing experimenting with color, shape, and texture. We offer a number of styles and platings to choose from, and they’re all turned the same way using a standard pen mandrel, 7mm drill bit and bushings. You’ll just need standard turning tools and supplies for this project. Today I’m going to turn a Snowman’s Top Hat Ornament Kit. It’s a lot of fun because you give it some personality. Let’s get started at the lathe.
Start with a blank cut about 1/4″ longer than the project tube and large enough diameter for the design. Grip the blank in a set of pen drilling jaws, then drill completely through using a 7mm bit.

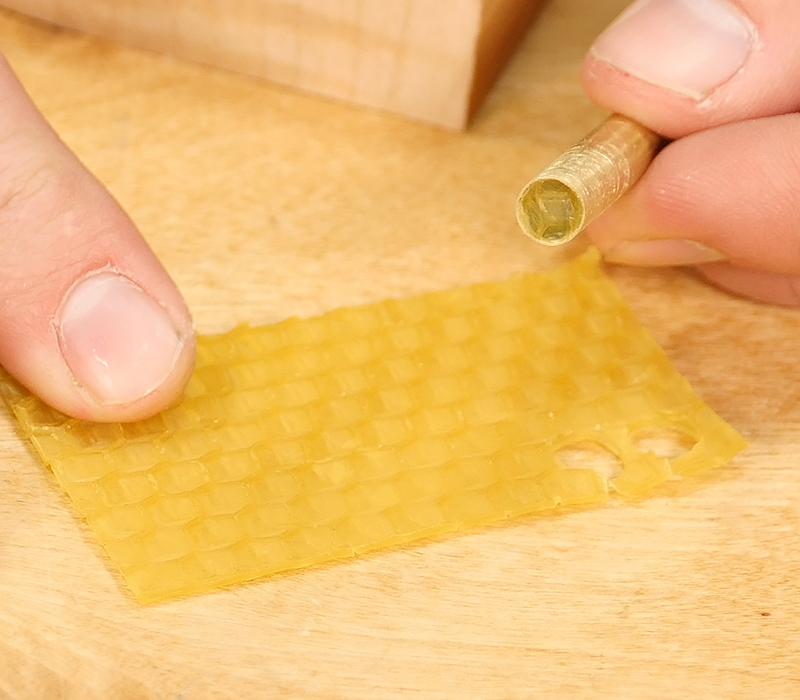
Before gluing the tube into the blank, scuff it up with some 180 grit sand paper so that the glue adheres better. I also like to plug the ends with some beeswax to keep glue out of the brass tube.
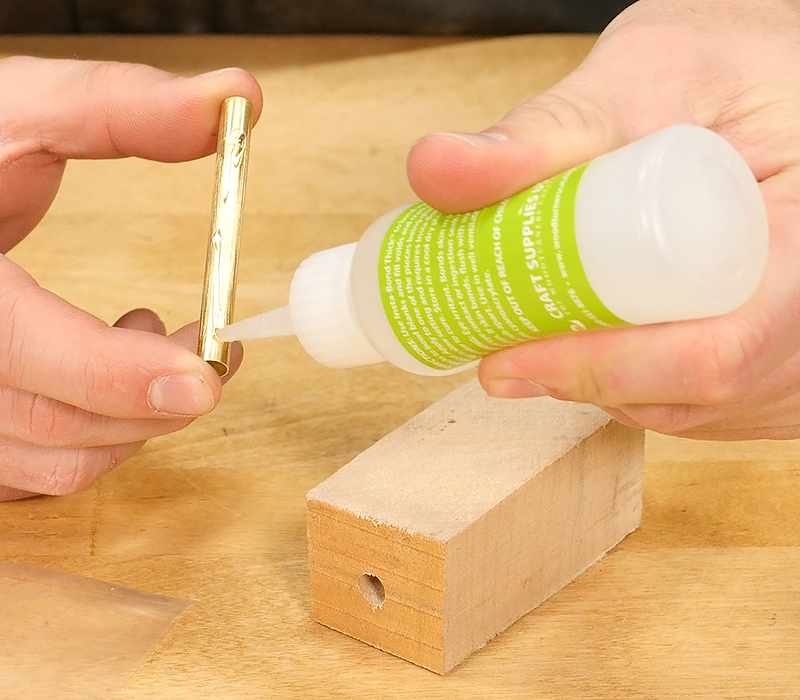
Using thick CA or epoxy, coat the brass tube, then insert it into the blank while twisting to spread the glue evenly. Set it aside until the glue dries.
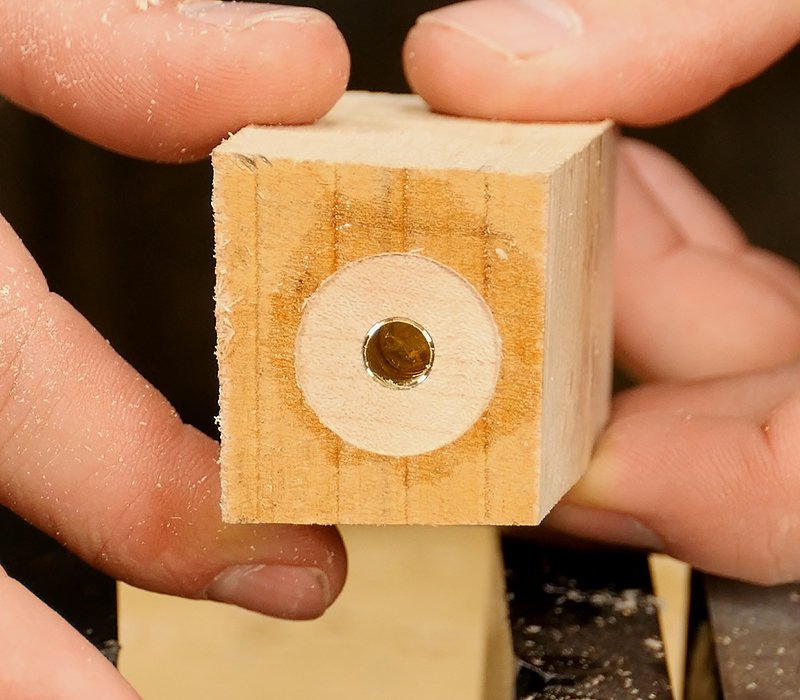
With the blank in a vice, barrel trim both ends until you can see the brass shine. This will keep everything square for final assembly.
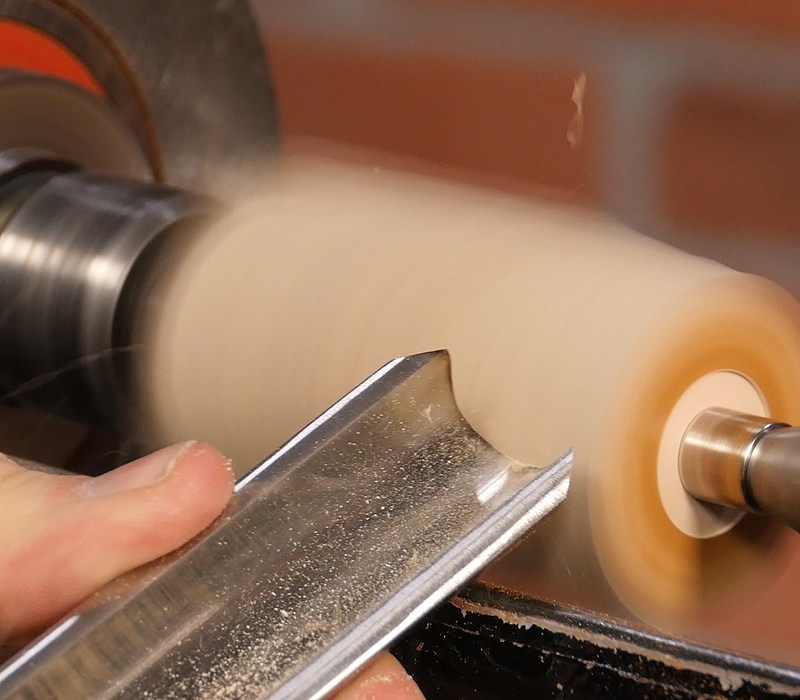
Now mount the bushings and the blank onto a pen mandrel and advance the tailstock. Rough the blank using a spindle roughing gouge.
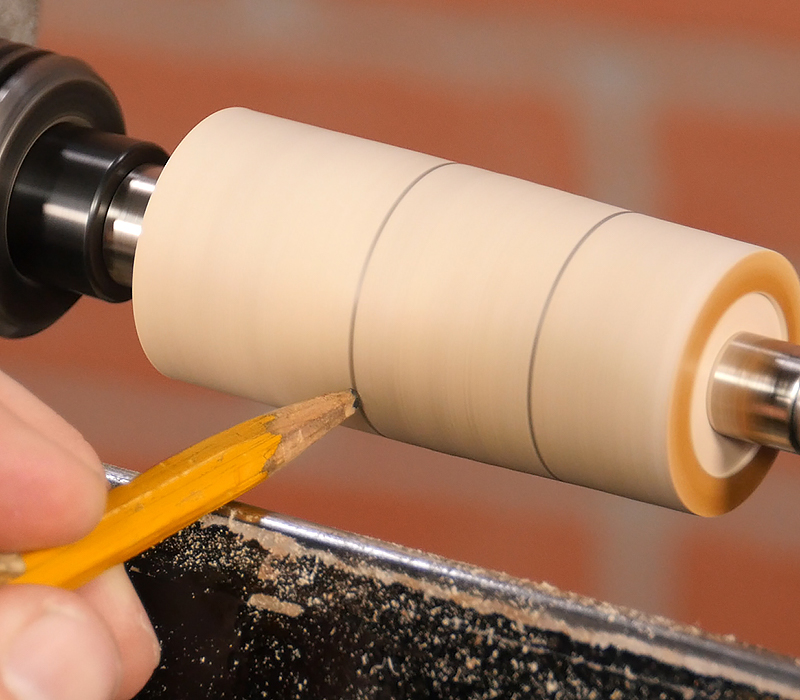
Once it’s roughed, mark the three layers of the snowman’s body and turn to shape.
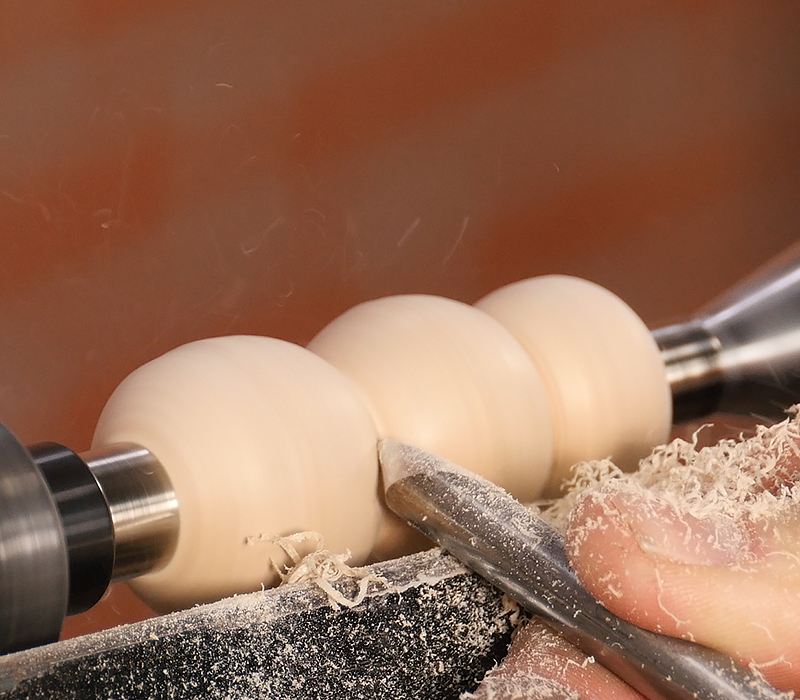
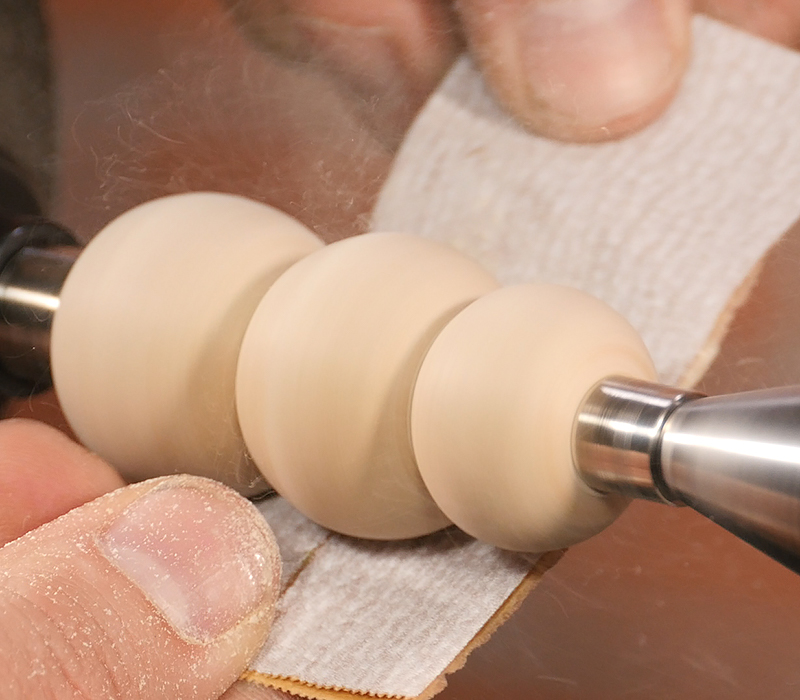
Turn down to the bushings on each end, then sand through 320 grit.
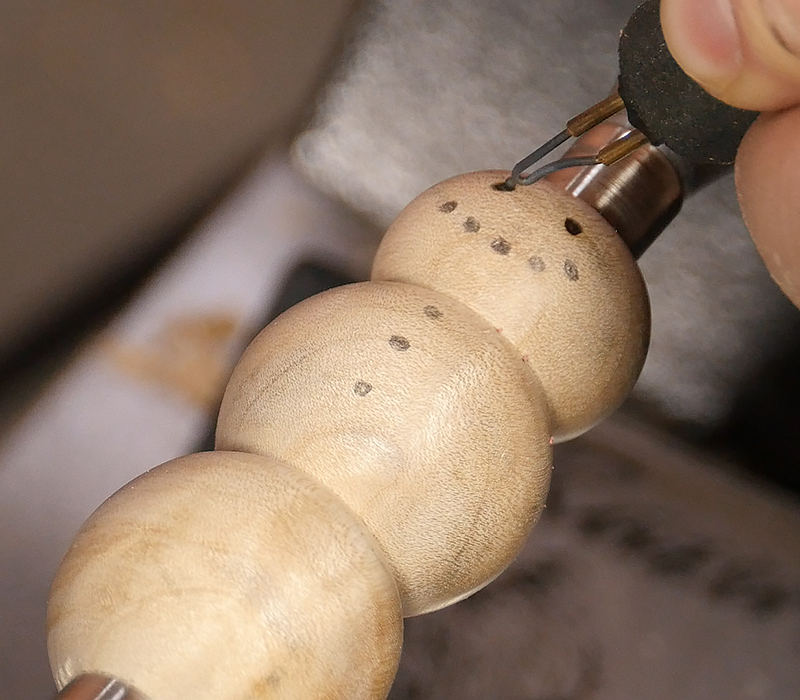
Now mark the eyes, mouth and buttons on the snowman for burning. Once you’ve got them marked, use a ball tip and burn them into place. If you don’t have a burner, a black marker will do the trick.
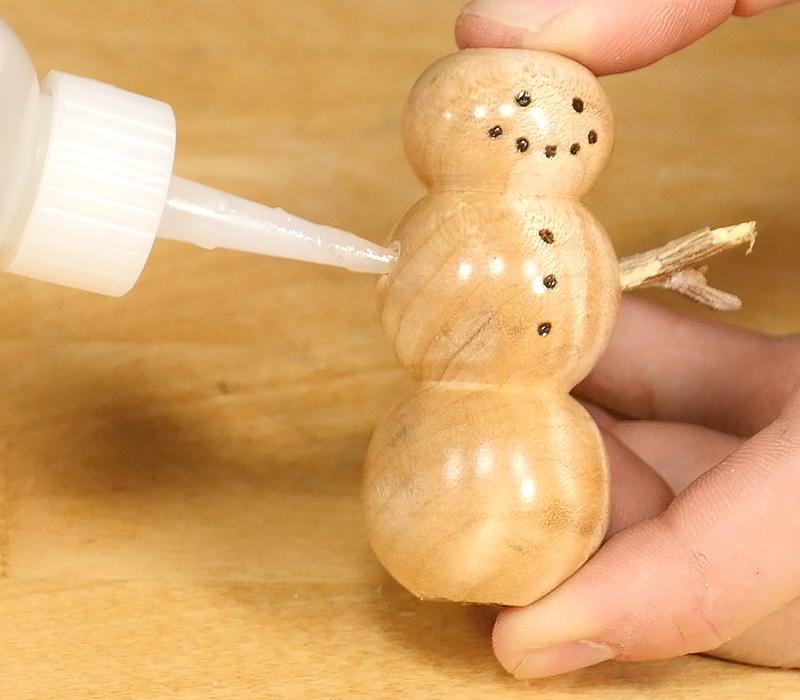
You can use whatever finish you’d like, here I’m going to use spray lacquer so I don’t smear the face details. Now we need to lock the spindle and drill two small holes for the arms.

Finally, I’ll glue two small twigs in place for arms. Once the glue is cured press the bottom and top hat into place and it’s all finished.
Supplies Used:
Top Hat ornament kit
Beeswax Sheet
Sheet Abrasives
CA Glue
Roughing Gouge
Spindle Gouge
Razertip Pyrographic Ball Tip Pen
Milescraft Turner’s Press
Master’s Magic Spray Lacquer
Quick and easy. Nice.
Two thumbs up this project is easy to turn and rather enjoyable.