
In this article you’ll learn about the many types of “Oil” finishes and what makes them different.
Excerpt from an article by Bob Flexner
Finishing is a mystery to most woodworkers, but it’s not because finishes are difficult to apply. All that’s involved in applying a finish is transferring a liquid to wood using one of three really easy-to-use tools: a rag, a brush or a spray gun. Finishing is a mystery largely because of the confusion created by manufacturers in their labeling, and there’s no better example of this than the mislabeling of various “oil” finishes.
The Nature of Oil
Some oils have more “reactive sites” than others, and it is at these sites that the molecules in oil form a chemical bond, or “crosslink” when exposed to air. Oils that never dry have very few or no reactive sites; oils that dry to a sticky state have a few reactive sites; and oils that dry completely to a soft film have sufficient reactive sites to make curing possible. The two large families of oils used in finishing are mineral oil and vegetable oil.
Mineral Oil
Mineral oil is distilled from petroleum and has no reactive sites. So mineral oil never dries. If an oil product sold as a wood finish stays liquid no matter how long you leave it exposed to air, then it’s almost surely mineral oil. Mineral oil is ineffective as a protective or decorative finish for wood.
Vegetable Oil
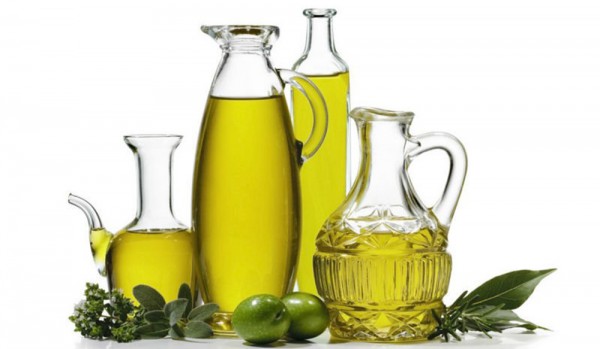
- Vegetable oils are pressed from plant seeds and nuts and are made up of a glycerol molecule with three fatty acids attached. There are many different fatty acids, each containing from zero to four reactive sites.
- Oils with fatty acids containing an average of zero-to-one reactive site per fatty acid don’t crosslink enough to ever dry. So these oils, which include olive, castor, and coconut, are similar to mineral oil. In the context of wood finishing, they are called “non-drying” oils.
- Oils with an average of one-to-two reactive sites per fatty acid dry better. But the drying takes a very long time. These oils are called “semi-drying” oils. Examples include walnut, soybean (soya) and safflower oil.
- Oils with fatty acids containing an average of two or more reactive sites dry fully to a soft film and are called “drying” oils. The most common examples are linseed oil and tung oil. Drying occurs faster when metallic driers are added. These drier’s are catalysts that speed the introduction of oxygen into the oil.
- Driers are commonly added to raw linseed oil to create “boiled” linseed oil. Driers aren’t added to tung oil because they can cause it to take on a frost-like appearance when dry.
- A myth persists in the woodworking community that finishes with driers added are unhealthy for contact with food or children’s mouths. This is not the case as long as the finish has fully dried; the rule of thumb for drying is 30 days, but the time can be reduced significantly in warmer temperatures.
- With more reactive sites, tung oil dries significantly faster than raw linseed oil – but not as fast as boiled linseed oil with the driers added. Tung oil also dries to a tighter network than either raw or boiled linseed oil, so tung oil is more water resistant.
Oil/Varnish Blend
- Linseed oil is often combined with varnish to create an oil/varnish blend. Blends of oil and varnish are very popular finishes with woodworkers.
- You can easily make your own blend by mixing any varnish, including polyurethane varnish, with boiled linseed oil and/or tung oil. To make spreading easier, you can add mineral spirits (paint thinner) to thin the finish. Begin with one-third oil, one-third varnish and one-third mineral spirits, and adjust from there to your liking.
- Oil/varnish blends have to be applied like straight oil. All the excess must be wiped off after each application or the result will be a soft, gummy finish.
- Only a miniscule build can be achieved with any of these “oils,” which is the reason linseed oil, tung oil, and blends of oil and varnish offer much less protection for wood than do finishes that cure hard and can be built up to greater thicknesses. But the thin build makes these finishes easy to repair. Simply apply another coat of oil.
- Oil is the easiest of all finishes to apply with good results. Simply wipe or brush the oil onto the wood (or pour on the oil and spread it around), let the oil soak in for a few minutes, then wipe off all the excess before it dries.
- This direction applies to all types of oil and all blends of oil and varnish. The only thing you can do wrong is not wipe off the excess. (If a little oil “bleeds” back out of the pores after you have wiped off the excess, continue wiping every 30 minutes or so until the bleeding stops.)
- If you are using a semi-drying oil (such as walnut oil), a drying oil (such as linseed oil or tung oil), or a blend of oil and varnish, the best procedure is to allow each coat to dry before applying the next. Each additional coat then adds a tiny bit of build to what is already there, which improves the moisture protection to the wood.
- As a general rule, you should allow each coat to dry overnight in a warm room before applying the next. The drying of all oils (all finishes for that matter) can be accelerated by raising the temperature. You can do this by turning up the heat or putting the object under a heat lamp.
How to Apply Oil

1. Sand the wood to remove mill marks and other flaws. Sand with a grit sandpaper (usually #80, #100, or #120 grit) that removes the problem. Then sand up through the grits to #180 or #220 grit, removing the scratches created by each previous grit.
2. Apply a wet coat of any oil or oil/varnish blend to the wood with a cloth or brush. Allow the finish to penetrate a few minutes and apply more oil to any spots that dry due to penetration. Wipe off the excess finish.
3. For subsequent coats, wait until the previous coat has dried, then sand with very fine sandpaper (#400 or #600) just enough so the surface feels smooth. Follow by applying another coat like the first and wipe off the excess.
4. Apply additional coats after each previous coat has dried until you don’t notice any improvement. Usually two to four coats are all that are necessary. Apply paste wax after the finish has dried.
Caution
With any drying oil, or blend of drying oil and varnish, hang the rags you use or drape them over the edge of a trash can or table to harden. Drying oils have the potential to spontaneously combust if rags are piled up and the heat that is created can’t dissipate.