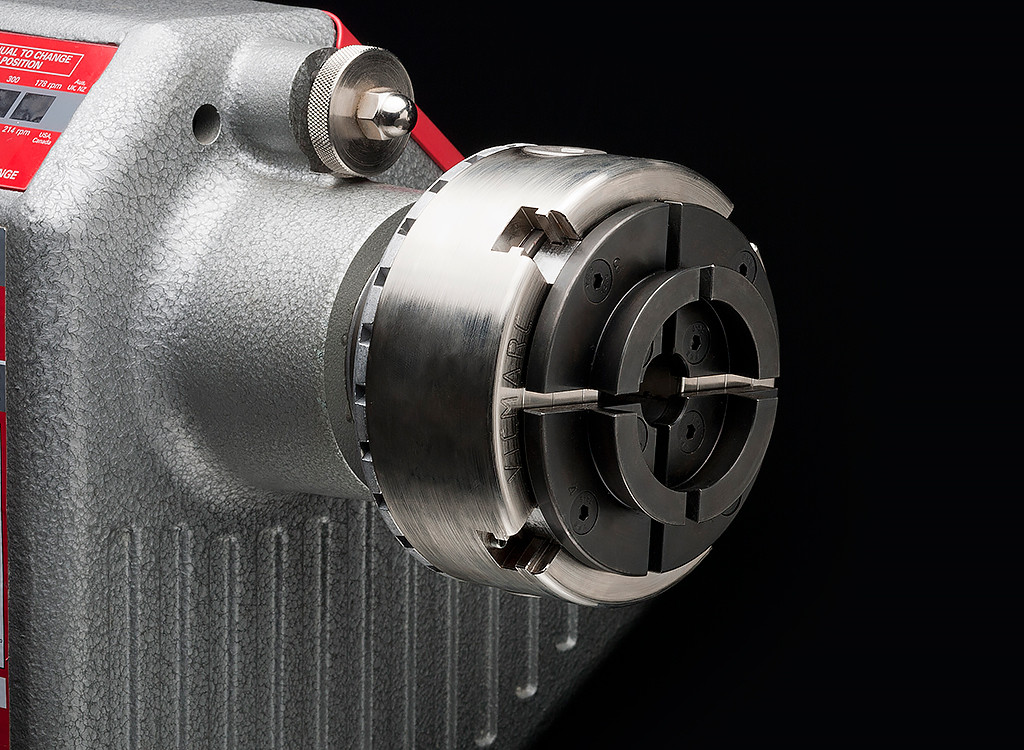
Buying the right chuck can seem confusing at first. However, because all chucks perform the same function and operate in a similar manner, choosing a chuck really comes down to which brand offers the features and price range that will best suit your needs. The information below will help you make an informed decision when purchasing a chuck so that you buy the chuck that’s right for you the first time. Be sure to review the safety tips below before using any chuck.
Essential Safety Tips Before Using Your Chuck
- Always wear proper eye, ear, and face protection.
- Make sure the chuck is properly secured on your lathe.
- Lathe speed will vary depending on wood size. See our Safe Wood Lathe Speed page to choose the correct lathe speed.
- Examine wood blanks carefully before turning. If you find cracks, knots or weak areas, discard the blank as it turning could result in injury.
- Do not extend jaw slides beyond the body, as this may result in the slides being thrown from the chuck, or injury due to the jaws protruding beyond the chuck body.
- And as always, use common sense and be cautious when turning.
Chuck Basics
In general, woodturning chucks have not changed significantly since they came on the scene in the early 1980’s. However, chucks today offer a better value than ever before as they are precision machined from higher quality materials with greater accuracy that allows accessories to interchange.
Chuck Threads
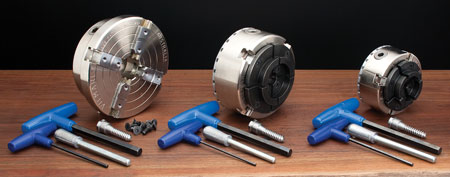
Chucks come in two types; direct threaded and threaded insert type. Direct threaded means the thread size is cut directly into the chuck body and can only be used on lathes with the corresponding thread size. Threaded insert type means the chuck utilizes a removable threaded insert which allows you to use the chuck on multiple lathes with varying thread sizes by changing the threaded insert as needed.
Key Operated Chucks
Key operated chucks are the most popular type of chuck due to one-handed operation. To operate a key chuck you simply put the chuck key in the matching hole on the body of the chuck and turn the handle either clockwise or counter-clockwise to open or close the jaws.
Lever Operated Chucks
Lever operated chucks require two-hand operation. To operate, lever bars are inserted into holes located on the exterior of the chuck body. Moving the lever bars back and forth cause the jaws to expand or contract.
Chuck Jaws
With a large number of jaws available to choose from, choosing the right set of jaws can be confusing. While the jaws supplied with most chucks are likely to be used most of the time, specialty jaws are available to suit specific applications and can prove to be very helpful. See the list of jaws below to learn more about their functions.
Dovetail Jaws
Capable of chucking bowls by clamping down on a foot or tenon and can expand in to a dovetail recess.
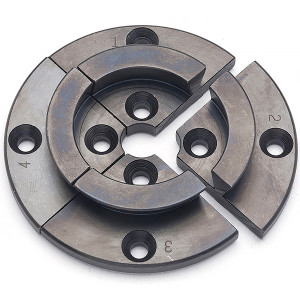
Long Nose Jaws
Designed to get the work piece away from the headstock and capable of holding heavy work. They are also ideal for gripping round stock.
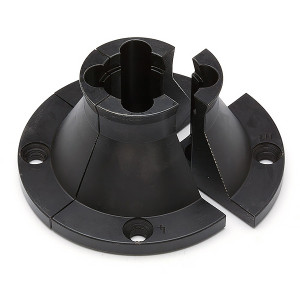
Shark Jaws
These jaws are used as traditional dovetail jaws for gripping a tenon or to expand into a turned recess. Serrated ridges along the interior and exterior of the jaw provide an aggressive grip.
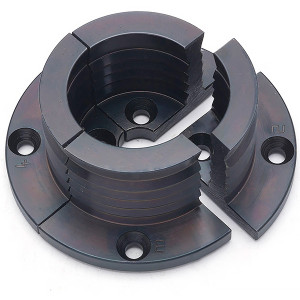
Step Jaws
This dovetail jaw features multiple steps inside the jaw to accommodate different diameters of stock.
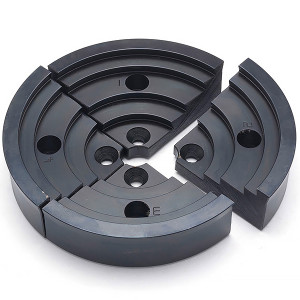
Extended Dovetail Jaws
These dovetail jaws are designed to move the work away from the chuck for easier access while turning. Highly recommended for pre-drilled projects such as pepper mills or kaleidoscopes.
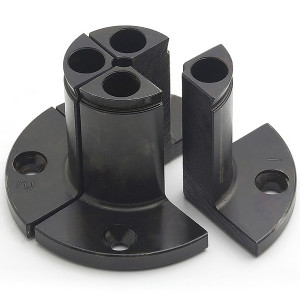
Pin Jaws
These long, narrow jaws are designed for securing pre-drilled blank such as pepper mills or flower vases. Can also be used for gripping onto a pen mandrel for improved accuracy and adjustability.
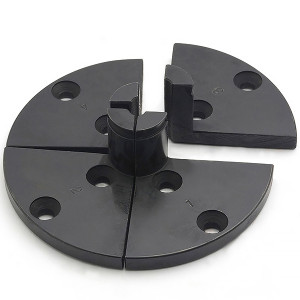
Adjustable Jaws
Great for rechucking work without marring the surface. Only to be used for making light finishing cuts or sanding.
Chuck Manufacturers
Vicmarc
These chucks are precision machined in Australia and provide smooth operation, superb accuracy, and overall quality unsurpassed by any other chuck.
Oneway
Precision machined in Canada using premium materials, these chucks are hand-fitted for smooth, dependable operation.
Teknatool
These chucks offer exceptional value without sacrificing dependability and performance. A full range of affordable accessories make these chucks an excellent choice.
Easy Wood Tools
The most innovative woodturning chuck since the introduction of the 4-jaw scroll chuck. The Easy Chuck features a revolutionary Snap-Lock jaw design that eliminates tedious jaw screws allowing you to change jaws in less than 30 seconds!
Apprentice Series
At nearly half the price of similary equipped chucks, the Apprentice™ chuck offers budget-minded woodturners an economical way of enjoying the benefits of using a chuck.
Basic Chuck Operation
Mounting the Chuck
Before mounting the chuck on the lathe, make sure the power source is disconnected and the spindle is locked. Make sure the threads of the chuck and spindle are the same and simply thread the chuck onto the lathe until snug.
Securing the Work Piece
This section applies to the standard dovetail jaws but the same general technique also applies to other jaws. Rough turn the blank to round between centers. Turn a dovetail on the base of the workpiece to fit the dovetail jaws. Make sure to turn the workpiece dovetail to closely match the profile of the chuck jaw.
Note: Do not exceed your chucks capacity.
Mounting Wood Using a Woodworm Screw
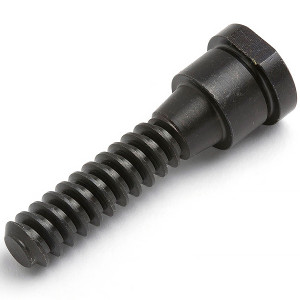
Mounting the woodworm screw is simple, place the thick section of the woodworm screw into the center of the chuck making sure all the flat sides are aligned with the jaw slides then close the jaws around it. Before final tightening make sure that the step in the thick section of the screw is seated behind and against the jaws, this will prevent any tendency for the screw to creep forward when in use.
Removing and Installing Jaws
Jaws slides are individualy numbered and must be re-installed with the corresponding numbers correctly. (such as jaw #1 fits jaw slide #1 and so-on.) To remove the jaws, use the small allen key supplied with your chuck to remove the hex screws that hold the jaws in place. Install the corresponding jaw slides. Rotate the chuck by hand to verify that all jaws run concentrically.
If using the Easy Chuck from Easy Wood Tools, simply insert the included hex wrench into the hole located in the jaw and press to unlock the jaw from the slide. To install, slide the jaw into the slide groove. When you hear the snap, the jaw is locked in place and ready to go.
Other Questions?
If you have any other questions regarding chucks or anything woodturning related please call us at 1-800-551-8876

Hey mate,
I’m searching for this kind of in-depth article on woodturning chuck. At every step of this article, you shared a photo that helps to understand the topic clearly.
I love the topic “Essential Safety Tips Before Using Your Chuck & Chuck Basics”. This helps to enrich my knowledge of lathe chuck.
Thanks for sharing your idea and it deserves to be shared I would like to share it with my friends!