
Note: The piece shown in this Inspiration Series video was made from Cottonwood and finished with beeswax.
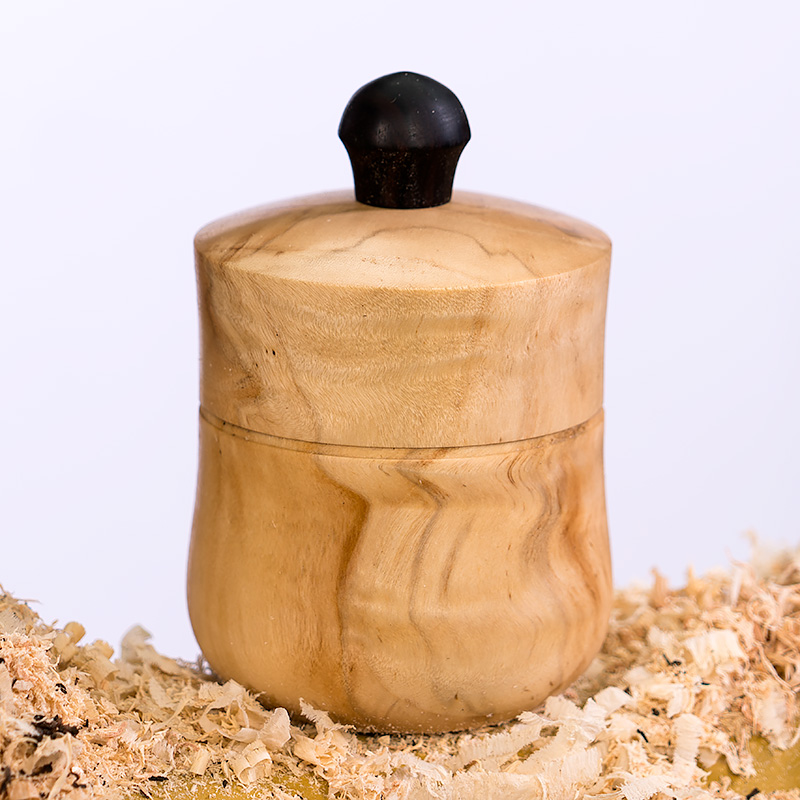
One of my favorite turning projects is a small canister designed for holding salt, sugar or any other ingredients used in the kitchen. I use a canister almost every day when cooking, and it makes a great table decoration.
You’re probably thinking, what makes this different than a regular box? Well, there are a few modifications that standout; a wide base, loose fitting lid, and a finial are some of the necessary changes that make this project unique. We’ll explain “the why” and “the how” later in this article.
Preparation
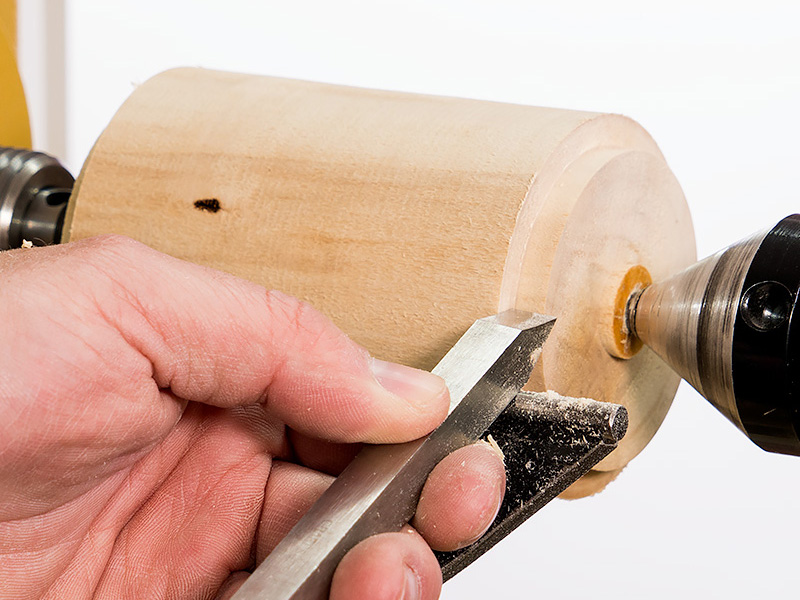
Select a blank of hardwood that is at least 5″ long x 4″ square, preferably something with good color and figure. Find the center on each end of the blank. Mount the blank between centers and rough turn the blank to round using a spindle roughing gouge. True each end of the blank with a parting tool. Turn a tenon on each end of the blank that will fit in your chuck.
Proper Proportions
Use a pencil and layout the lid and body of the canister. We will layout ours using the rule of thirds, with 1/3 being the lid and 2/3’s being the body, this will give us the best proportions and it will look great! Part off the body portion of the blank with a narrow parting tool, the thinner the parting cut, the better the grain alignment will be.
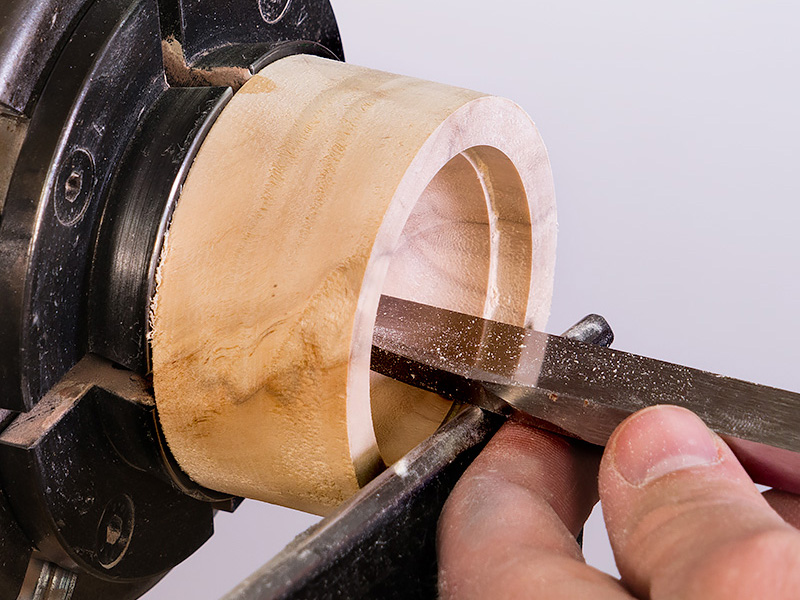
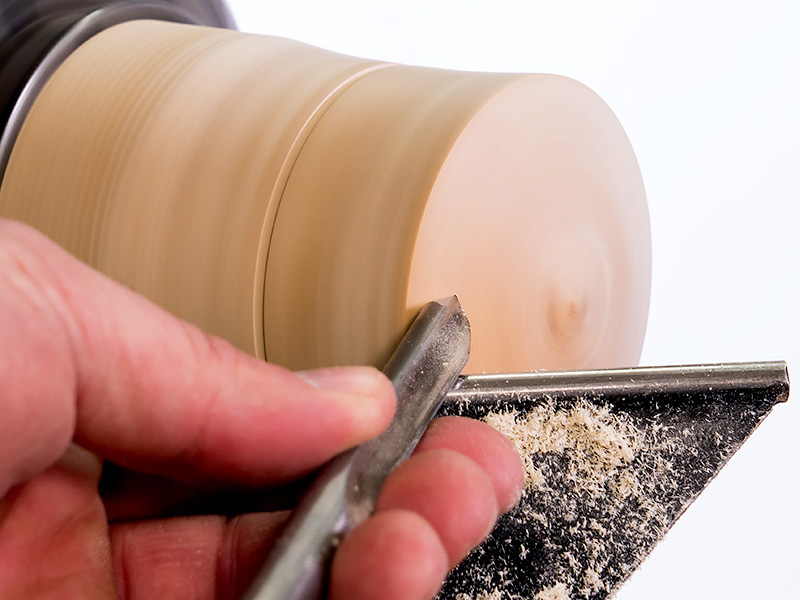
Hollowing the Lid
With our lathe speed around 2,200 rpm use a spindle gouge and true the face of the lid. Rough out the lid using whatever method you feel comfortable with, we’ll be using a spindle gouge and scraper. For this canister we want our wall thickness around 1/4″. The interior wall of the lid needs to be straight and square, if it tapers at all the lid won’t fit correctly. Sand and finish the interior of the lid. Make sure to use a food safe finish such as beeswax or walnut oil. Remove the lid and mount the canister body in the chuck.
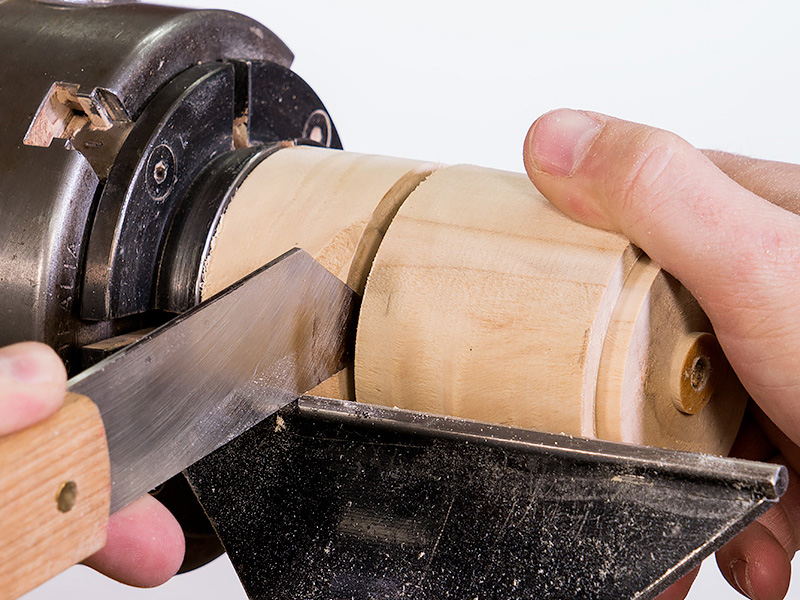
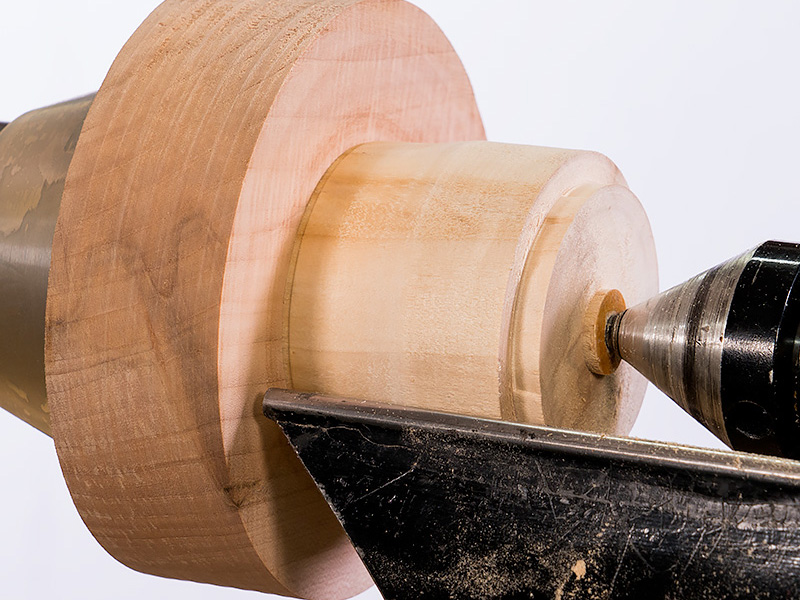
Hollowing the Body
True up the blank and rough fit the lid to the body. Turn a tenon to fit inside the lid leaving it slightly oversize. We do not want the lid to fit just yet. The reason for this is that if we fit the lid now, once we hollow out the body it can generate heat and warp just enough to ruin the fit of the lid. So just turn the tenon to where it’s close to fitting but won’t go on. Hollow out the box with the interior profile matching your desired exterior profile. Sand the inside of the box then allow the box to rest for 15-20 minutes. Now we’re ready to fit the lid. Turn the tenon so that the lid has a “working fit” which is essentially a fit that is tight enough to hold the lid and act as a jam chuck so that we can turn on the exterior of the lid.
Finishing the Lid
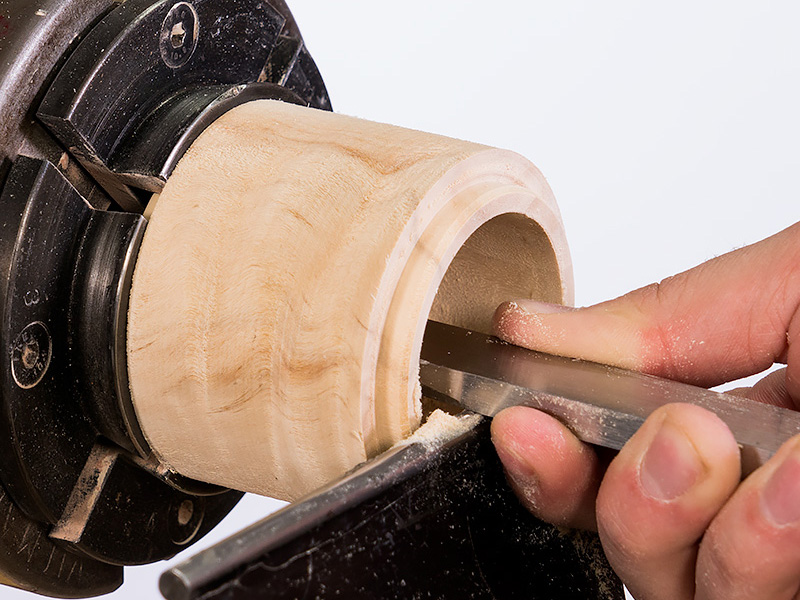
Mount the lid on the canister body. Turn the exterior of the lid and body to your desired shape while keeping in mind wall thicknesses. Sand the lid through 320 grit. Mount a 1/4″ drill bit in a drill chuck in the tailstock. Drill a hole at least 1/8″ deep being careful not to drill completely through the lid. This hole is for our finial. Finish the exterior of the lid with a food safe finish and remove the lid. Now that the lid is finished we can get our final fit between the lid and body. On this project we want a loose fitting lid that can be removed with one hand. Turn the tenon on the body to your desired fit, constantly checking the fit.
Finishing the body
With the lid complete and the body hollowed out, we are ready to turn the exterior of the body. Remove the body from the chuck and mount a waste block. Turn a jam chuck to fit the tenon in the body. Once the body is mounted securely, turn the body to a final shape. Make sure you turn the body so that it has a wide stable base, because everyone knows that spilling the salt is bad luck! Sand and finish the body.
Turning the finial
Select a 1″ x 2″ piece of contrasting hardwood for the finial, we’ll be using African Blackwood on ours. Mount the blank and turn a small finial that will complement the box leaving a tenon to fit the drilled hole in the lid. Sand and finish the finial. Glue the finial into the lid with a small amount of glue to prevent squeeze out.

Complete
Your Salt Canister is now complete! Now fill it up with salt, sugar or anything else you want! If you show this to your family and friends, chances are you’ll end up turning more than just one.
Nice video, especially with the accompanying written directions.
Nice and thorough video, especially with the accompanying written instructions.
Great video
I am surprised that you don’t use negative rake scrapers for cleaning up the inside of the box and cleaning up the top and bottom. My preferred tools for that task.
A negative rake scraper would have been an excellent option as well. We wanted to show how the use of a wax can help hold the fibers to reduce tear out. Thanks for the tip!