Note: The piece shown in this Inspiration Series video was made of Silver Maple.
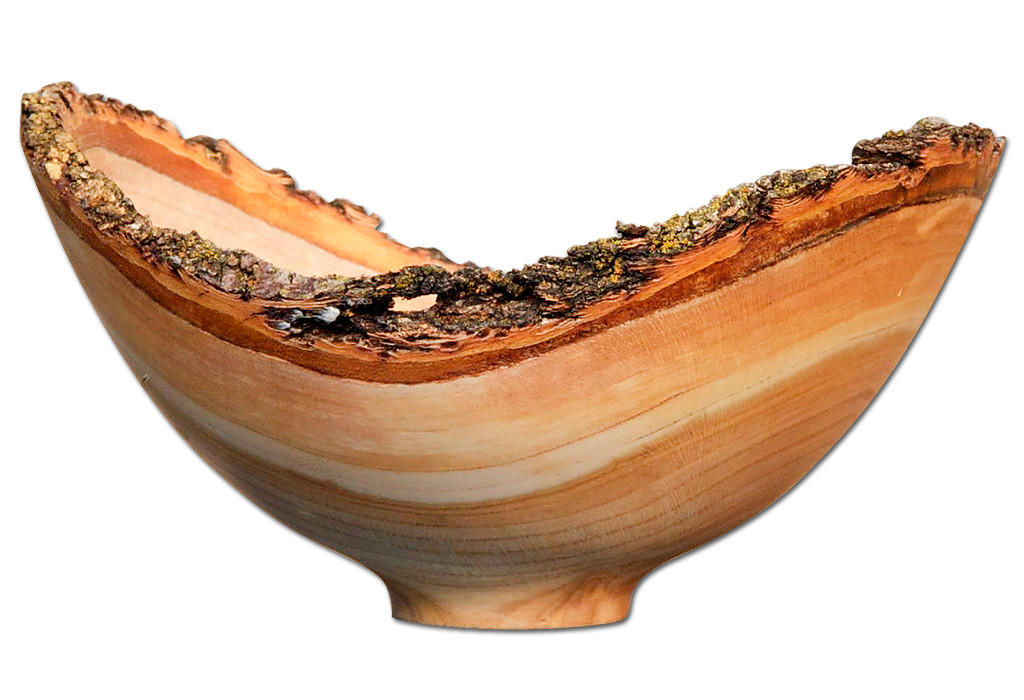
A natural edge bowl is one where the rim of the bowl utilizes the wood in its natural state. The rim of a natural edge bowl will have an undulating shape, flowing with the natural surface characteristics of the log, and typically will have two high points and two low points due to the curvature of the log section from which the bowl is turned.
Blank Selection
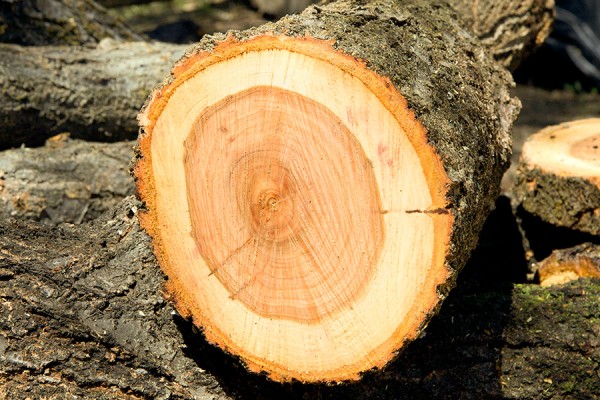
Select a wood species that has a contrasting sapwood and heartwood. Usually, the sapwood is lighter in color and will show a dramatic contrast and display the shape of the bowl against the darker heartwood. The heart center, or pith, is not left in the bowl as this area is unstable and frequently is the cause of cracks and checks. If a bark edge is desirable, select a log which has thin, light bark and does not show any signs of loosening or decay. Heavy bark can be very attractive, but extra precautions will need to be taken to prevent the bark from coming off or being damaged during turning. Logs with an offset heart can be used to give a greater drop on the low sides, but will only allow one bowl per section. Natural edge bowls are not usually turned end-grain due to cracking problems in the base, little grain pattern and few choices of shape.
Preparation Before Turning
Select a log 8-10″ diameter and cut off a 2″ or 3″ section to remove any checks, rot or dirt to produce clean timber with bark firmly in place. Mark off a log section an inch or two longer than the diameter of the log and cut off the section, making a clean cut, square to the log. Stand the log section on end and mark a line through the pith, trying to get the pith as near to the center of the line as possible. With the line as a guide, use a band saw or chainsaw and cut the log section in two, following the pith to the other end. You now should have two blanks with the pith visible on the cut face of each piece. Measure across the flat face of the blank to find the maximum diameter. Set your compass to layout a circle about 1/2″ less than the diameter. If you have a maximum diameter of 10”, set the compass to 4-3/4″. Layout a circle 9-1/2″ in diameter out of a piece of thin plywood or cardboard, and mark the center point. Cut out the circle on a band saw. Drive a 1-1/2″ nail through the center point of the disc, just enough to hold it firmly in place. Using the band saw, and with the disc as a guideline, cut the blank into a circle then remove the disc.
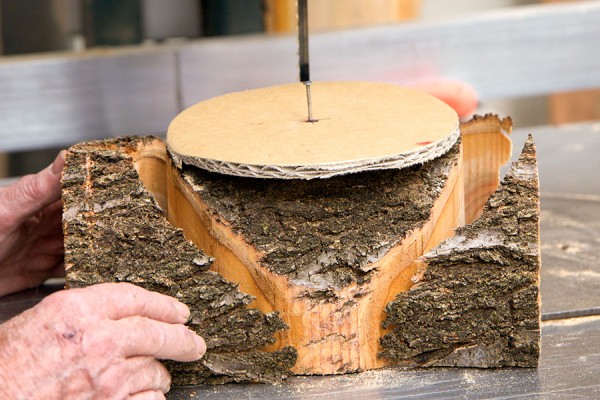
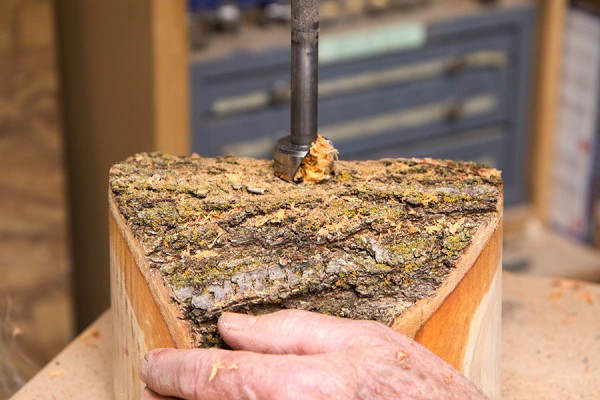
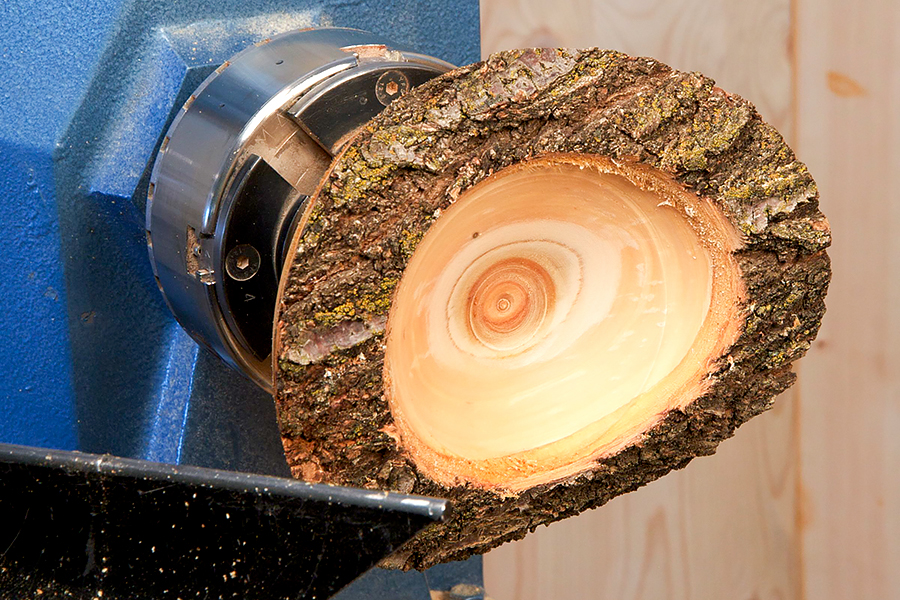
Turn the blank over and center the disc on the flat face. Drive in a nail to mark the center of the blank. Remove the template and nail. Turn the blank right side up; remove bark around the nail hole on the center of the blank. The drive center needs to set into the wood, not bark. This can be done using a wood chisel or on the drill press using a 1″ Forstner Bit. Use a mallet or hammer to drive the drive center into the center of the blank. Place the drive center in the headstock spindle and a revolving cone center in the tailstock spindle. Position the bowl blank over the drive center, then move the tailstock into position against the center of the base. This will be the center mark left by the nail when the disc was centered on the base. Lock the tailstock securely in position and advance the cone center well into the wood, probably 1/4″ or more. Tighten the tailstock spindle lock.
Turning the Blank
The correct lathe speed should allow the blank to turn fast enough that the lathe tools can remove the wood with reasonable effort using efficient cutting action. Too high a speed may cause the lathe to vibrate and possibly move around the floor. Excess speed may also cause the blank to vibrate due to imbalance, possibly resulting in the blank flying off the lathe resulting in serious injury as well damaging the lathe or bowl blank. Speeds that are too low will not produce efficient cutting action, making it difficult to quickly bring the blank into round.
For additional help see our article: Determining Safe Lathe Speeds
A natural edge bowl about 8″ diameter can be roughed out at about 750 rpm, if the bowl blank has been cut out using a band saw and a disc as discussed earlier. Once the bowl blank is mounted on the lathe, rotate the blank by hand, checking visually for balance. If necessary, make adjustments. Set the determined lathe speed and turn the lathe on, keeping your hand on the stop switch. If vibration is excessive, turn the lathe off. If necessary, lower the speed until you reach a point where vibration is acceptable, and then turn the lathe off. Adjust the tool rest until it is about 1/2″ below center, Rotate the blank by hand to be sure the tool rest is close to the bowl blank, but not touching it. Start the lathe. Use a 1/2″ deep fluted bowl gouge to begin removing the wood, starting at the bottom and working toward the top.
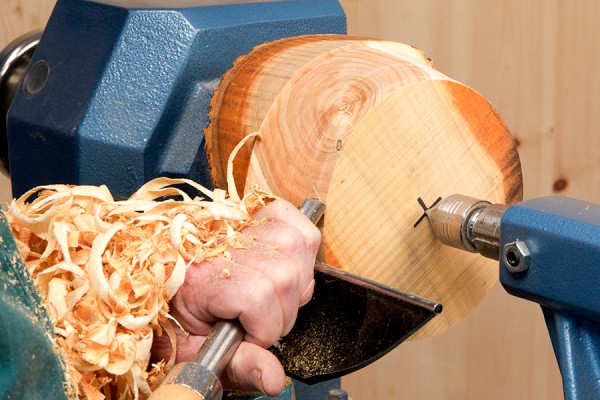
When the bark area on the low side is reached, start cutting from the top down, as this will help prevent the bark from being pushed off by the gouge during the turning process. Mark the low side of the bark edge with a pencil. Rotate the piece 180 degrees to compare the position of the lower bark edge on the opposite side. If the bark edge is asymmetrical, loosen the tailstock and reposition the base of the blank against the cone center and tighten. Check the position of the bark edge again and adjust as needed until the rim of the bowl is symmetrical. Continue turning the bowl until you achieve the desired shape. Be sure to turn a tenon on the base to fit your chuck. The tenon will be turned away later. Mount the bowl in a chuck. Turn the base to the desired final shape. Using a 1/2″ Bowl Gouge, start shaping the inside of the bowl.
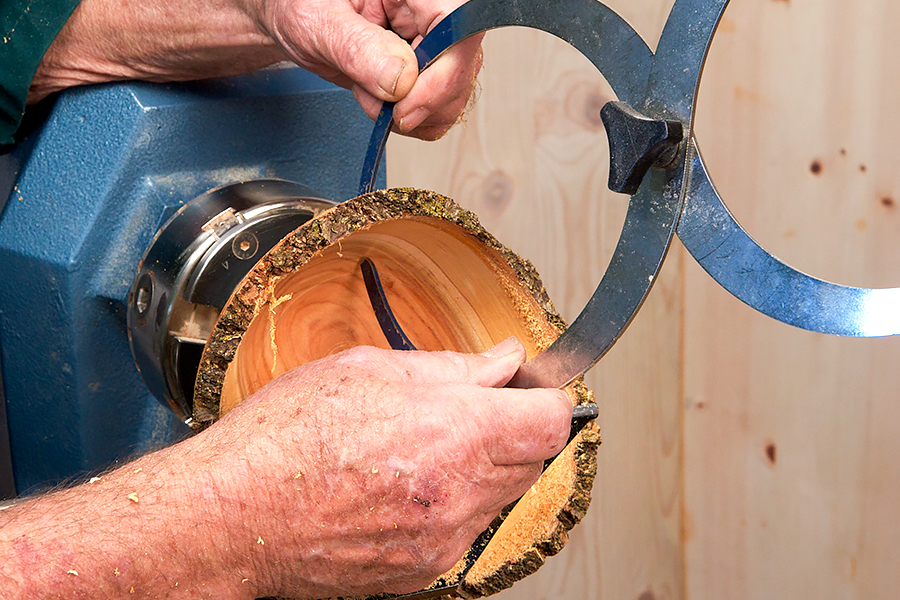
Use double-ended calipers to make sure you have a consistent wall thickness. Be sure to check frequently.
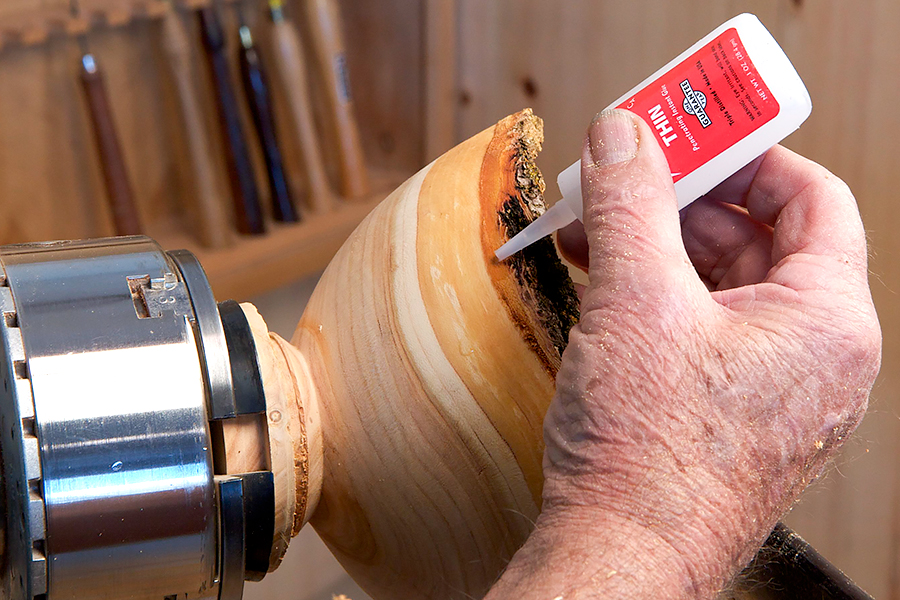
Once the final wall thickness is achieved, use thin CA glue to glue the loose bark into place. This will help prevent it from coming off in the future. Finish shaping the inside of the bowl in preparation for sanding.
Sanding and Finishing the Bowl
When sanding, we recommend using a power or inertia sander. Start by using 120 grit or so depending on the woods surface. Be sure not to sand the bark, as this will ruin the natural surface and may damage the bark edge. Finish sanding. Once sanded, apply Deft Clear Wood Finish to seal and finish the inside and outside of the bowl. Then wipe off the excess and let dry. Mount and turn a 6″ or so waste block to a screw center. Turn the face of the waste block to a dome shape that matches the inside profile of the bowl. Glue neoprene or foam to the waste block to protect the inside of the bowl when re-chucked. Place a paper towel between the foam and re-chuck the bowl by placing the inside of the bowl against the neoprene and the waste block. Now bring the tailstock up against the base of the bowl. Turn away the remaining waste material down small enough to where you can sand most of the foot of the bowl. Remove the excess wood with a handsaw or parting tool. Sand and finish the foot of the blank by hand.