
Turning a Jack-O’-Lantern Tea Light is a fun and simple project you can make to add a spooky glow to your home during halloween.
Prepare the Blank
For this project we’ll begin with a 4” x 6” x 6” block of low figured maple. The low figure will help the dye apply evenly. Mark the center of the blank and drill a pilot hole for a screw center. Next, mount the blank on the lathe using a screw chuck, or woodworm screw. Both of these mounting techniques are very strong and work well for rough turning the workpiece.
Rough the blank down to round using a bowl gouge.
If you don’t know what lathe speed should be see our article: Determining Safe Lathe Speeds.
Turn a tenon for mounting the blank in a 4-jaw chuck. Match the tenon diameter and shape to the dovetail profile of your chuck jaws.
Turn the Jack-O’-Lantern to Shape
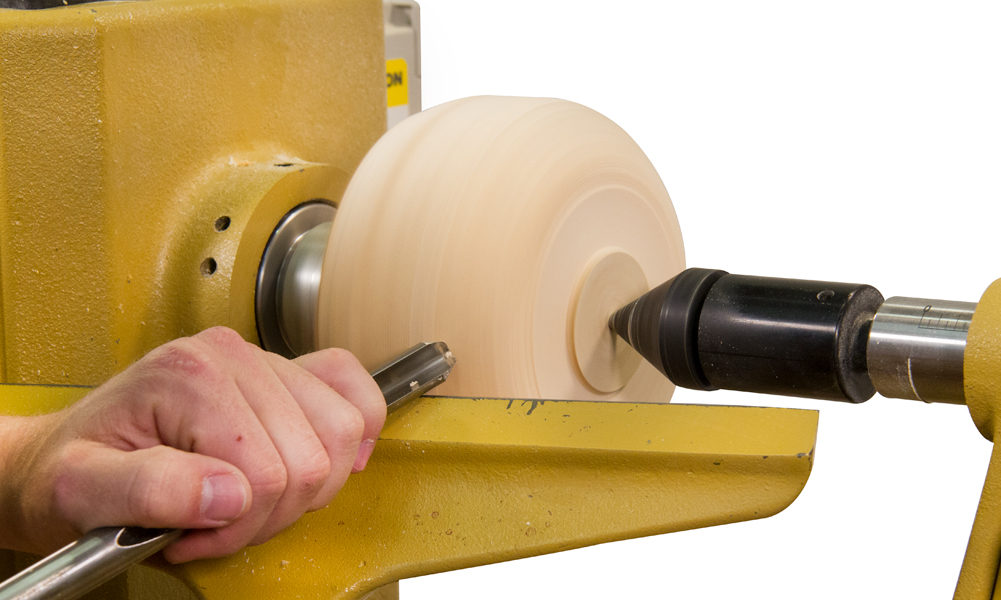
Mount the blank in the chuck gripping the tenon using a tailstock revolving center for support. Use a bowl gouge and begin to turn the blank to your desired pumpkin shape. (Make sure to “ride” the bevel to reduce the likelihood of torn grain.) If you have any torn grain, lightly use a scraper or shear scraper to help remove it.
Using a drill chuck with a 1-5/8” Forstner bit in the tailstock, drill a hole 1” deep. To fit the tea light in the drilled hole, use a square end scraper and expand the hole to 1-7/8” diameter. Sand the pumpkin through 320 grit, followed by steel wool.
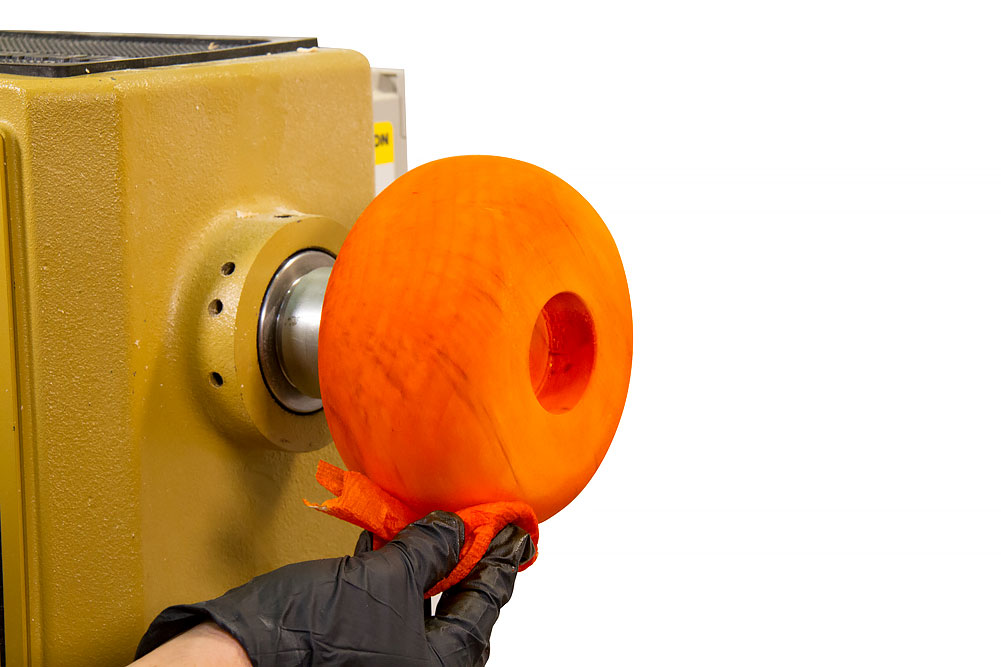
Add Some Color
To prepare the wood surface for dyeing, we need to apply a sanding sealer. You can apply sanding sealer using a brush or rag with the lathe off. Once the sanding sealer has dried, turn the lathe on and cut it back using steel wool. Now you’re project is ready for dyeing.
We’re going to use Artisan dye because it is an alcohol based dye that can be easily mixed to create custom colors. Test the orange dye on a piece of scrap wood to see if you need to lighten or darken the orange before coloring your pumpkin. Once you have the perfect color, dye the pumpkin using a rag with the lathe off. Apply as much dye as necessary for a consistent, even color.
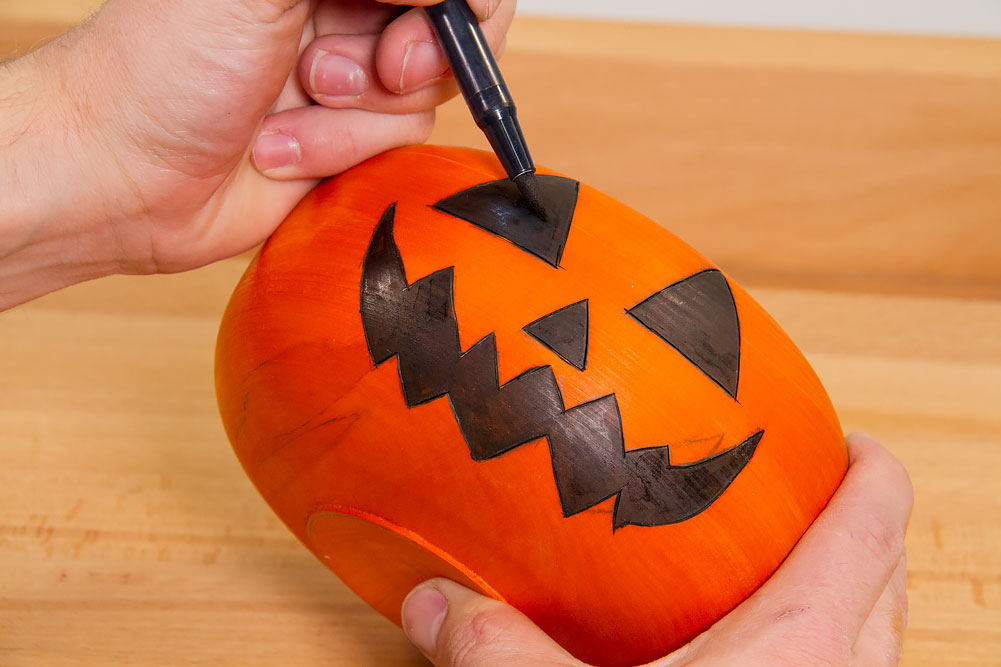
To color the face of the Jack-O’-Lantern use a black Tombow marker. We recommend applying a spray lacquer finish to seal the dye without smearing it. Apply several light coats. Complete the Pumpkin tea light by gluing the glass tea light cup in the pumpkin using an epoxy or RTV silicone adhesive.

Now light the candle and enjoy your one-of-a-kind Halloween decoration for years to come!
Supplies Used:
We no longer carry tea light candle holders, but they can be purchased at many local stores or other online retailers.
Thank you for the really cool project well be turning a few of these.
How can I print a copy of the JackOLantern project description? Thanks.
Click print in your browser.
As a safer alternative to an open candle flame, I use a battery powered votive candle with a flicker flame.
Thank you, this looks like a great project and I can’t wait turn out several jack – o – lanterns.
Fast, Fun and Kool!
Why didn’t I think of that?
Thanks.