
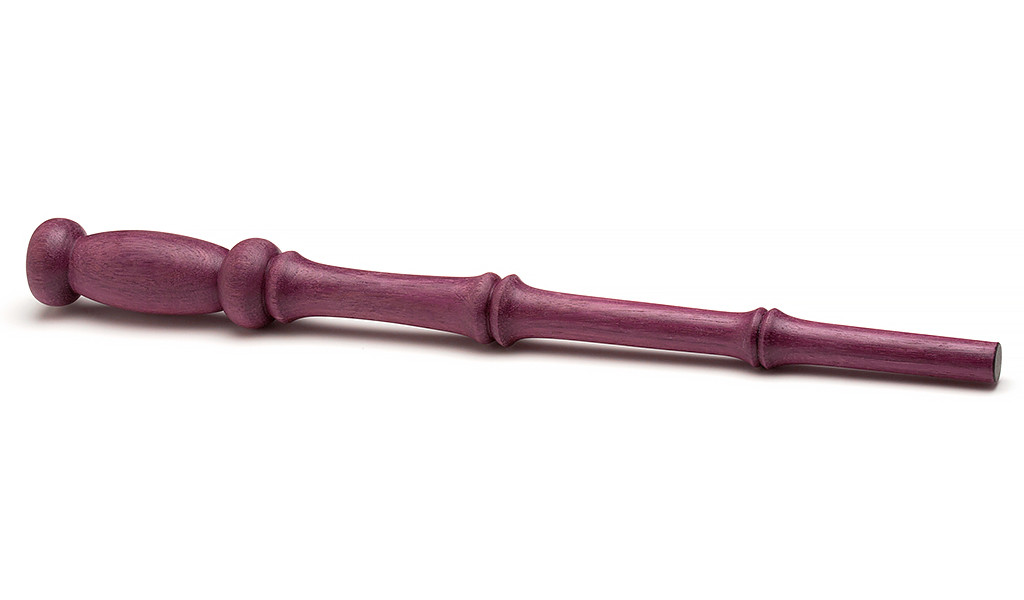
Turning a Magic Wand is a fun and easy project that anyone can make and is perfect for kids of all ages. Turn a simple tapered wand or get creative with shapes, colors and textures to make any wizard jealous. This is a very simple project that is great for spindle turning practice.
Blank Preparation
Select a blank 1″ x 1″ x 12″. Mark the center on each end using a Center Finder. Mount the blank between centers using a Revolving Center and Drive Center.
Turning Tip: If you are planning on coloring the magic wand, use a light colored wood such as; Holly, Ash, or Maple.
Turning the Wand
Turn the blank to round using a roughing gouge. Turn the blank to your desired shape using a spindle gouge. Leave a 1/4” of waste material on each end of the blank to trim off later. Sand the wand through at least 320 Grit.
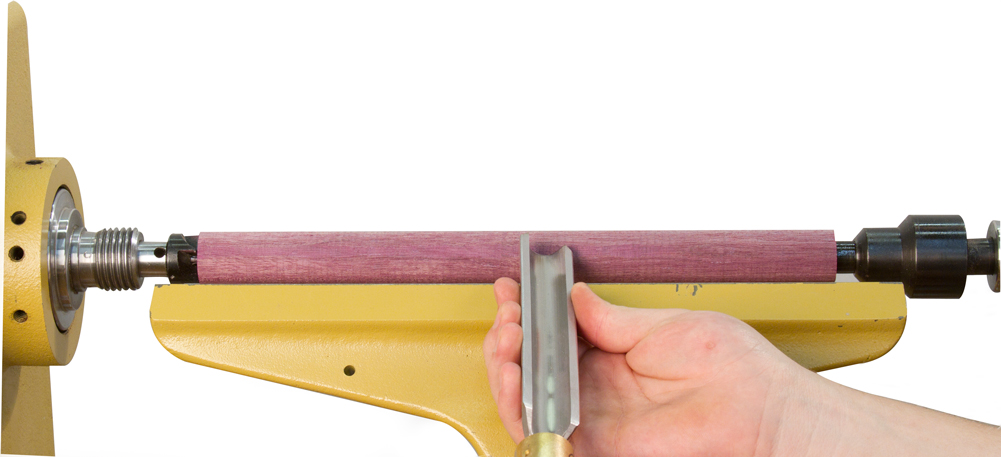
If you’re having difficulty with the spindle gouge, use a skew flat on its side or an Easy Wood Tool. This will be easier to control and allow you to focus on the shape of your wand.
Decorative Techniques
The techniques below can be used to add a little wizard flare to your magic wand.
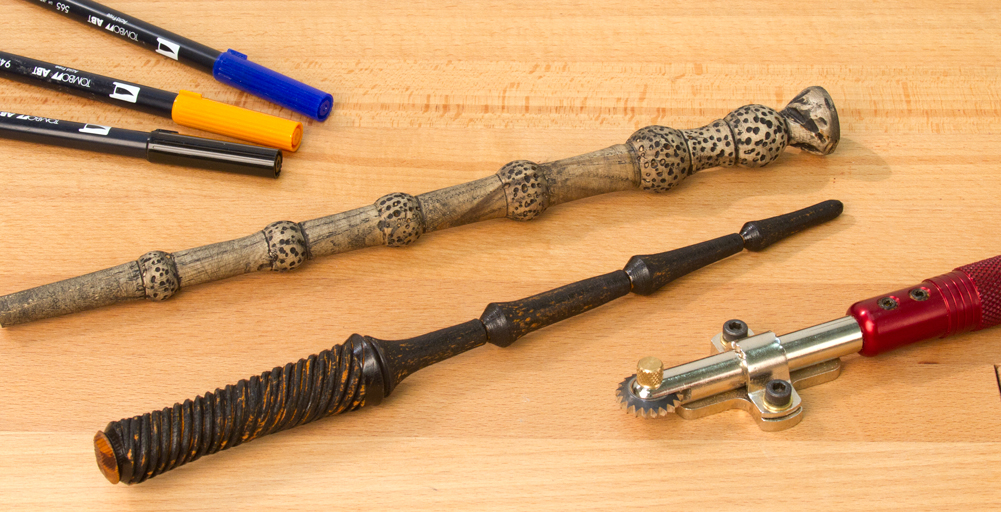
Textured Finish- By using a texturing tool, you can produce a realistic textured or rope-like surface on the handle section as shown.
Coloring and Appearance- To create an old or weathered look to the wand, use a combination of Liberon White Liming and/or Black Patinating Wax. Shoe polish or similar materials can also be used. Use a wire brush to rough the surface for a worn look. To create bright colors, we recommend using Tombow Markers.
Finishing the Wand
We recommend finishing the blank using with friction polish or spray lacquer. Remove the blank from the lathe and use a handsaw to remove the 1/4” waste material from each end of the wand. Sand and finish the exposed ends.
I recommend using a stabilized 3/4″ pen blank to turn the handle of a wand, with a 3/8″ hole (about 1/2″ deep) in the top to insert the wand shaft. Then turn the shaft (8-11 inches long) and make the 3/8″ tenon for insertion into the handle. Epoxy the two pieces together and then sand (or turn) the joint smooth, if desired. I like to use a fancy stabilized burl for the handle and a complimentary straight-grain wood for the shaft, for example bird’s eye burl with hard maple, or claro walnut with black walnut.
The common name of the rowan here is ‘mountain ash.” FYI: it is unrelated to the more common american ash trees. These are smaller trees (~40’ tall at the largest), with bunches of small brilliant orange fruit called rowan berries. other name is “lady of the mountain” since it sometimes prefers growing high up in low mountains.
Traditional wands are made of Rowan wood. Does anyone know of a source for Rowan wood?
You need to make provision for insertion of the ‘core’ which gives the wand its magical powers, i.e. phoenix feathers, dragon heartstrings, and unicorn tail hairs.
(;-}