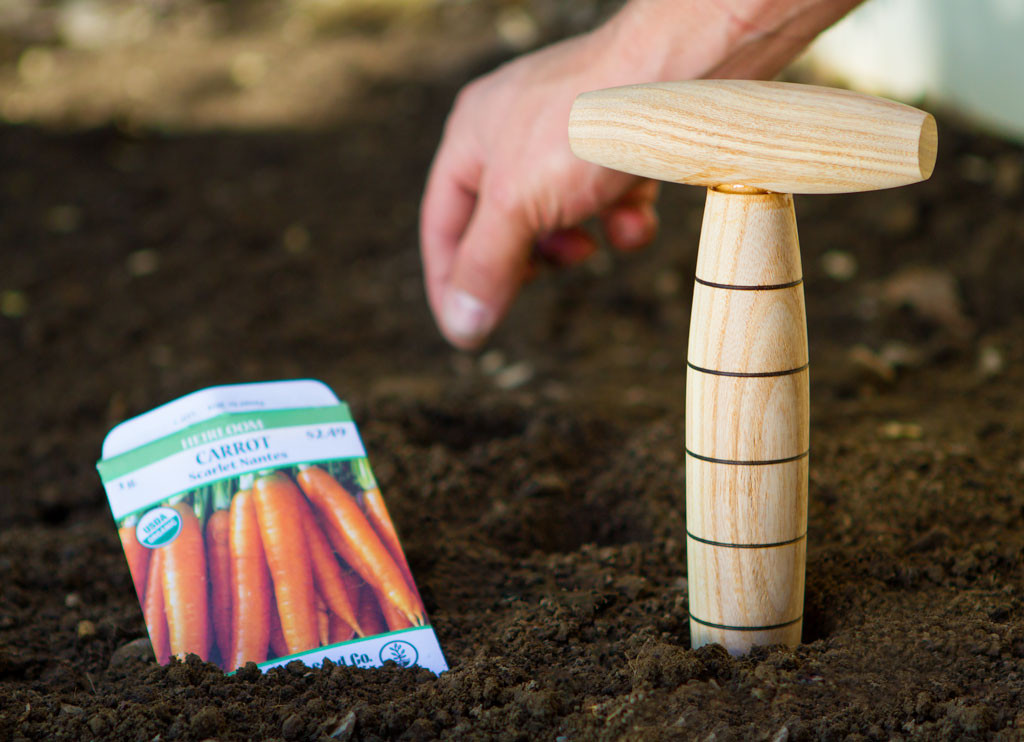
Whenever I turn, I tend to stick to functional projects that have a use like a salad bowl that will be used daily in my kitchen, or a small bat to hit balls for my dogs to fetch. A garden dibber is no exception. With 3 garden boxes and a lot of planters, I use mine quite frequently.
But right now you might be asking yourself, “what is a Garden Dibber?”. Garden Dibbers were designed to make planting bulbs, seeds, and small herbaceous plants easy, by creating the perfect diameter hole to the correct depth. Before using the dibber in your garden make sure the soil is well tilled as it will make using your garden dibber easier. Once you garden with one of these tools, you’ll never go back to planting seeds without one. In this article you’ll learn how to turn a few pieces of scrap wood into a functional gardening tool. Let’s get started!
Preparing the Wood Blanks
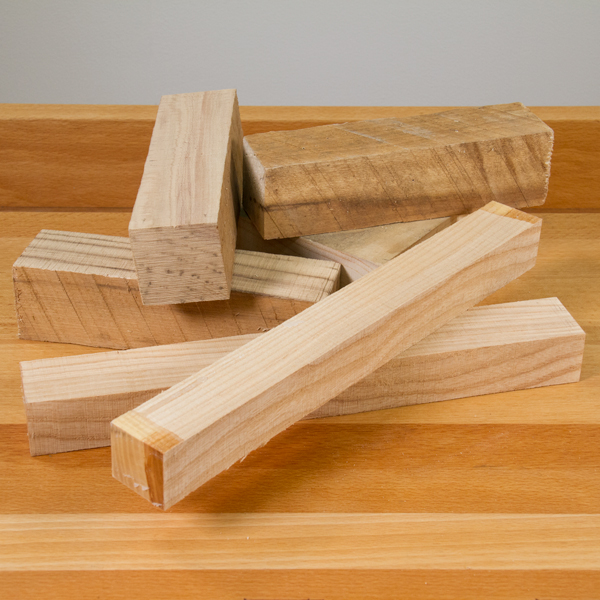
Before we start, we’ll need two blanks. One for the handle and the other for the dibber. Cut a 1-1/2″ x 1-1/2″ x 4″ blank for the handle. Cut a 1-1/2″ x 1-1/2″ x 10″ blank for the dibber. Try to use a hardwood like Ash, Maple, or Sycamore as these harder woods will be much more durable over time when they’re exposed to the elements. Go ahead and mark the centers on both ends of each blank and we’re ready to go.
Turning the Handle
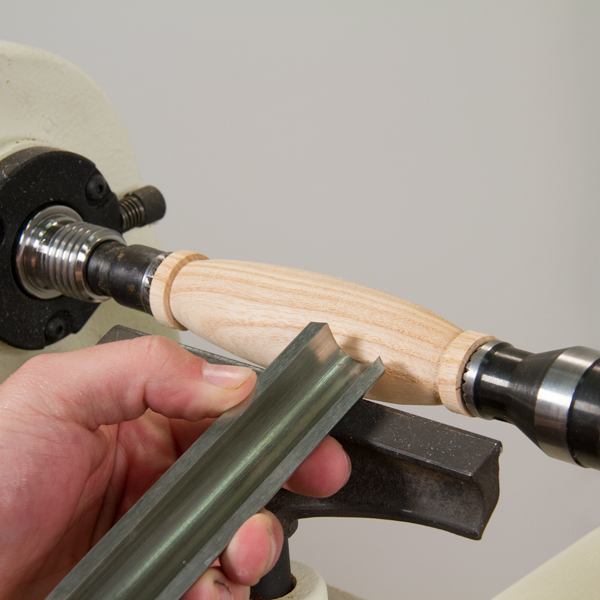
Our dibber design is going to be a T-handled variant, so let’s turn the handle section first. Mount the handle blank between centers. Rough the blank down to round using a 3/4″ spindle roughing gouge or similar tool. Once round, use a spindle gouge to finish turning the handle to shape making sure the handle provides a good grip and fits comfortably in your hand.

Stop the lathe and make a small mark on the center of the blank. Lock the lathe spindle so the blank cannot rotate and drill a 3/4″ dia. hole 3/4″ deep into the handle. Make sure you drill the hole 90 degrees to the center of the handle so the dibber body doesn’t sit crooked in the handle. This is for the dibber tenon to mount into. When the mounting hole is drilled, unlock the spindle and finish turning the handle to shape. Sand the blank through 320 grit. Take the blank off the lathe and sand and finish the ends of the handle.
Turning the Dibber
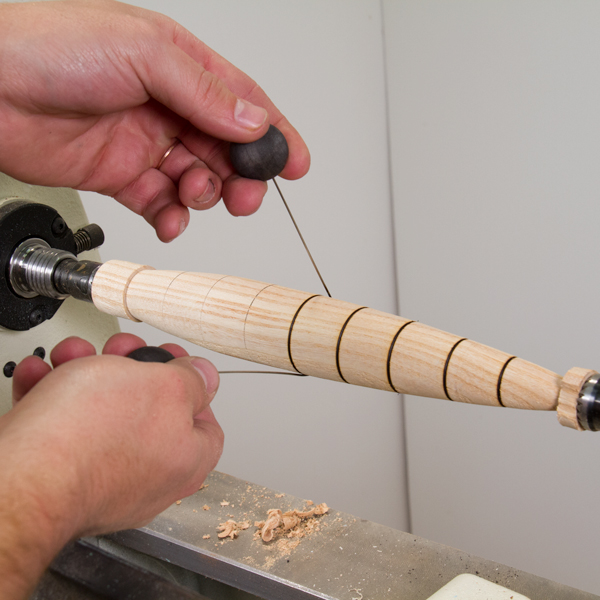
Now that we have our handle turned, it’s time to turn the dibber. Mount the dibber blank between centers and rough the blank down to 1-1/4″ round using a 3/4” spindle roughing gouge or similar tool. Finish shaping the blank with a taper on each end.
If you’re not sure what shape to make your dibber, check the internet as there are lots of different styles of dibbers to see. Once you have decided on what shape to make your dibber, turn a 3/4″ long by 3/4″ round tenon to fit into the handle. Use a caliper and check for fit often to make sure the tenon will fit snug into the handle. Once you’ve got the tenon sized to fit the handle, you’re ready to turn the rest of the dibber. A decorative but very useful touch is to create depth indicating lines on the dibber every inch for precise seed planting. I’ll mark the dibber every inch up to 8 inches. To do this, make a pencil mark every inch along the dibber. Using the point of a skew chisel laying flat on it’s side, cut a small vee-groove on each pencil mark. For an added decorative touch, burn lines into the grooves of the dibber using a KC wire burner. Be careful when burning the grooves as the wire gets very hot! Sand the dibber through 320 grit. Remove the dibber and sand each end.
Assembling the Dibber
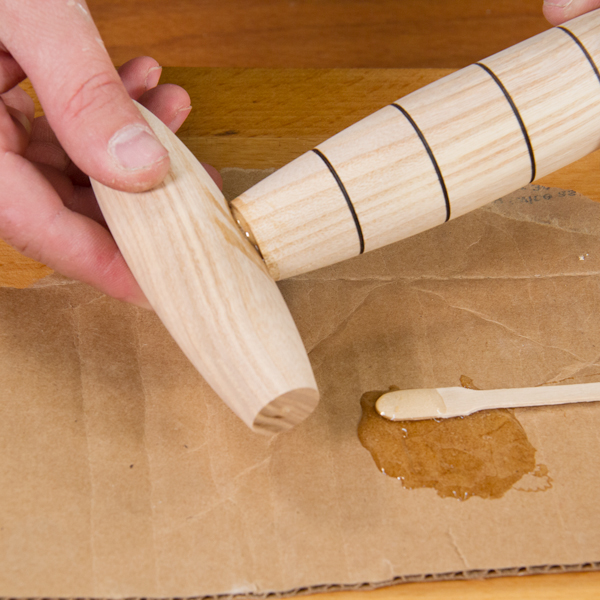
Use a high quality 2-part epoxy to glue the dibbler together. I don’t recommend using CA glue because it will become brittle due to exposure to the elements and may come apart. Apply the glue to the tenon and press together. Wipe away any excess glue. Once the epoxy is completely hardened we recommend finishing this garden tool with a coat of walnut oil to prevent the wood from cracking during use. Also, make sure to re-oil your dibber occasionally.
Using a Garden Dibber
Garden Dibbers were designed to make planting bulbs, seeds, and small herbaceous plants easy, by creating the perfect diameter hole to the correct depth. Before using the dibber in your garden make sure the soil is well tilled as it will make using your garden dibber easier. Simply press the dibber into the soil while twisting it back and forth until the dibber is at the desired depth. Now you’re ready to plant your bulb or seed!
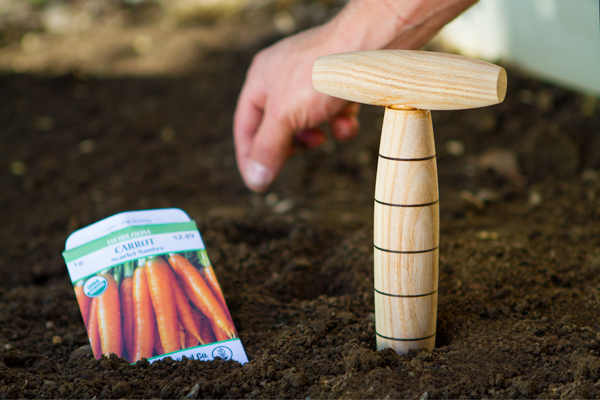
We’ve finished our Garden Dibber! If all went according to plan you should have a useful gardening tool ready for the planting season! Leave any comments or suggestions you might have in the comment section below, we’d love to hear them!

Just getting back into turning after several years away. This was a nice easy project. I made one out of Madrone with a polyurethane finish. I have some metal number stamps so I marked each line with its equivalent number.
Since you’re working to make a tool that will be going into the wet soil; 3 small suggestions: 1) apply several coats of a finish that can take if the soil is wet or damp 2) consider using a material that will not support fungus or rot if it gets damp & dirty, like locust or Osage orange. 3) Consider drilling ~ 1″ deep into the pointed end, and reinforcing that point with a small nail or brad, also epoxied into the drilled hole. That way, if you hit a buried rock when making the hole, the tip will not be immediately ruined.
It looks like a very nice project to make, the only thing I’m going to do is drill a hole at one end of the handle to put a leather shoelace in it to hang it up. Or on your garden cart.
The mortise hole should be drilled on the drill press before turning, which will assure that it is centered and square to the turned handle.
That is a good alternative to drilling on the lathe.