

Duck calls and pepper mills are two of the most popular woodturning projects today. So naturally, we thought combining them both into a single project would make a great project that’s unique, challenging and fun to use too.
There are a couple of challenges inherent to turning a duck call pepper mill. Making a pepper mill requires a fair amount of skill and patience alone. Add the challenge of creating the proper shape and scale that makes the finished product look like a real duck call and you have a project that’s challenging and very rewarding too!
Helpful Diagrams
First of all, be sure to print out all of the diagrams below before you start turning this project. These diagrams will help you get the critical dimensions right and show you a classic duck call shape that we like to turn. If you have any questions while you’re turning this project give us a call at 1-800-551-8876 and we’ll be glad to help.
Preparing the Blank
To get started, select a 4″ x 4″ x 12″ piece of wood that is free of voids and knots. We recommend using plain maple, ash or similar material if you’re going to paint it after it’s turned. If you prefer the look of natural wood, you may want to use figured wood instead.
Let’s get started…
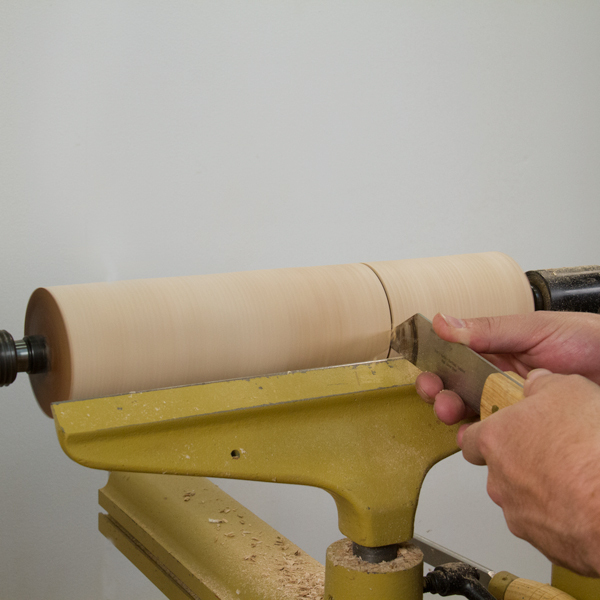
Mark the center on both ends of the blank then mount it between centers on your lathe. Rough the blank down to round. Once the blank is round, mark a pencil line 4″ in from the left end of the blank. Using a narrow parting tool, make a 1/2″ deep part on the line. This line is where we’ll separate the mill head from the mill body.
Now, turn a tenon on each end of the blank along with a tenon on each side of the part you just made. The dimension of these tenons is critical so be sure to refer to the Tenon Diagram for the correct sizing.
Using a narrow parting tool, carefully part the blank in two. If you prefer not to cut all the way through with the lathe running, you can make the parting cut as deep as you are comfortable with then turn off the lathe and cut through the remaining material using a hand saw.
Drilling the Mill Head
Before we do any drilling, it’s important to make sure our forstner bits are sharp. If they are dull, hone the bit using a diamond hone or similar until the bit is sharp.
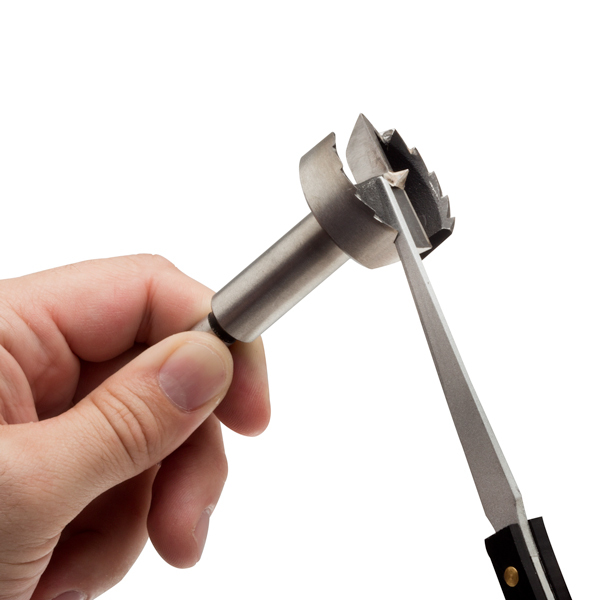
Also, it’s important to use a food safe lubricant such as mineral oil, beeswax or even water while you’re drilling. This will help reduce heat and help the bit cut more efficiently. Now, we are ready to move on to drill the mill head and mill body.
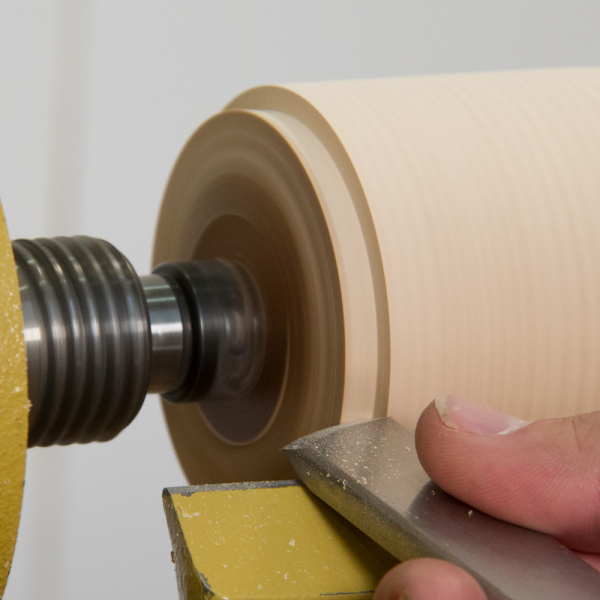
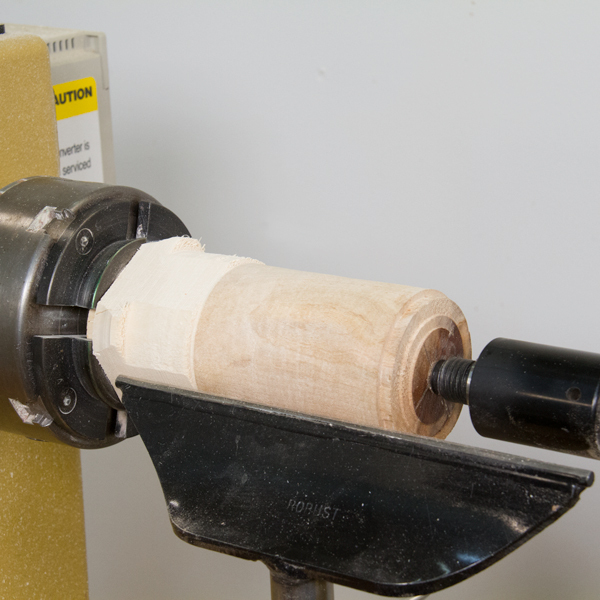
Mount the mill head blank in a chuck gripping one of the tenons we turned earlier. Before you fully tighten the chuck jaws, rotate the handwheel and lightly tap the blank as needed until it runs true then tighten. Before drilling the blank, we need to clean up and true the end of the blank. Turn a slightly concave surface near the center so the bit will drill straight.
Before you begin drilling…
Hole dimensions (both size and depth) are critical to the proper fit and function of a pepper mill. Take your time, double check dimensions and don’t be in a rush when drilling. We recommend marking desired hole depth on the shaft of the drill bit with masking tape so you know when to stop.
Drilling the Mill Body
At first glance, drilling the mill body might look complex or even overwhelming. Don’t worry, it isn’t as difficult as it may appear. Take each step one at a time and it will turn out just fine. Be sure to double check sizes with the diagram as you go.
Mount the mill body blank in a chuck gripping the tenon we turned earlier. Make sure that the blank runs true before tightening jaws.
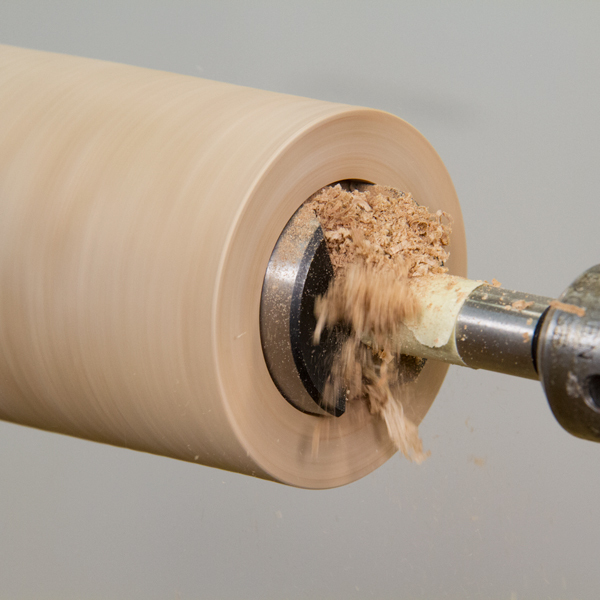
The first step in drilling the mill body is to drill the a hole 5/8″ deep using a 1-3/4″ bit. The next step is to drill a 1-1/2″ deep hole using a 1-9/16″ bit. Use a lubricant on the bit and clear the chips frequently as you drill. Finally, drill the last hole completely through the blank using a 1-1/16″ bit. You will probably need to use a bit extender so that the bit can reach all the way through the blank. Mark the drill bit shank with masking tape so that you know when you’re close to reaching the end of the blank. Once you see the bit start coming through the end of the blank, slow down and be careful not to hit the chuck jaws. If all went well, your mill body blank should look like that shown in the drilling diagram. Now, let’s move on to turning the mill to shape.
Turning the Mill Head
Before we turn the mill head, we’ll need to make a simple jam chuck with a tenon for the mill head to mount onto for turning. To make a jam chuck, mount a piece of scrap wood (2” or thicker) in a chuck or on a faceplate. Turn a 1-1/4″ long tenon that fits snugly into the drilled hole in the mill head.
If the fit is loose, wrap some masking tape around the tenon as needed until the mill head fits tightly on the jam chuck.
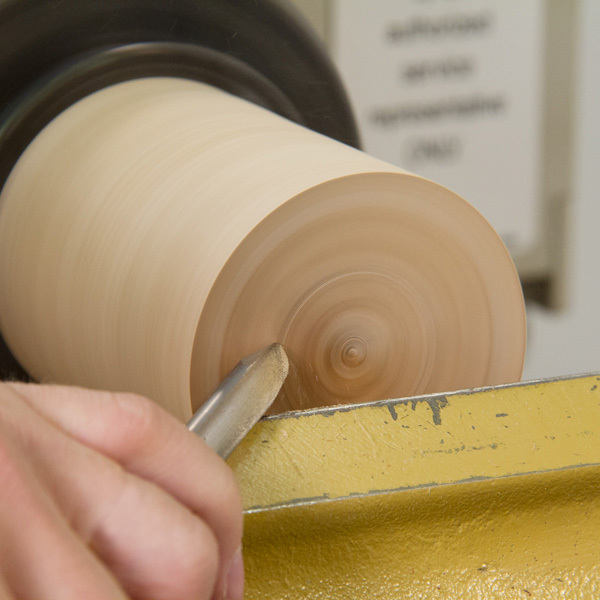
Turn the mill head to the dimensions shown on the duck call shape diagram. If you rather, you can turn your own design instead. Be sure to use the tailstock for added support whenever you can.
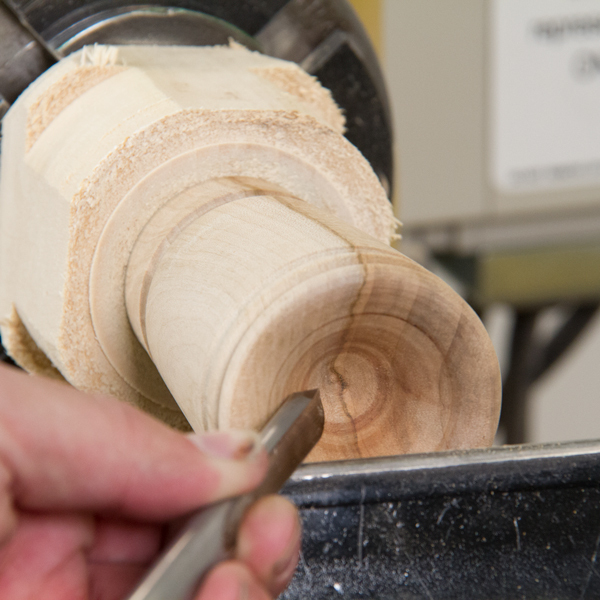
Once the mill head is turned to shape, remove the tail stock. Flare the tailstock end of the mill head to mimic a duck call stopper, this will add a sense of realism to the finished product.
Sand the mill head through 400 grit. If you are not going to paint your mill head, go ahead and finish it with your choice of finish.
Turning the Mill Body
Just like the mill head, we need to make a jam chuck with a tenon for the mill body to mount onto. Select a piece of scrap wood large enough to make a 1-3/4″ dia. tenon. Once the jam chuck with tenon is made, mount the mill body and position the tailstock against the mill body.
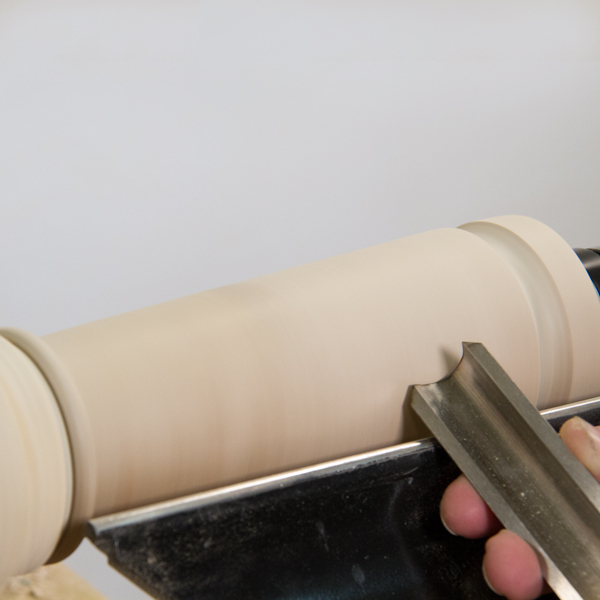
Turn the mill body to the dimensions shown on the duck call shape diagram or to your own design if you like. Make sure to check the mill body’s dimensions often so you don’t turn through the blank. I have done it before and it was a real surprise and disappointment after so much work! Once the mill body is turned to the correct dimensions, sand it through 400 grit. If you are not going to paint your mill body, go ahead and finish it with you choice of finish.
(Optional) Painting the Mill Body and Mill Head
Painting the wood will give the finished duck call pepper mill an authentic look that will really tie this project together. I prefer to use different, yet complimentary colors on the head and body. When painting and/or decorating the head and body, you can keep it simple or get as complicated as you wish.
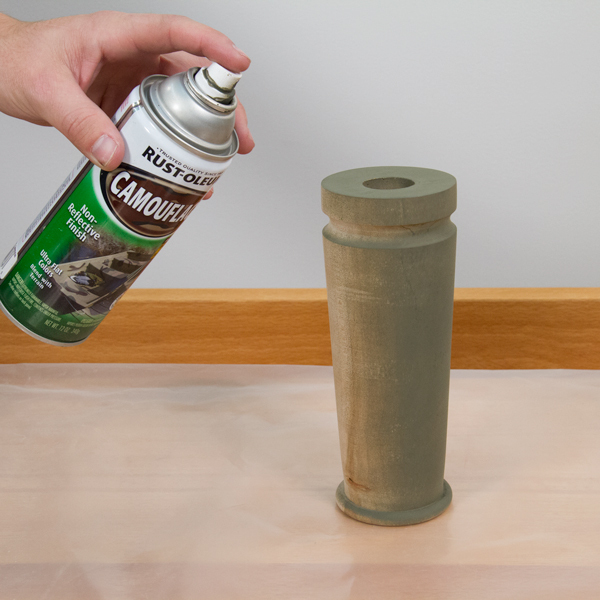
For this mill, we’ll use a matte black spray paint found in any hardware store and completely paint the mill head. Make sure to apply multiple light coats when painting. If you apply too much paint at one time, it will result in runs and drips which look terrible. When painted, place the mill head out in the sun to cure the paint.
Now let’s paint the mill body using a matte forest green paint. Just like the mill head use multiple light coats until the wood doesn’t show through the paint. Place the mill body in the sun to cure. (Optional) If you like, you can distress the paint to add an aged appearance by sanding areas that would be worn away from use on a real duck call. Once the mill body and head are dry, you can use a matte spray lacquer as a top coat to protect the paint and make it more durable.
Assembling the Mill
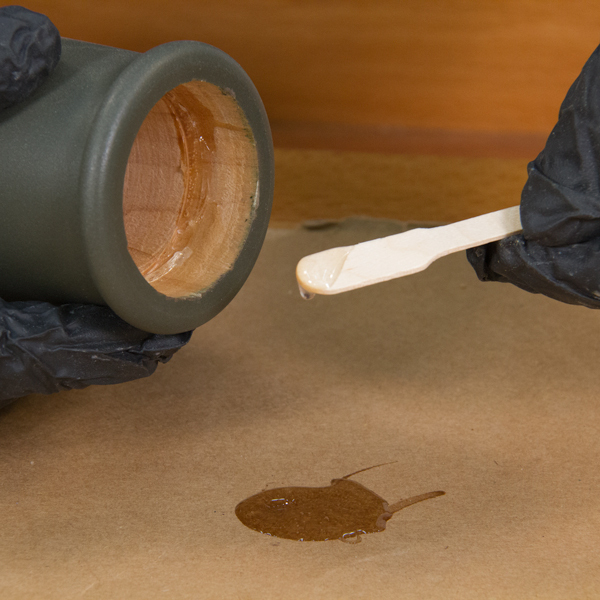
When you glue the parts into the mill, we recommend using a high quality epoxy that will hold up over time. Lightly coat the inside wall of the hole in the mill head with epoxy. Press the stopper into the hole and set it aside until the epoxy cures. Lightly coat the inside wall of the 1-9/16″ hole in the mill body with epoxy. Press the Crush Grind® mechanism into the hole and set it aside until the epoxy cures. Make sure that the epoxy does not interfere with any moving parts.
Final Assembly
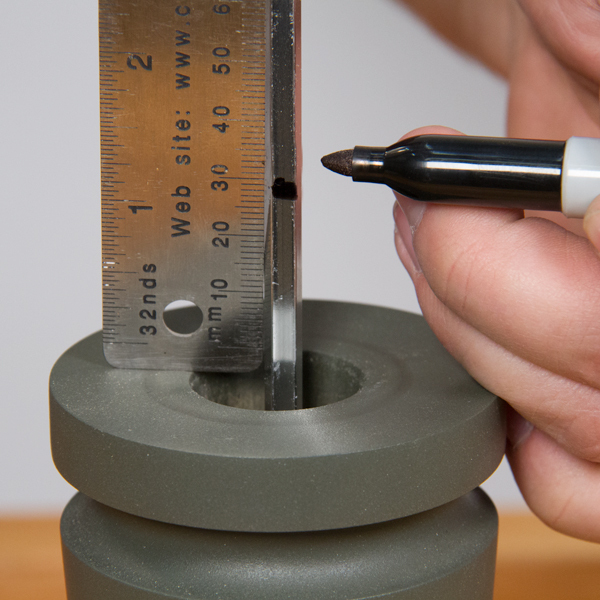
Once all the parts are glued in place and the epoxy has cured, we are ready to begin final assembly. The first step is to cut the hex shaft to the correct length. Insert the mill shaft into the mill body and mark the shaft to length so that at 1-1/8” extends beyond the mill body. With a hacksaw, carefully cut the hex shaft to length being careful not to bend it.
Slide the mill head onto the hex shaft and push the mill body and head together until they touch.
Your Duck Call Pepper Mill is now complete!

Hopefully you had fun turning a duck call pepper mill. Try turning a few more with different shapes and find out which one you like best. Leave any comments or suggestions you might have in the comment section below, we’d love to hear them!
Hi I am having a problem trying to understand the top of this duck call, all my mechanisms have threads and a nob, now if cut that off all do u keep the top on, and if u glue it all in how do you open to refill it, please explain this, and is there a special pepper mechanism for this duck call. Thank- you. Jimmy
This duck call peppermill requires that you use a Crush Grind mechanism. Here is a link to the mechanism: http://www.woodturnerscatalog.com/p/53/1264/CrushGrind-Mill-Mechanism
I may be dense, but how does the mill shaft turn? The hole in the Mill Head, according to the Drilling Diagram, is 15/16″. The mill shaft is about 1/8″ in diameter. What does the mill shaft grab onto to activate the grind mechanism?
Thanks in advance.
The rod slides into the stopper which is glued into the mill head during assembly.
great idea! very creative
Thanks for the diagram finally a fresh shape to make. Been looking for some thing new for ages.