
As woodturners, we tend to hold on to every last scrap of wood in the shop. Often times, we find a beautiful piece of wood that is just too soft or punky to turn. These are the pieces we reluctantly throw away since they can’t be used. Or can they? We’ve all seen commercially stabilized blanks for sale, but now there are products available to stabilize your own blanks at home, and it’s easier than you might think. And with a range of dyes and scents to choose from, you can enhance the wood in ways you never thought possible. Let’s get started.
What is wood stabilizing?
The basic principle of wood stabilizing is to take a piece of soft or punky wood and inject it with resin to create a stable, hardened wood blank that is safe to turn. The resin displaces air pockets throughout the grain structure, creating a dense blank that is nearly impervious to moisture changes and can be polished to a high gloss.
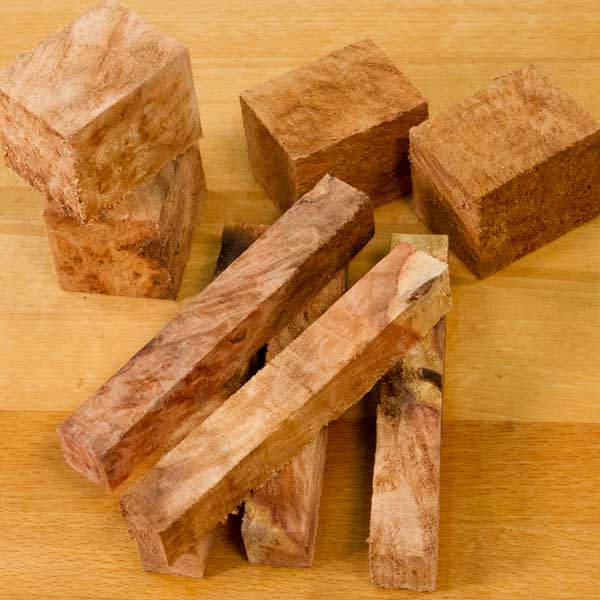
Preparing the wood blanks
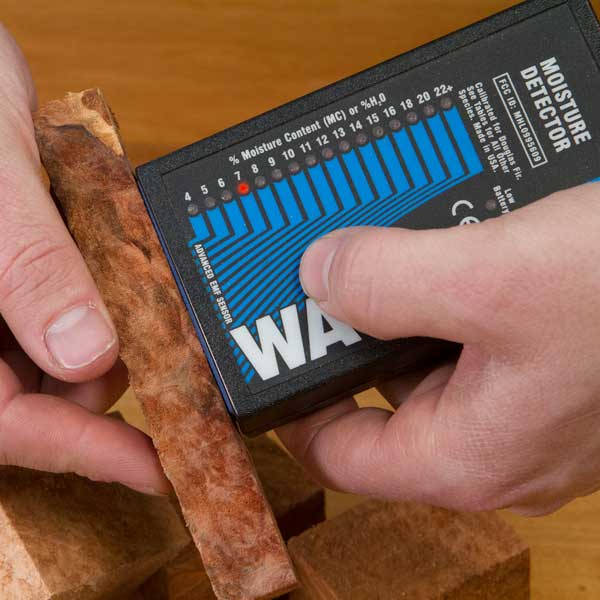
The first step in stabilizing a wood blank is to make sure the blank is dry. A wet blank cannot be stabilized. Use a moisture meter to verify that the moisture content of the wood is below 10%. To speed up the drying process, rough cut your blank slightly oversize and place it on a drying rack to allow airflow on all sides. You can also dry blanks in a kiln or oven. Give it time, drying too fast will cause the blank to crack.
Custom Blanks (Optional)
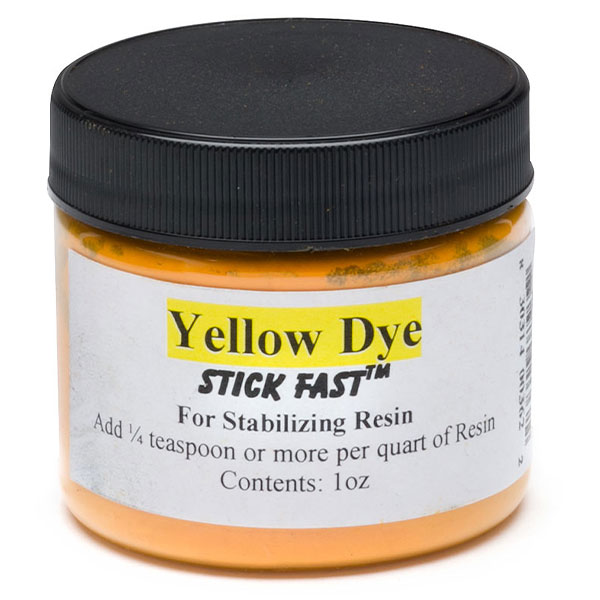
One of our favorite things about stabilizing is the ability to dye wood blanks. It’s easy, and the options are endless. Using Stick Fast coloring dye, mix the color and resin at a ratio of ¼ tablespoon of coloring dye per 1 quart of resin. Mix thoroughly. Add more dye for a more vivid color.
Get ready to stabilize
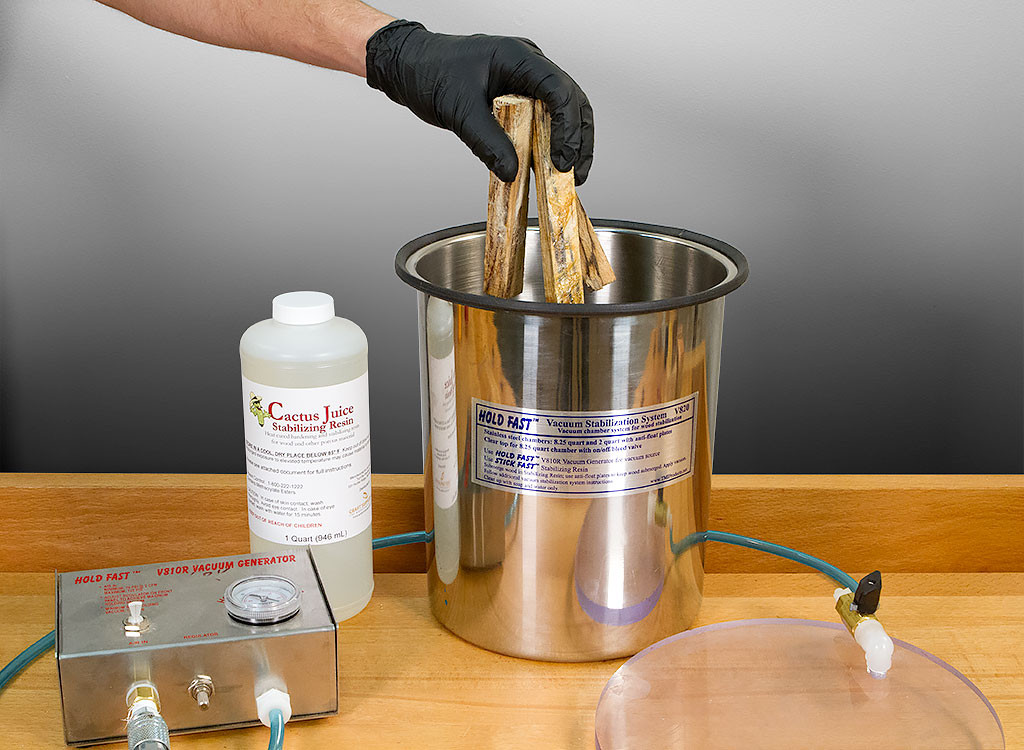
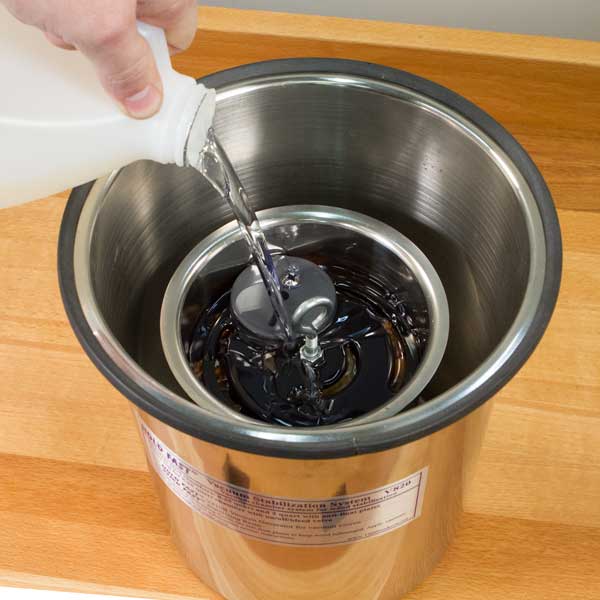
Now that the blanks are nice and dry it’s time to stabilize. In this article we will be using the Holdfast Vacuum Stabilization Chamber Kit. This kit includes a stainless steel pot, inner chamber, anti-float plate, and vacuum generator. For this example, we’ll be leaving the wood natural.
Place the inner chamber inside the stainless steel pot. Place the wood blanks into the inner chamber and use the anti-float plate to keep the blanks submerged during stabilization. Fill the inner chamber with enough resin to completely submerge the blanks with 1” of resin on top of the blanks. Don’t worry, we can re-use the resin again and again.
Seal the chamber and attach the vacuum lines. Turn the vacuum generator on at the lowest setting and slowly increase the power to full. This prevents the resin from foaming too quickly and making a big mess. Depending on the thickness and type of blank, the vacuum should be run from 30 minutes to an hour. Initially the resin will foam due to air being pulled from the blanks. Continue the vacuum until you see very few air bubbles exiting the blank. Tapping or gently shaking the chamber helps release air more quickly from the blank.
Once the bubbling is minimal or has stopped, turn off the vacuum generator and carefully remove the lid. You may notice that not much resin seems to have been vacuumed into the wood. This is because the wood does not soak up much resin when under vacuum, it soaks up the resin when the atmospheric pressure is allowed back into the chamber. Leave the blanks to soak in the resin for a half hour or so. After soaking, remove the anti-float plate and check that the blanks do not float. If they float, repeat the vacuum and soaking process. Once the blanks no longer float, remove the blanks from the chamber and wipe off the excess resin. Pour the leftover resin into a jar for re-use. Clean the chamber pot with soap and water before the resin begins to gum up. Trust us, it’s worth the effort now.

Curing the blanks
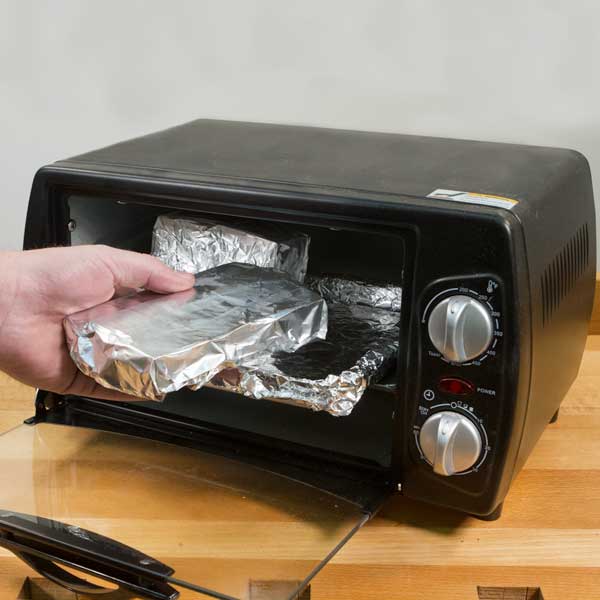
Now that our blanks are full of resin, it’s time to cure the resin. Wrap each blank individually in aluminum foil. Place the wrapped blanks into an oven pre-heated to 200 degrees F. We highly recommend using an inexpensive toaster oven rather than your kitchen oven. Your family will thank you! Use an oven thermometer to make sure the temperature is accurate, too little or too much heat will ruin the curing process.
Pen blank size pieces should be baked for 30 minutes to an hour. Larger pieces will require more time. Check the blanks after 30 minutes to see if the resin has cured. Cured resin will be hard and look crystallized. If the resin is still wet, put the blanks back into the oven until the resin is completely cured.
Now that the resin is cured, let the blanks rest for 24 to 48 hours before turning. Take care when turning your stabilized blank, the resin makes the blank more brittle and it should be turned like an acrylic blank.
In this article you learned how to properly stabilize your own soft and punky wood blanks like the pros! We used the following items to stabilize our blanks:
Supplies Used:
- Holdfast Vacuum Stabilization Chamber Kit
- Stabilizing Resin – Stick Fast or Cactus Juice
- Coloring Dye for Stabilizing Resin
- Safety equipment – Nitrile Gloves, Eye Protection
- Air Compressor
- Oven (capable of 200 degrees F)
If you have any questions about stabilizing wood blanks, please call our technical support team at 1-800-551-8876.
I have some Bermuda Oak, it’s around 80 years old, should I use it?
I neglected to mention the wood is a 1.5″ x 1.5″ x 6″ spalted Tamarind so you’d think it would be soft enough to turn.
I have some 40 year old walnut burl I want to make knife & chisel handles with. Can you reccomend what material I should use?
I have a few pieces of big leaf maple burl with bark on them. Would like to try and keep some of the bark when I turn these into pen blanks. Should I try to stabilize the wood, and then resin-cast it to be able to keep that “plateau”? I’m just sorting out when stabilization is advisable, and when resin casting is right. Thanks!
Has anyone tried to stabilize mesquite?
Is it possible to use this method on a finished wooden product like a wooden bowl or dish?
Not, it is not. If it’s finished the stabilizing resin can’t penetrate through the finish. The stabilizing process will generally warp the wood so the bowl would need to be returned.
Will plastic infusion change the dimension of a wood piece cut to final size?
When a blank is infused with resin the blank may deform or warp, causing the size to change – but only slightly
Interesting. Stabilizing macadamia wood (janka 2,300) would have some benefits? Is it worth stabilizing that wood? Thank you
Yes, we’d recommend stabilizing macadamia wood as it will increase the hardness and moisture resistance of the wood
Hi!
Have you tried to stabilize cork oak bark?
Technically it should be possible, but we haven’t tried it.
Is cedar a good wood to stablize?
We haven’t tried it, but it should take the resin well enough – though it might crack during the curing. We’d definitely recommend testing it on a small piece first just in case!
Do you have any of the extra rubber rings for the medium (single container) hold fast system…mine is about to break and I don’t know where to get them. Its splitting at a seam.
We do! It is sold in 60″ segments that you can cut to fit. Here is the link: Hold Fast Vacuum Seal Cord
Hi, I was interested in getting into making stabilized hybrid wood blanks. Im totally new to this craft. I wanted to use alumilite with the wood I think those come looking pretty impressive. Does the wood have to be stabilized first before mixing it with the alumilite resin or does that resin stabilize the wood in itself? Thanks any info is super helpful.
We recommend stablilizing wood blanks before casting them with alumilite. If you don’t stabilize you will have issues with the wood moving and separating from the alumilite. Hope that helps!
Will it work on black palm wood because it’s is very very hard
Yes, it’ll work on Black Palm. Good luck!
I have some bigger bowl blanks that have several soft or rotting areas. Can this product be brushed on throughout the turning process?
No, the stabilizing resin is not suitable for bowl blanks. With soft or rotting wood we recommend using polycryl wood fortifier (applied days or weeks before turning) or Minwax wood hardener (can be applied while turning).
What are blanks? New to all this but interested in reinforcing wooden tree branches for artistic installations… Need the basics defined (sorry!)
Hey Marianne! Blanks are blocks of wood that are cut to a size appropriate for turning. Bowl blanks for bowls, pen blanks for pens, etc.
The term blank does not mean that they are seasoned or dry, just that they are of a species and size that would generally work for the project for which it is named.
Will this method stabilize snakewood?
Unfortunately, no. Snakewood is too dense to stabilize – the resin won’t make it into the fibers. And if you tried then the heating process (curing) would likely crack the snakewood.
Is there a commercial service available to stabilize wood? Don’t get me wrong; the instructions here are terrific and I get to buy really awesome stuff, but the amount of wood I have to stabilize is small.
Normally the commercial services only accept large batches of blanks – you’re best bet will be to try and find something like that locally. If you have smaller orders Arizona Silhouette might be the way to go, they do custom orders and you can send them your blanks for stabilization.
Great !
I’m looking to make stronger wooden rings. Would stabilizing either the ring blanks or even the initial piece of wood be a good idea?
Definitely! We strongly recommend stabilizing any soft wood that you are using for a ring core. It’ll turn easier and last far longer that way.
What woods need stabilizing and which dont? Does walnut?
Walnut is a hardwood and does not require stabilisation. Burls and pressed wood blanks do though.
Line the chamber with a small garbage bag to eliminate clean up.
It is very hard to find any cactus resin in my country, is there any alternative resin i can use?
We can ship Cactus Juice to most countries, if you contact our customer service team (livechat at the top of the page or call 1-800-551-8876) they can tell you for sure if we ship to your country.
As far as what is available in other countries it is hard to say for sure!
How negative pressure do you have to pull in order for the resin to be sucked into the blank? I’m working on my own chamber right now, but don’t know if I’m getting enough of a vacuum to do the job.
You need to pull between 23-27 inches of mercury, depending on your altitude. You will lose approximately one inch of Mercury for every 1,000 feet in elevation, here in Utah the max we can pull is roughly 24 inches.