
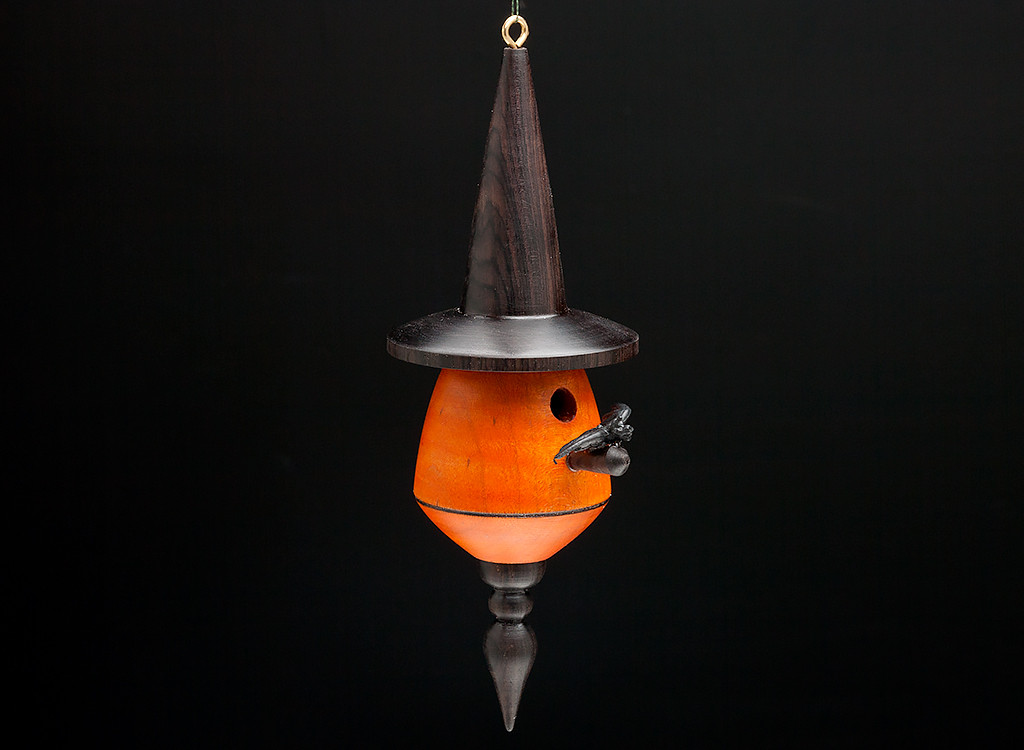
Turning a bat house ornament is a fun and unique intermediate project that’s sure to be enjoyed by all your spooky guests. Featuring a witch hat roof, pumpkin orange body, and black finial, this project will hone your small scale turning skills and let you experiment with coloring.
Before you begin, print the Bat House Diagram for reference.
Prepare the Blank
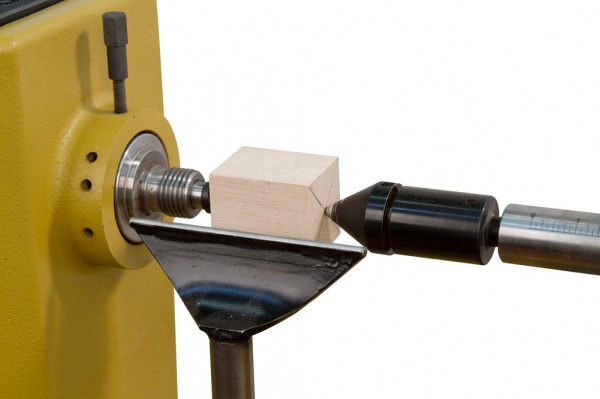
Select a hardwood for the body (choose a light colored wood if you plan to color the body). Mount the blank between centers and rough down until round.
Turn a dovetail tenon to fit into a 4-jaw chuck
Turn the Body
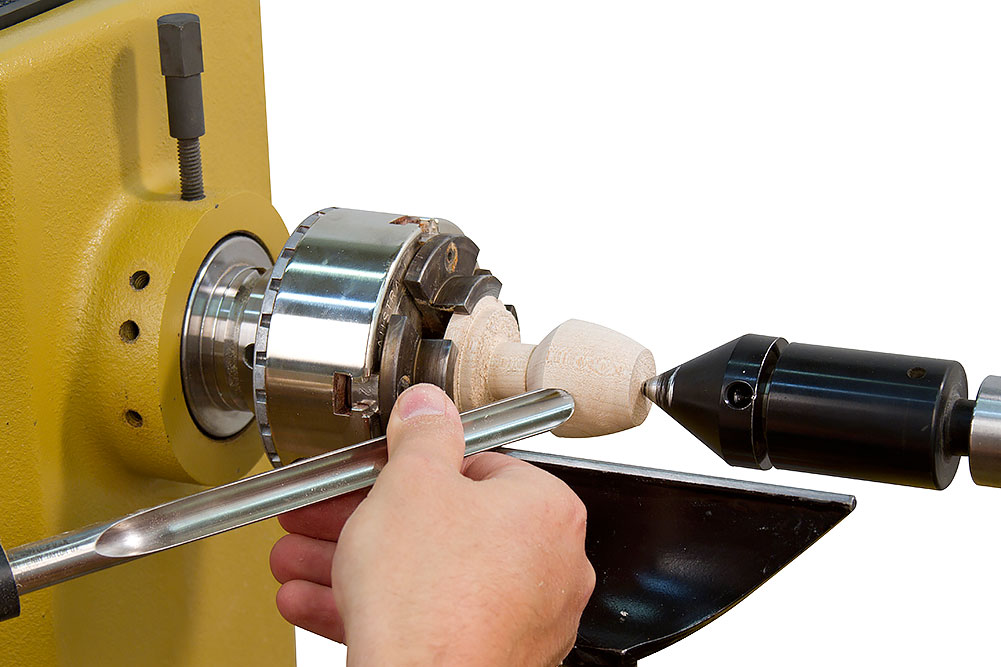
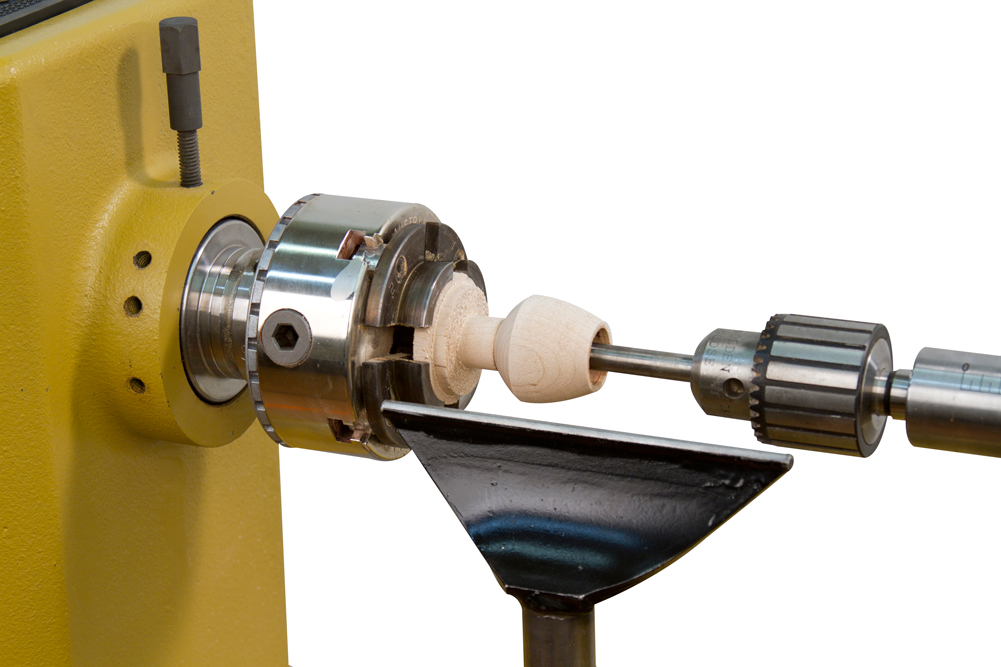
Mount the tenon into a 4-jaw chuck using a tailstock revolving center for support
Turn the birdhouse body to the desired shape (tailstock end is top of the ornament body) leaving enough material at the headstock end to support the blank while working.
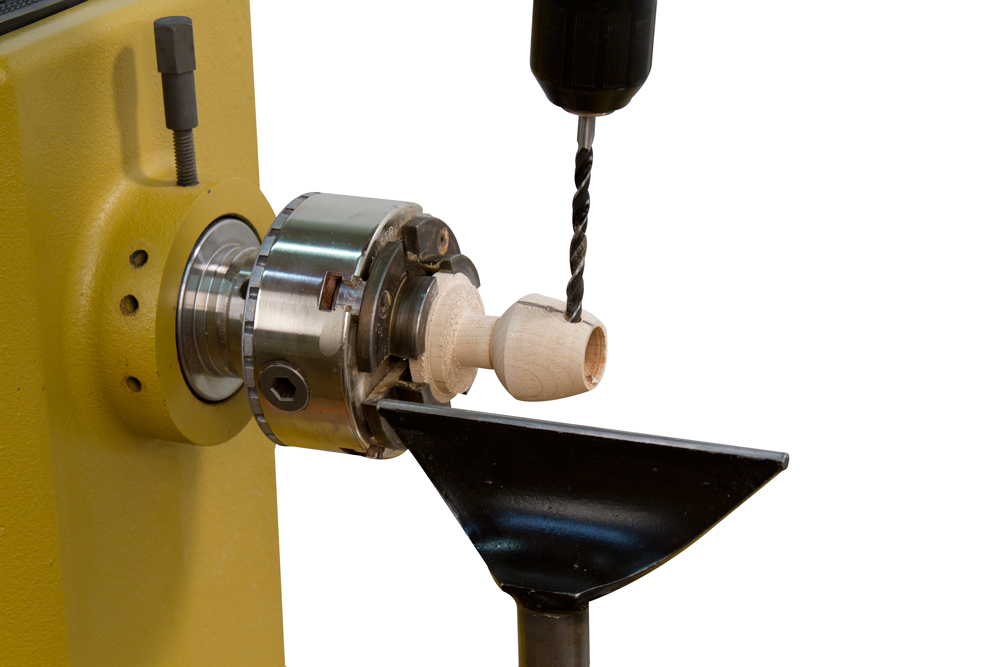
Using a Drill Chuck mounted in the tailstock, drill a 3/4″diameter hole 1” deep in the blank. This will leave 1/4” of wood in the base of the birdhouse body section.
Hint: wrap masking tape around the drill bit 1” from the end so you know when to stop drilling.
Layout the perch and entrance holes (see diagram) making sure holes are vertically aligned with one another. Mark the center of the hole locations using a Center Punch. Using a hand drill, carefully drill the entrance hole and perch holes (refer to diagram for sizes) at right angles to the axis of the ornament. Drill these holes about 1/4” deep. It’s ok if you drill through the wall.
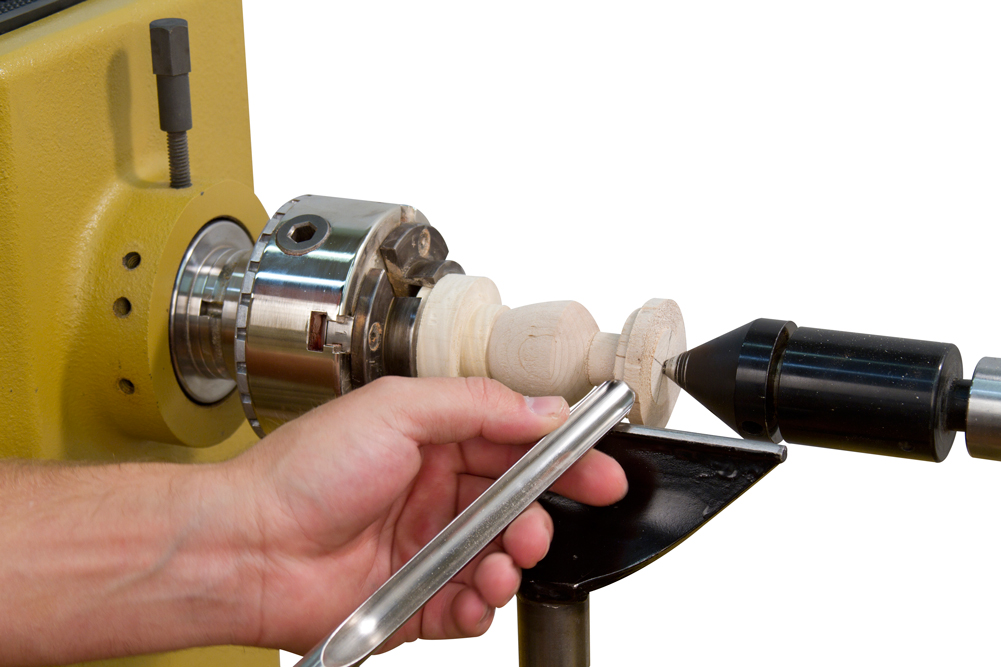
Remove the ornament body from the chuck. Mount a 1-1/2” diameter waste block in your chuck. Turn a tenon for the ornament body to press on to. Check for fit often to make sure the fit is snug but not too tight as it might split the ornament body. The waste block with tenon should have a shoulder for the top of the ornament body to register against. Mount the ornament body on the tenon supported by a tailstock revolving center. Turn the base of the ornament body.
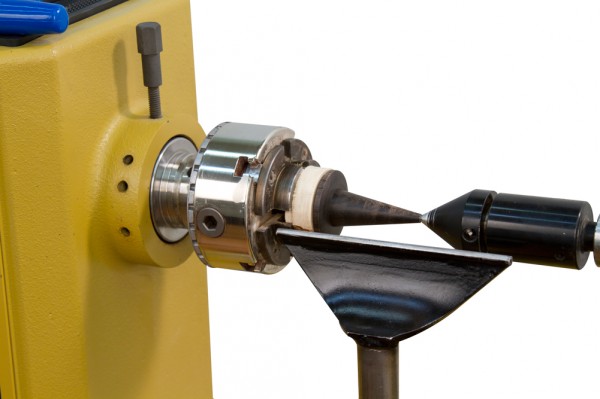
Using a drill chuck mounted in the tailstock, drill a 1/4” diameter hole through the base of the ornament body. Now sand the ornament body through at least 320 grit.
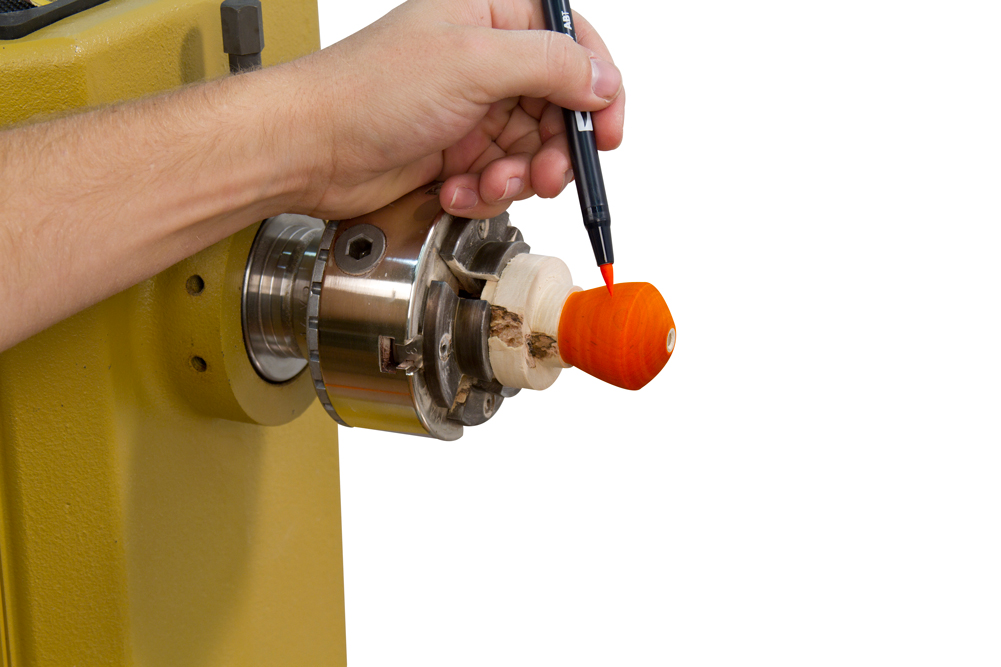
Color and Finish the Ornament Body
Color the ornament body using dyes or a Tombow marker as we did.
We recommend finishing the ornament body with spray lacquer the seal the dye without smearing it. Apply several light coats and allow to dry before handling.
Turn the Ornament Roof
Mount a hardwood blank between centers. Here we used Blackwood. Turn the blank to round then turn a dovetail tenon using a parting tool or skew chisel for mounting the blank in a chuck.

Mount the blank in a chuck. Using a drill chuck mounted in the tailstock, drill a 3/8″ dia. hole approximately 1/2” deep in the end of the roof blank. Turn a 1/8″ wide tenon on the drilled end of the blank to fit in the bottom of the ornament body. (Test fit frequently). Remove the roof from the chuck. Mount a 1-1/2” diameter waste block in your chuck (you can use the same blank as used on the ornament body). Turn a tenon for the base of the roof blank to press on to. Check for fit often to make sure the fit is snug but not too tight.Mount the roof on the waste block. Using the tailstock with revolving center to support the end of the roof blank, turn the roof to the desired shape leaving an 1/8” dia. of waste material on the end of the roof for the revolving center to provide support. Sand and finish the roof. Remove the revolving center and carefully turn away the remaining waste material leaving a square shoulder on the top of the roof. Sand and finish. Using a drill chuck mounted in the tailstock, drill a 1/16” dia. hole in the end of the roof for mounting the screw eye.
Remove the revolving center and carefully turn away the remaining waste material leaving a square shoulder on the top of the roof. Sand and finish. Using a drill chuck mounted in the tailstock, drill a 1/16” dia. hole in the end of the roof for mounting the screw eye.
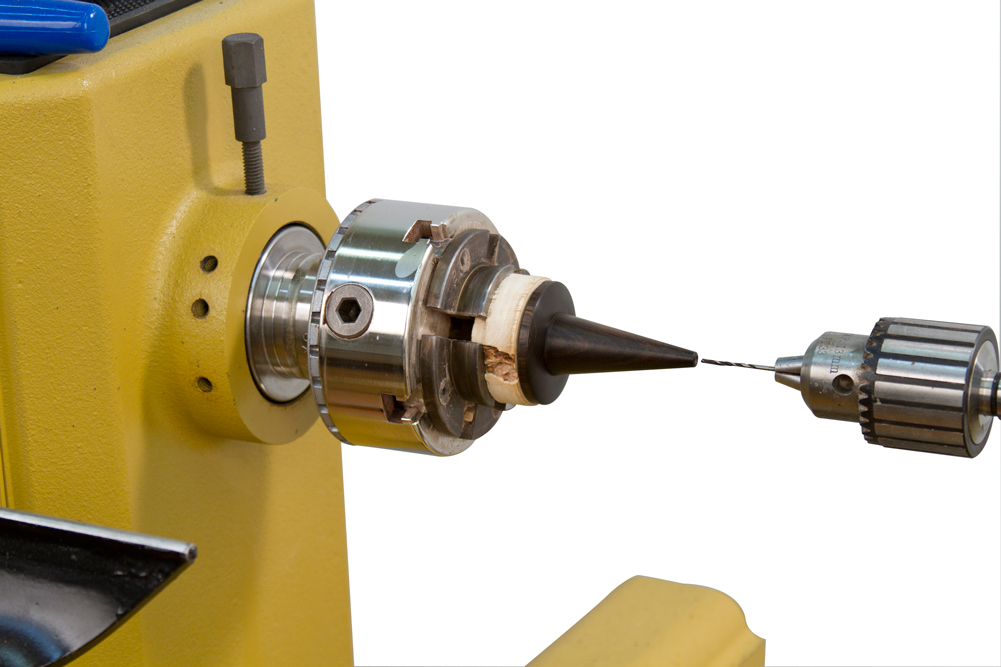
Turning the Finial and Perch
Mount the 3/4” blackwood blank between centers and turn down to 1/2” diameter so that the blank will fit into a 1/2” capacity drill chuck.
Mount the 1/2” capacity drill chuck in the headstock of the lathe. Mount the blackwood blank in the chuck (as far into the chuck as possible. Using a pencil, mark a line 3/4” from the end of the blank. This section of the blank is used for turning the perch. With a revolving center supporting the end of the blank, turn the perch to shape with a taper on one end for pressing into the birdhouse ornament body. (See diagram for recommended perch shape). Sand and finish the perch. With the lathe stopped, separate the perch from the blank using a small handsaw.
Position the revolving center against the end of the blank. Turn a 1/4” diameter tenon approximately 1/4” long on the end of the blank supported by the revolving center. (See diagram for recommended shape).
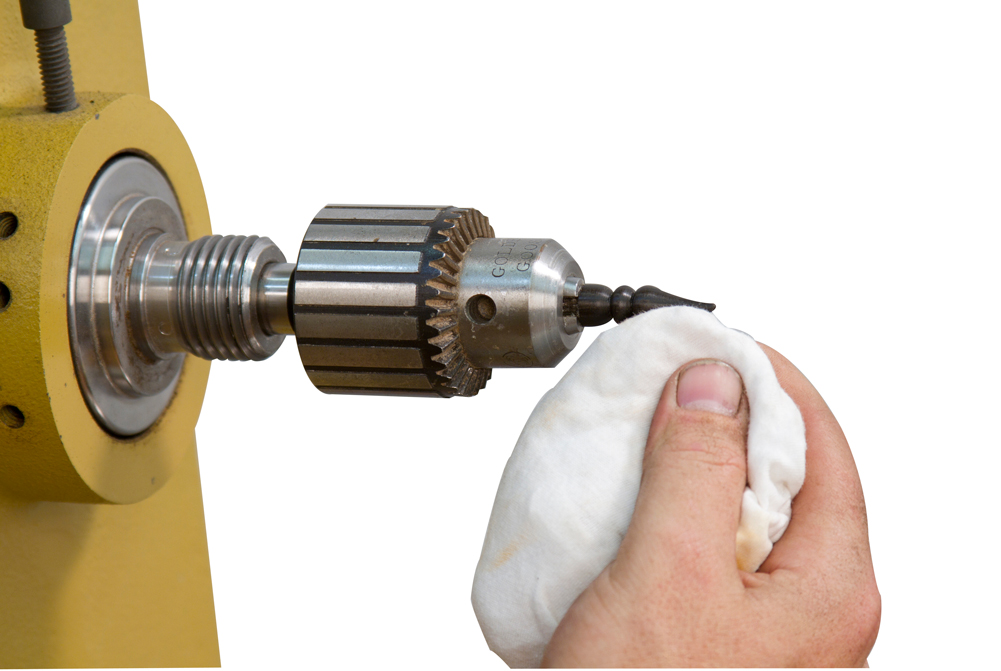
Remount the blackwood blank in the drill chuck gripping the tenon. With a revolving center supporting the end of the blank, turn the finial to the desired shape leaving a small amount of wood in place against the revolving center. Sand and finish the finial.
Move the revolving center away from the end of the finial and carefully trim off the excess material. Sand and finish the point.
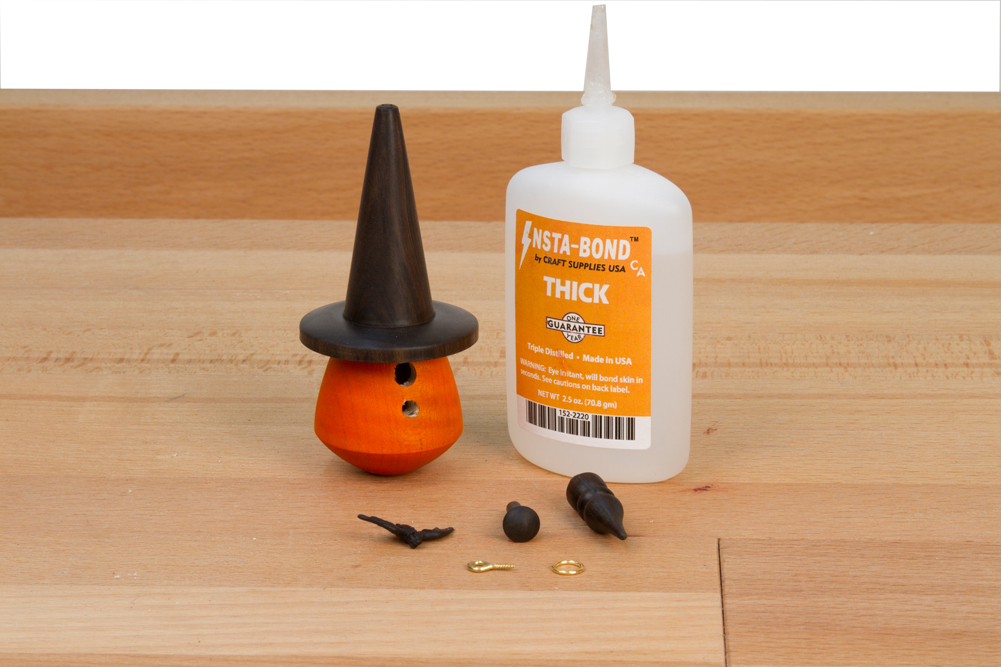
Assembling the Bat House
Using CA Glue or regular white glue (easier to wipe off excess) glue the bottom finial and perch into the body. Glue the roof onto the body by holding the roof section upside down and placing a bead of glue inside the hole. Carefully press the roof tenon into the ornament body.
I have been wanting to do this. Can you tell me where I can get the bat to mount on the perch. You show it in your pictures, do you carry these
Sorry, we no longer carry those miniature bats. I cannot say for sure where you can find them, but your best bet is a hobby store like Hobby Lobby. Good luck!